10 Tips for Water Damage Repair

The key to water damage repair is to take care of the problem as soon as possible. Flooding and water damage is a very common issue. Even though there’s little you can do to prevent this, there are many steps you can take to limit the damage.  

Here are 10 simple steps that you can explore before the water damage company arrives:

Turn Off the Water and the Electricity

The most important thing to keep in mind during flooding is safety. You must turn off the main water and electricity supply to the building before you start working on anything. Turning off the water could help reduce the extent of the flooding. Switching off power reduces the risk of electrical shock.

Inspect for Serious Issues

The second step is to inspect for serious issues after the flooding. Things like mold and mildew should be your main focus. Some types of mold and mildew can be toxic to humans and the last thing you want is to live in a home infested with them.

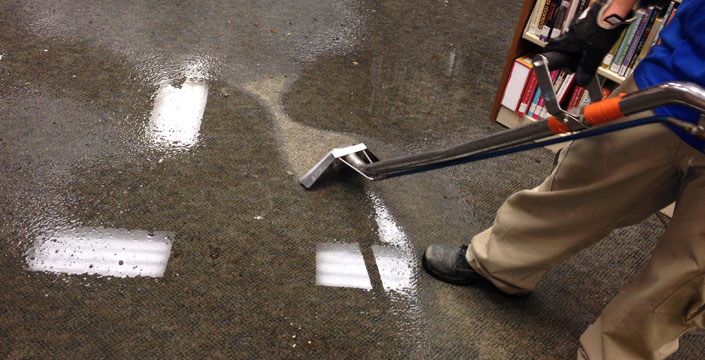
Dry Out the Affected Areas

It’s also important to dry out all the affected areas. This should be done as soon as possible. The more the water remains clogged the more damage it will cause.

Disinfect Materials

There’s no way of knowing what kind of germs came with the flooded water so don’t take any chances. Disinfect every inch of the flooded areas to avoid any issues.

Replace Damaged Wood

The wood will suffer the most when flooding occurs. Inspect the wooden structures in your home after the water is dried off and replace any damaged or rotten wood as soon as possible.

Start Off with Ceiling

Just like wood, the ceiling is also susceptible to damage after flooding. The rule of thumb in cleaning up the mess is to start from the top to the bottom. In light of this, inspecting the ceiling for damage and drying it off is highly recommended.

Install New, Sealed Floors

Once you have removed the rotten wood, disinfected the entire place, and dried off the water, it’s time to consider possible repairs. Installing a new, sealed floor should be your first step. A water damage restoration service can help you a lot with this.

Replace Drywall

Once the sealed floor is in place, you need to move to the drywall. Take all the necessary measurements and replace the damaged drywall accordingly.

Check Your Insurance

The cost of restoring your home after flooding can be high. If you have homeowner insurance, it’s important to get in touch with your provider and see what options for your specific situation are.

Inspect External Siding

Finally, repair the siding on your home too. The damage on the siding might not be extensive if the flooding was internal but it doesn’t hurt to check.

These are the ten simple steps you can take in water damage repair. But always make sure you move as fast as possible to limit the damage extent.

Here’s What You Should Do Before Calling a Basement Waterproofing Contractor

When faced with a wet basement, most people’s first reaction is to call a water damage repair contractor. This is not always a good idea because while most basement problems are easy to fix, your contractor will probably blow them out of proportion just to get you to install an expensive interior drainage system that’s completely unnecessary. Of course, this means more money in their pocket as the installation costs will be huge.

Sometimes, the best course of action is to seek alternative and cost-efficient solutions that enable you to fix your basement by yourself. Read on to find out how to do just that.

Prevention is Better than Cure

Oftentimes, the best way to improve your water damage restoration measures is to perform regular maintenance on your gutters. This includes cleaning them out, mending holes (if there are any), and positioning them so that they face your downspouts, enabling the water to go straight from the roof to the ground.

Ideally, you want the water coming from your downspouts to fall at least 4 feet from your house. If the water spills closer than that then you’ll have to extend the water spouts, which shouldn’t cost you more than $15. This is much less than what you’d have to pay for gutter repairs.

Check the Soil

The soil around your house should preferably slope away at 1-inch per foot, while the grading should mostly contain fill soil and about 20 -30% of clay content. Sandy soil is not recommended because it won’t shed the water properly. The same goes for soil with organic matter.

We’d also recommend that you remove any leaves, mulch or ground cover that’s there before you pour soil onto your foundation, as they will create a water-retaining layer that defeats the purpose of what you’re trying to achieve, which is to slope the water away from your house.

On the other hand, if some of the soil is actually sloping towards your house, then you’ll have to dig a steep U-shaped ditch to divert it away.  

Waterproof Your Walls

You can also waterproof your walls by digging a trench until you reach the footings of the affected walls.  Then, install a drainage pipe to catch water and divert it to the nearest drainage pit. You’ll also have to add a vapor barrier and reparge the exterior walls, fill the trench with soil and then regrade the surface area for better drainage. While this solution is more expensive than putting in an interior drainage system, you’ll find that it’s more effective and long lasting because it will completely divert water away from the wall before it even reaches your home’s interior.

Finding the Right Contractor

If you feel that you’re not comfortable with attempting these water damage solutions on your own, then it’s advisable to hire an experienced contractor that specializes in drainage work. Make sure to consult different contractors before you make a decision, and choose a contractor whose payment schedule allows you to pay most of the cost after the job is done. You can even arrange to hold out payment until after the first heavy rains, which is the best way to test the system’s performance.