The Way to Paint Cypress Lumber

Cypress is a relatively abundant wood, frequently found in doors, door frames, clapboards and other fittings. In the majority of cases, painting cypress timber is just like painting any other type of timber. However, on occasion a carpenter or woodworker may find herself working with untreated and likely rough cypress wood, which poses a unique issue. Cypress is a oily, tannin-packed wood. If that oil remains in the wood, common paints won’t bond with it.

Sand the cypress timber to a smooth end, utilizing a handheld vibrating sander or handheld rotary instrument fitted with sanding disks. Start with coarse-grit sandpaper (60-grit) to eliminate quite rough spots, then change to medium-grit sandpaper (120-grit) to bring the cypress to an intermediate end. Complete the procedure with fine-grit (240-grit) sandpaper.

Wash the timber by wiping it down with a tack cloth.

Mix a batch of technical primer if you are unable to find a primer on oily forests, like cypress. The proportions should be 50 percent linseed oil, 40 percent benzole and 10 percent turpentine, plus priming pigment proportion to the amount of liquid that you mix up. In the event that you were able to locate primer for fatty woods in the paint store, skip this step.

Apply the exceptional primer to the cypress timber, with long, even brush strokes. Let this dry for many hours before proceeding.

Brush on oil-based paint, using longstrokes. Let this dry for many hours or as directed by the producer, then apply at least one more coat of paint.

See related

How to Maintain the Deer Away From Tomatoes

While deer are often a welcome sight, it’s not a fantastic point to find the shirts of your precious tomato plants (Solanum lycopersicum) and their fruits eaten for them. Deer will eat just about any foliage they can get when they’re really hungry, and your tomato plants are no exception. Many solutions exist which keep deer away from the tomatoes, but they work better when used in combination together.

Hammer wooden stakes firmly to the ground around the tomato plants or around the garden perimeter. The number of bets you will need depends on the size of this garden, but use enough to encourage the net. Wrap black plastic mesh closely around the outside of one stake and secure it in multiple factors with string, twine or wire. Pull the net tight to the next stake and secure it. Repeat this procedure until it’s secured to all of the stakes. The bets and mesh should be at least 8 ft high, and the net should pay for the complete length of the bets to avoid the deer from crawling under or jumping over the fence.

Fill out a pump sprayer with 1 part hot sauce and 16 parts water. Spray the tomato plants thoroughly until they’re dripping with all the solution on a calm moment. Reapply the solution after periods of rain. This solution won’t harm the crops or the bull.

Fill a set of nylon stockings with a strong-scented pub soap and then hang it around your tomato plants within 3 feet of every plant. In case you have nothing to hang it hammer a stake into the soil next to the tomato crops or use a tomato cage. Human hair left from cutting also has the same effect. The scent might discourage algae, but you have to replace the hair after heavy rains. Replace the soap when it melts. These methods aren’t necessarily effective, but might provide some security when used properly.

See related

My Rose Bush Tips Are Turning Red

Seeing fresh red leaves on your rose bush (Rosa) might be a signal that the bush is healthy and growing, depending on the time of year. When green leaves start to turn red, however, it’s likely a indication of a larger problem that could be harmful or fatal to the plant. Roses rise in U.S. Department of Agriculture plant hardiness zones 3 through 10, depending on the number.

Growing Powerful

When you notice fresh leaves appearing on the stems of a rose bush, it’s typical for those leaves to be red or burgundy. They frequently stay this color until they get close to full dimension, when they start turning green — often from the inside out, sometimes making it look as if they have reddish tips. This is actually the normal growing process for many rose bushes, and it ensures the bush is healthful.

Nipped from Jack Frost

If green leaves start looking reddish or reddish-brown around the edges in late spring or fall, then it’s possible they’ve been damaged by frost. Frost sometimes shows up suddenly after the rose bush has started to climb in the spring, or sooner than anticipated in the autumn. This won’t necessarily damage the plant; a single frost that nips the edges of the leaves isn’t likely to kill the rose bush. Repeated spring frosts might be a problem, but in the autumn, your bush likely goes dormant as the weather cools and loses its leaves until spring.

Deadly Disease

At the height of the growing season, red tips on leaves which already turned green likely are a indication of rose rosette disease. This illness will destroy the plant, as there are no treatments for rose rosette disease as of November 2013. The illness started in wild roses subsequently traveled into cultivated roses. It turns out the leaves red, or a mixture of red, yellow and green, while creating the stems fragile and unusually thorny. The leaves also may look curly or twisted.

How It Spreads

Grafting roses can disperse the rose rosette disease, however, the most frequent culprits are tiny bugs: eriophyid mites. The mites are nearly microscopic in size, therefore it’s unlikely you’d notice them — you’ll observe the rose rosette symptoms first. The mites are also difficult to control as routine insecticides have little to no impact on them. The mites do not have wings, so they usually stay contained to a small region, but they often are blown to other plants from the wind. When you suspect rose rosette disease — along with its normal accompaniment of mites — it’s best to dig the plant up and set it in a fragile trash bag for disposal with your trash. Do not add it into your compost pile. Disposing of this plant helps remove the disease along with the mites, hopefully before any nearby roses become infected.

See related

What Berry Can You Plant on a Hill in sunlight?

Sunny hillsides are ideal for growing berries. Not only does this type of location provide ample sunshine, but in addition it allows for adequate drainage so that dirt never becomes soggy. When selecting berry plants, home gardeners have a selection of varieties to choose from. All provide not just appealing landscaping, but also delicious fruit.

Brambles

Blackberries and boysenberries grow as trailing vines known as brambles. Requiring little more than sun and well-drained dirt of any type to thrive, they are great for planting on hillsides. Blackberry varieties, such as the thornless “Black Satin” along with also the thorny “Shawnee” produce dark, hot fruit throughout the summer in U.S. Department of Agriculture zones 6 through 8. Boysenberries, a cross between a blackberry and a loganberry, produce juicy reddish-purple fruit mid-season at USDA zones 5 through 10 and can also be offered in a thornless variety.

Blueberries

Blueberries, that are indigenous to North America, are acceptable for growing on sunny hillsides. Contrary to lowbush blueberries, which grow best in colder climates, the highbush and rabbiteye varieties are adapted to grow in warm areas. Highbush blueberries grow up to 10 feet tall in USDA zones 6 through 9, producing clusters of round, sweet strawberries in the summer. Rabbiteyes, found in USDA zones 7 through 9, are marginally larger than the highbush variety, reaching up to 15 feet tall with no pruning. Such as brambles, they prosper in the sunshine and in well-drained soil that’s well-irrigated throughout the growing season.

Strawberries

The creeping custom of strawberries is well-suited to growing on a hillside. The June-bearing number produces fruit in late spring to early summer, whilst everbearing and day-neutral strawberries possess more harvesting seasons, extending to the fall. Thriving in full sun in USDA zones 3 through 10, they prefer slightly acidic, well-drained loose dirt. One of many June-bearing varieties, “Camarosa” and “Cavendish” produce big fruit and are cold-hardy. The “Tristar” and “Fort Laramie” everbearing varieties make large, especially delicious berries.

Tips

Pick berries of all kinds whenever they are ripe — if it is simple to remove the berry from the vine, it is ready to pick. Frequent harvesting is ideal as this promotes constant fruit production. Once picked, strawberries have a brief shelf life and can quickly become moldy. Your crop will last longer if placed in plastic baggies in small amounts with air left inside to allow them to “breathe .” Put unrefrigerated berries in a basket nested in a different basket, which also allows air to reach the fruit and prevent mold.

See related

How Does a Sweet Potato Appearance as a Flower?

When you look at a sweet potato (Ipomoea batatas), what you see will be a enlarged underground root which has little indentations where new growth may begin. Should you maintain a sweet potato about for a long time, shoots will begin to emerge from these areas, and if you plant the sweet potato, then you’ll find a sweet potato vine. If you are lucky, you may get to see it blossom. The flowers look like small morning glories. Sweet potatoes do not usually flower often out the tropics.

Edible Sweet Potato

Christopher Columbus introduced sweet potatoes to Europeans on his fourth voyage from the West Indies. Early Spanish explorers took sweet potato to the Philippines and Portuguese explorers disperse it farther into Asia and Malaysia. They are in the morning glory family, Convolvulaceae, together with funnel-shaped flowers coloured white to lavender, depending on the cultivar. There are plenty of varieties which differ from the colour and moistness of the flesh. Flesh colors are white, orange, purple and red. Flesh consistency is either dry-fleshed or moist-fleshed. Sweet potatoes are an important crop in Asia, Africa, Malaysia, and South and Central America, and they rank as the sixth most important food crop in the world.

Flowers

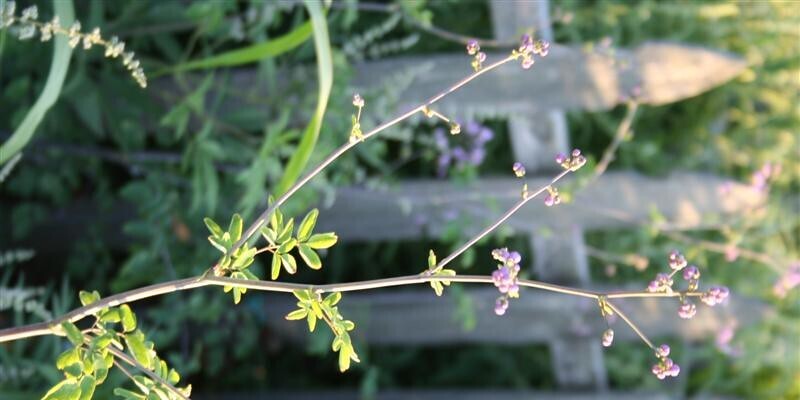
Sweet potato flowers are made of five fused petals. They have a deep, tubular throat topped by a sloping apartment rim known as the blossom’s limb. The limb is usually white, and the throat is pale to deep lavender. In some varieties, the blossom is entirely lavender. The five male flower parts, the pollen-bearing stamens, are fused to the inside of the blossom’s throat. The female flower part, the pistil, rises from the bottom of the blossom and is situated in the throat. The base of the blossom contains abundant nectar from yellow glands, a reward for pollinating bees. Cupping the blossom’s bottom on the exterior are the green sepals. The blossoms are 1 to 2 1/2 inches long and 1 to 2 inches broad.

Flowering

You want to get up early to see sweet potato flowers at their very best. They start right after daybreak, and have usually disappeared by noon. They only stay open for a single morning. The chief pollinators are honeybees and bumblebees. Flowers occur in clusters of one to 22, sprouting from where leaves join the stem. Sweet potatoes blossom best when days are short during winter. Where freezing temperatures occur, this means putting the plant in a greenhouse or indoors for the winter. The breeds of creamy sweet potatoes most commonly grown in america do not produce flowers frequently. You can encourage flowering by putting the sweet potato in a container to limit root growth and by not fertilizing the plant using a high-nitrogen formula, which promotes vegetative growth at the expense of flowering.

Cultivation

Sweet potatoes are a tropical plant, growing in U.S. Department of Agriculture plant hardiness zones 9 through 11, with winter protection needed in USDA zone 9. It is a summer annual crop in USDA zones 8 and lower. Because flowering is uncommon, seeds for sweet potatoes aren’t accessible except for breeding purposes. The plants are grown from slips instead, which can be rooted stem-bearing pieces of sweet potato roots. Vegetative propagation ensures you get the cultivar you desire. Most sweet potatoes produce large, vining plants which require a large growing region. Several cultivars, known as bush varieties, have shorter vines for smaller gardens or containers. Sweet potatoes require a few months of warm weather for the best production of roots. Roots require a curing period following harvest.

Ornamental Sweet Potatoes

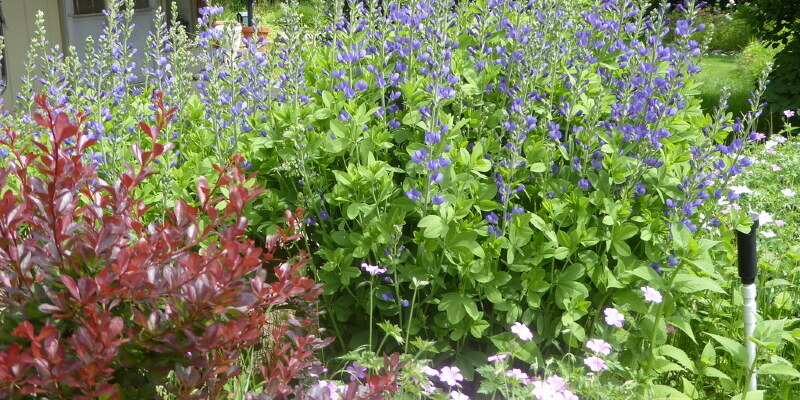
You can get varieties of sweet potatoes selected for attractive foliage instead of edible roots. Ornamental sweet potatoes have vibrant 3-inch leaves, mainly heart-shaped but a few deeply lobed. The eaves can be yellow-green, light green, red or deep purple to nearly black. They make great ground covers cascading plants for containers or for spilling over partitions. The vines produce big, white-fleshed roots which are edible, but not too delicious. If the plants produce flowers, then they are tucked among the leaves and pale pink. Ornamental sweet potatoes also grow in USDA zones 9 through 11, but are grown as annuals in cooler climates. Several cultivars are “Sweet Caroline” with a wide array of leaf colors, “Illusion Garnet Lace” with greatly cut burgundy leaves, and “Illusion Midnight” with nearly black leaves.

See related

Kinds of Plants Which Are Self-Pollinated

Plants can self-pollinate when they feature both male and female components, allowing them to copy without pollen from another plant, whereas other kinds of plants need pollen from another plant of the very same species or cultivar. Genetic diversity improves plant stock and several plants with the potential to self-pollinate have developed plans that prefer pollination from outdoors.

Self-Pollination

Pollination occurs when pollen is transported from where it was formed in the stamen, or male portion of the flower, to a receptive surface in the pistil, or female part. Most plants need an outside agent to transfer the pollen, such as wind, bees, butterflies and birds, but some species are self-pollinating. At self-pollinated plants, the pollen is transferred between its stamen and pistil, without relying on a different organism for transport.

Characteristics of Self-Pollinating Plants

Most self-pollinating plants have small, inconspicuous flowers that fall pollen right onto the stigma, part of the pistil formation. Their independence from other beings makes them flexible and hardy; several weeds are self-pollinating. These kinds of plants need less energy to produce attractants for pollinators, and can grow in areas in which the pollinators can’t survive, such as the Arctic and high elevations. Self-pollinated plants have a tendency to copy uniform, but not equal, offspring.

Plants with Male and Female Flowers

More potential to self-pollinate exists when flowers have stamens and pistils, but plans within the plants prefer cross-pollination, pollen carried in another plant’s flower. Monoecious plants have separate male staminate and feminine pistilate flowers that mature at various times, increasing the potential for cross-pollination. Oaks, birches, corn and pumpkin are monoecious plants. Dichogamous plants, such as fireweed, possess a stamen and pistil in precisely the exact same flower, but in addition they mature at different rates.

Self-Pollination in Fruit Trees

Fruit trees are called self-pollinating when the blossoms can be fertilized from the other blossom on precisely the exact same tree or another tree of the identical cultivar or a different cultivar of the very same species. The pollen is usually transferred by bees. Sour cherries, apricots and peaches are self-pollinating in this way. Apart from fruit tree species need to be fertilized with pollen from a different cultivar, even if the flowers have female and male components, as a “self-recognition” response blocks pollen from fertilizing a flower on precisely the exact same plant.

See related

How to safeguard a Leather Couch From sunlight

Leather’s look and feel was prized for centuries, but leather will not have environmental enemies that may greatly shorten its useful life from decades to just years. Chief among these enemies is the sun. However, there are things you can do to secure your fine leather couch and other furniture.

Keep It Shaded

The surest way to protect a leather couch and other leather-upholstered furniture from sun damage is to put the furniture at a spot that’s out of direct sunlight. Strong sunlight can fade dyed leather in as little as four to six weeks. Direct sun also causes leather to dry out and crack since the sun’s heat causes the leather’s natural oils to disappear.

Close Blinds

If you can’t move the couch or other leather furniture to a shaded spot, close the drapes, shades or blinds, or cover the piece with a decorative blanket during the sunniest, hottest aspect of the afternoon. As an alternative, you might employ commercial tinting film to the windows to prevent the sun’s ultraviolet rays, which cause the maximum harm.

Wash and Protect

Regular cleaning and conditioning assist your leather upholstery withstand the sun. About every 3 months, clean the upholstery with a commercial leather cleaner. Don’t use ammonia-containing products, furniture wax or abrasive cleansers. Apply a commercial leather conditioner twice a year to help keep leather from drying out.

Leather Forms

Leather upholstery comes in three types that differ in their opposition to sun damage. Most furniture manufacturers use “fully finished” leather that’s dyed with opaque colours and ended with a surface layer which strongly resists sun damage, stains and wear. Some furniture is covered with aniline leather that’s colored with a transparent dye that emphasizes the grain of the leather but has no surface layer. Additionally, there is semi-aniline leather which uses transparent dyes and has a thin surface layer. These leathers are softer, but much more vulnerable to damage from sunlight, scratches and stains.

See related

The way to repair the Temperature Control on a Single Handle Faucet

The temperature on your hot water heater can be as high as 200 degrees Fahrenheit, so it’s important to have guards in your faucets to keep you from receiving a blast of scalding water. When producers deliver this kind of shield on a single-handled faucet, it’s usually in the shape of a plastic disk that prevents the knob from turning too much in the hot direction. Some faucets have a fever limiter on the cold side too. Although tap designs vary, you can generally alter the alignment of the disk by removing the faucet handle.

Look for the screw which holds the handle into the valve stem. If you do not see one, then it may be concealed below a decorative cap. Pry the cap off with a flathead screwdriver. In addition, it can be concealed under the lever, if you’re operating at a lever-style faucet.

Unscrew the screw with a Phillips screwdriver or Allen wrench. In case you have trouble turning it, then spray lubricant on it to loosen the threads. You may strip the mind if you try to drive the screw.

Pull the handle to reveal the temperature limiter. It is usually a plastic or metallic disc using a nub or superior which catches on the grip. The disk may not be attached to anything else, and if not, you ought to be able to pull it straight off the valve. If it doesn’t come off, the producer has designed it so you could simply turn it in place.

Consult the tap manual to determine the exact method to modulate temperature. On some models, you need to rotate the disk counterclockwise to increase the fever, and on a few you have rotate it clockwise. Some disks are notched, and each notch corresponds to a stationary change in temperature, usually 6 degrees Fahrenheit.

Pull the disk (if it comes off), then rotate it at the proper way and replace it. If the disk in your tap is not removable, then simply turn it in the correct way to make the adjustment. There can be another limiter to modulate the cold side. If so, rotate it in the proper direction.

Replace the handle when you’re finished adjusting the temperature and then snap the cap back into place.

See related

How to Update the Electric in a Two-Story House

Updating the electrical wiring in any house can be hard. Updating the wiring in a two-story home is particularly challenging and frustrating because the new wiring has to be fished through the walls on the first floor, through the wall header plate and into the wall cavities on the second floor. This is not a project that a beginner must also consider undertaking. It’s a project for the experienced DIY electrician.

Get a condom Permit

The National Electrical Code (NEC) and many local building codes permit the residential homeowner to do nearly everything a licensed electrician can do. The homeowner should conduct the job under a wiring license and have the very same evaluations completed on his job, the same as the professional. Some communities allow you to apply for a license on the web, but some ask that you apply in person at the Office of Codes Enforcement. Be prepared to submit a drawing showing where you intend to install receptacles, switches, lighting outlets and fixed-in-place appliances. The drawing also needs to demonstrate how they’ll be connected. A listing of the materials you’ll be using will be required with the program.

Two Approaches to Rewiring a Two-Story House

There are two approaches that you can take when rewiring a two-story house. You can make each of the “home runs” — the cables going to the breaker panel — to your main service panel, or you can put in a subpanel on the second floor and create the second floor “home runs” to that subpanel. Installing a subpanel on the second floor is the perfect approach because it saves time and substances. When installing a subpanel, you want to run just 1 cable — the subfeeder cable providing power to your subpanel — to the second ground. That means it’s not necessary to run 1 cable for each circuit to be set up on the second floor. What you save in the cost of cable will more than pay for the cost of the subpanel. Ensure to put in a main-lug subpanel with its disconnect breaker in the main service panel.

Installing a Complete Service Upgrade

If you’re performing a complete electrical upgrade which includes a higher ampacity service panel, you’ll need to hire a licensed electrician to install and connect the new service entrance mast, meter and also service-entrance cable. The electrician also will create the links to the new service fall the utility company will install.

Lessen Frustration With the Electronic Stud Finder

Always expect the unexpected when performing any electrical work on old homes. Building codes that have standardized construction practices have changed over the years, and many residences were constructed before there were any true construction codes set up. It isn’t uncommon to encounter extra fire stops — horizontal bits between the wall studs — in homes built before 1950. They’re even more common in homes that were constructed by their first owners. It’s the encountering of these blockages that make rewiring a house such a struggle and also makes it so frustrating at times. An electronic stud finder eliminates most of the frustration from pinpointing the exact location of all of the studs, fire stops and the other obstructions hidden from view by the wall finish. Modern electronic stud finders have also characteristics that allow them to be used to find plumbing and electrical wiring inside the walls.

Leave the Old Wiring Intact

When doing a complete service update, leave the old wiring intact while installing the new service panel, subpanel and division circuits. By leaving the old wiring intact, you’ll have the electricity needed to operate power tools and work lights. Once you have installed the brand new service panel and its related wiring, have the expert electrician complete the installation. When the new service is linked to the utility company’s service fall, it is possible to transfer some of the original circuits that will nevertheless be used from the panel to the new panel. After that, remove the old panel and some reachable wiring that is no longer being used.

See related

How to Know When a Pineapple Is Ripe & Ready to Be Picked In the Plant

Pineapples (Ananas comosus) are indigenous to southern Brazil and Paraguay but also prosper in the warm Mediterranean areas of the southern and coastal United States. Pineapple plants are herbaceous perennials that grow to between 2 1/2 and 5 feet tall. While growing pineapples is not so difficult, harvesting the fruit can be tricky. Determining when a pineapple fruit is ripe enough to harvest is dependent mainly on the color and size of the fruit.

Regarding Pineapple Fruit

Pineapple fruit is a seedless fruit called a syncarp, meaning it is generated in the fusion of several small flowers into a single, large fruit. When pineapple fruits are mature, the individual fruitlets on the peel or skin flatten, and the peel begins to change color from green to yellow, starting at the base of this fruit and moving into the top. Mature pineapples can be hefty, weighing as much as 5 to 10 pounds.

When to Harvest

For optimum sweetness and quality, pineapple fruit should not be picked until one-third or more of the peel or shell has turned from green to yellow. Ideally, you should select the fruit through the late mature green stage, when the fruit has reached full size and adulthood but hasn’t turned yellow, then allow the harvested fruit to ripen off the plant at room temperature. Do not refrigerate your pineapple fruit until it’s ripened. If pineapple is refrigerated at the immature green stage, it can result in chilling injury and improper ripening. Ripeness can likewise be determined by massaging your finger against the side of the fruit. Ripened pineapples produce a dull, solid sound if you do this, but immature fruit produce a hollow thud.

Ripening Time

The time that it takes a particular plant to produce ripe fruit that is ready for harvest is based upon the amount, the developing climate, care and the technique of propagation. For example, propagation by cutting can take up to 24 weeks to produce ripe fruit, while suckers and slips take require less time. Generally, the initial harvest of pineapple fruit from your plant will require 18 to 20 weeks of development before it’s ready to harvest. The second crop typically requires slightly less time.

Greatest Time to Eat

Because pineapples are prepared to harvest slightly before they are ready to eat, then it can be difficult to determine if it has ripened into the stage that provides the very best quality and flavor. The physical appearance of the fruit frequently provides several key clues to its readiness for eating. When your pineapple fruit turns almost entirely yellow and gives off a sweet scent, it’s typically prepared to eat. The pulp of a ripe pineapple is yellow to golden yellow, juicy and has a flavor that is sweet.

See related