My Rose Bush Tips Are Turning Red

Seeing fresh red leaves on your rose bush (Rosa) might be a signal that the bush is healthy and growing, depending on the time of year. When green leaves start to turn red, however, it’s likely a indication of a larger problem that could be harmful or fatal to the plant. Roses rise in U.S. Department of Agriculture plant hardiness zones 3 through 10, depending on the number.

Growing Powerful

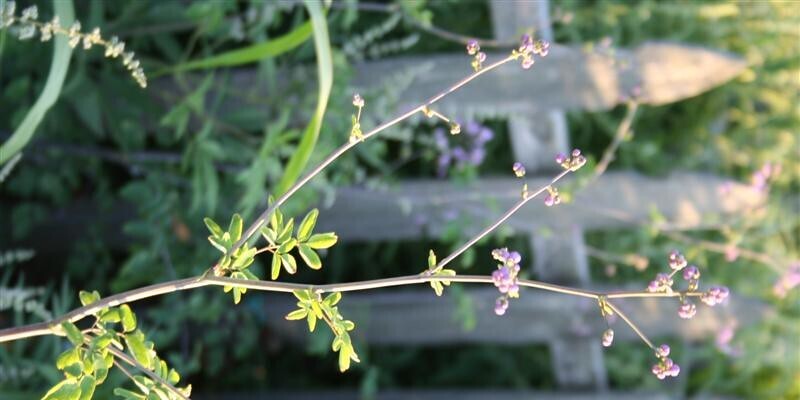
When you notice fresh leaves appearing on the stems of a rose bush, it’s typical for those leaves to be red or burgundy. They frequently stay this color until they get close to full dimension, when they start turning green — often from the inside out, sometimes making it look as if they have reddish tips. This is actually the normal growing process for many rose bushes, and it ensures the bush is healthful.

Nipped from Jack Frost

If green leaves start looking reddish or reddish-brown around the edges in late spring or fall, then it’s possible they’ve been damaged by frost. Frost sometimes shows up suddenly after the rose bush has started to climb in the spring, or sooner than anticipated in the autumn. This won’t necessarily damage the plant; a single frost that nips the edges of the leaves isn’t likely to kill the rose bush. Repeated spring frosts might be a problem, but in the autumn, your bush likely goes dormant as the weather cools and loses its leaves until spring.

Deadly Disease

At the height of the growing season, red tips on leaves which already turned green likely are a indication of rose rosette disease. This illness will destroy the plant, as there are no treatments for rose rosette disease as of November 2013. The illness started in wild roses subsequently traveled into cultivated roses. It turns out the leaves red, or a mixture of red, yellow and green, while creating the stems fragile and unusually thorny. The leaves also may look curly or twisted.

How It Spreads

Grafting roses can disperse the rose rosette disease, however, the most frequent culprits are tiny bugs: eriophyid mites. The mites are nearly microscopic in size, therefore it’s unlikely you’d notice them — you’ll observe the rose rosette symptoms first. The mites are also difficult to control as routine insecticides have little to no impact on them. The mites do not have wings, so they usually stay contained to a small region, but they often are blown to other plants from the wind. When you suspect rose rosette disease — along with its normal accompaniment of mites — it’s best to dig the plant up and set it in a fragile trash bag for disposal with your trash. Do not add it into your compost pile. Disposing of this plant helps remove the disease along with the mites, hopefully before any nearby roses become infected.

See related

What Berry Can You Plant on a Hill in sunlight?

Sunny hillsides are ideal for growing berries. Not only does this type of location provide ample sunshine, but in addition it allows for adequate drainage so that dirt never becomes soggy. When selecting berry plants, home gardeners have a selection of varieties to choose from. All provide not just appealing landscaping, but also delicious fruit.

Brambles

Blackberries and boysenberries grow as trailing vines known as brambles. Requiring little more than sun and well-drained dirt of any type to thrive, they are great for planting on hillsides. Blackberry varieties, such as the thornless “Black Satin” along with also the thorny “Shawnee” produce dark, hot fruit throughout the summer in U.S. Department of Agriculture zones 6 through 8. Boysenberries, a cross between a blackberry and a loganberry, produce juicy reddish-purple fruit mid-season at USDA zones 5 through 10 and can also be offered in a thornless variety.

Blueberries

Blueberries, that are indigenous to North America, are acceptable for growing on sunny hillsides. Contrary to lowbush blueberries, which grow best in colder climates, the highbush and rabbiteye varieties are adapted to grow in warm areas. Highbush blueberries grow up to 10 feet tall in USDA zones 6 through 9, producing clusters of round, sweet strawberries in the summer. Rabbiteyes, found in USDA zones 7 through 9, are marginally larger than the highbush variety, reaching up to 15 feet tall with no pruning. Such as brambles, they prosper in the sunshine and in well-drained soil that’s well-irrigated throughout the growing season.

Strawberries

The creeping custom of strawberries is well-suited to growing on a hillside. The June-bearing number produces fruit in late spring to early summer, whilst everbearing and day-neutral strawberries possess more harvesting seasons, extending to the fall. Thriving in full sun in USDA zones 3 through 10, they prefer slightly acidic, well-drained loose dirt. One of many June-bearing varieties, “Camarosa” and “Cavendish” produce big fruit and are cold-hardy. The “Tristar” and “Fort Laramie” everbearing varieties make large, especially delicious berries.

Tips

Pick berries of all kinds whenever they are ripe — if it is simple to remove the berry from the vine, it is ready to pick. Frequent harvesting is ideal as this promotes constant fruit production. Once picked, strawberries have a brief shelf life and can quickly become moldy. Your crop will last longer if placed in plastic baggies in small amounts with air left inside to allow them to “breathe .” Put unrefrigerated berries in a basket nested in a different basket, which also allows air to reach the fruit and prevent mold.

See related

How Does a Sweet Potato Appearance as a Flower?

When you look at a sweet potato (Ipomoea batatas), what you see will be a enlarged underground root which has little indentations where new growth may begin. Should you maintain a sweet potato about for a long time, shoots will begin to emerge from these areas, and if you plant the sweet potato, then you’ll find a sweet potato vine. If you are lucky, you may get to see it blossom. The flowers look like small morning glories. Sweet potatoes do not usually flower often out the tropics.

Edible Sweet Potato

Christopher Columbus introduced sweet potatoes to Europeans on his fourth voyage from the West Indies. Early Spanish explorers took sweet potato to the Philippines and Portuguese explorers disperse it farther into Asia and Malaysia. They are in the morning glory family, Convolvulaceae, together with funnel-shaped flowers coloured white to lavender, depending on the cultivar. There are plenty of varieties which differ from the colour and moistness of the flesh. Flesh colors are white, orange, purple and red. Flesh consistency is either dry-fleshed or moist-fleshed. Sweet potatoes are an important crop in Asia, Africa, Malaysia, and South and Central America, and they rank as the sixth most important food crop in the world.

Flowers

Sweet potato flowers are made of five fused petals. They have a deep, tubular throat topped by a sloping apartment rim known as the blossom’s limb. The limb is usually white, and the throat is pale to deep lavender. In some varieties, the blossom is entirely lavender. The five male flower parts, the pollen-bearing stamens, are fused to the inside of the blossom’s throat. The female flower part, the pistil, rises from the bottom of the blossom and is situated in the throat. The base of the blossom contains abundant nectar from yellow glands, a reward for pollinating bees. Cupping the blossom’s bottom on the exterior are the green sepals. The blossoms are 1 to 2 1/2 inches long and 1 to 2 inches broad.

Flowering

You want to get up early to see sweet potato flowers at their very best. They start right after daybreak, and have usually disappeared by noon. They only stay open for a single morning. The chief pollinators are honeybees and bumblebees. Flowers occur in clusters of one to 22, sprouting from where leaves join the stem. Sweet potatoes blossom best when days are short during winter. Where freezing temperatures occur, this means putting the plant in a greenhouse or indoors for the winter. The breeds of creamy sweet potatoes most commonly grown in america do not produce flowers frequently. You can encourage flowering by putting the sweet potato in a container to limit root growth and by not fertilizing the plant using a high-nitrogen formula, which promotes vegetative growth at the expense of flowering.

Cultivation

Sweet potatoes are a tropical plant, growing in U.S. Department of Agriculture plant hardiness zones 9 through 11, with winter protection needed in USDA zone 9. It is a summer annual crop in USDA zones 8 and lower. Because flowering is uncommon, seeds for sweet potatoes aren’t accessible except for breeding purposes. The plants are grown from slips instead, which can be rooted stem-bearing pieces of sweet potato roots. Vegetative propagation ensures you get the cultivar you desire. Most sweet potatoes produce large, vining plants which require a large growing region. Several cultivars, known as bush varieties, have shorter vines for smaller gardens or containers. Sweet potatoes require a few months of warm weather for the best production of roots. Roots require a curing period following harvest.

Ornamental Sweet Potatoes

You can get varieties of sweet potatoes selected for attractive foliage instead of edible roots. Ornamental sweet potatoes have vibrant 3-inch leaves, mainly heart-shaped but a few deeply lobed. The eaves can be yellow-green, light green, red or deep purple to nearly black. They make great ground covers cascading plants for containers or for spilling over partitions. The vines produce big, white-fleshed roots which are edible, but not too delicious. If the plants produce flowers, then they are tucked among the leaves and pale pink. Ornamental sweet potatoes also grow in USDA zones 9 through 11, but are grown as annuals in cooler climates. Several cultivars are “Sweet Caroline” with a wide array of leaf colors, “Illusion Garnet Lace” with greatly cut burgundy leaves, and “Illusion Midnight” with nearly black leaves.

See related

Kinds of Plants Which Are Self-Pollinated

Plants can self-pollinate when they feature both male and female components, allowing them to copy without pollen from another plant, whereas other kinds of plants need pollen from another plant of the very same species or cultivar. Genetic diversity improves plant stock and several plants with the potential to self-pollinate have developed plans that prefer pollination from outdoors.

Self-Pollination

Pollination occurs when pollen is transported from where it was formed in the stamen, or male portion of the flower, to a receptive surface in the pistil, or female part. Most plants need an outside agent to transfer the pollen, such as wind, bees, butterflies and birds, but some species are self-pollinating. At self-pollinated plants, the pollen is transferred between its stamen and pistil, without relying on a different organism for transport.

Characteristics of Self-Pollinating Plants

Most self-pollinating plants have small, inconspicuous flowers that fall pollen right onto the stigma, part of the pistil formation. Their independence from other beings makes them flexible and hardy; several weeds are self-pollinating. These kinds of plants need less energy to produce attractants for pollinators, and can grow in areas in which the pollinators can’t survive, such as the Arctic and high elevations. Self-pollinated plants have a tendency to copy uniform, but not equal, offspring.

Plants with Male and Female Flowers

More potential to self-pollinate exists when flowers have stamens and pistils, but plans within the plants prefer cross-pollination, pollen carried in another plant’s flower. Monoecious plants have separate male staminate and feminine pistilate flowers that mature at various times, increasing the potential for cross-pollination. Oaks, birches, corn and pumpkin are monoecious plants. Dichogamous plants, such as fireweed, possess a stamen and pistil in precisely the exact same flower, but in addition they mature at different rates.

Self-Pollination in Fruit Trees

Fruit trees are called self-pollinating when the blossoms can be fertilized from the other blossom on precisely the exact same tree or another tree of the identical cultivar or a different cultivar of the very same species. The pollen is usually transferred by bees. Sour cherries, apricots and peaches are self-pollinating in this way. Apart from fruit tree species need to be fertilized with pollen from a different cultivar, even if the flowers have female and male components, as a “self-recognition” response blocks pollen from fertilizing a flower on precisely the exact same plant.

See related

How to Know When a Pineapple Is Ripe & Ready to Be Picked In the Plant

Pineapples (Ananas comosus) are indigenous to southern Brazil and Paraguay but also prosper in the warm Mediterranean areas of the southern and coastal United States. Pineapple plants are herbaceous perennials that grow to between 2 1/2 and 5 feet tall. While growing pineapples is not so difficult, harvesting the fruit can be tricky. Determining when a pineapple fruit is ripe enough to harvest is dependent mainly on the color and size of the fruit.

Regarding Pineapple Fruit

Pineapple fruit is a seedless fruit called a syncarp, meaning it is generated in the fusion of several small flowers into a single, large fruit. When pineapple fruits are mature, the individual fruitlets on the peel or skin flatten, and the peel begins to change color from green to yellow, starting at the base of this fruit and moving into the top. Mature pineapples can be hefty, weighing as much as 5 to 10 pounds.

When to Harvest

For optimum sweetness and quality, pineapple fruit should not be picked until one-third or more of the peel or shell has turned from green to yellow. Ideally, you should select the fruit through the late mature green stage, when the fruit has reached full size and adulthood but hasn’t turned yellow, then allow the harvested fruit to ripen off the plant at room temperature. Do not refrigerate your pineapple fruit until it’s ripened. If pineapple is refrigerated at the immature green stage, it can result in chilling injury and improper ripening. Ripeness can likewise be determined by massaging your finger against the side of the fruit. Ripened pineapples produce a dull, solid sound if you do this, but immature fruit produce a hollow thud.

Ripening Time

The time that it takes a particular plant to produce ripe fruit that is ready for harvest is based upon the amount, the developing climate, care and the technique of propagation. For example, propagation by cutting can take up to 24 weeks to produce ripe fruit, while suckers and slips take require less time. Generally, the initial harvest of pineapple fruit from your plant will require 18 to 20 weeks of development before it’s ready to harvest. The second crop typically requires slightly less time.

Greatest Time to Eat

Because pineapples are prepared to harvest slightly before they are ready to eat, then it can be difficult to determine if it has ripened into the stage that provides the very best quality and flavor. The physical appearance of the fruit frequently provides several key clues to its readiness for eating. When your pineapple fruit turns almost entirely yellow and gives off a sweet scent, it’s typically prepared to eat. The pulp of a ripe pineapple is yellow to golden yellow, juicy and has a flavor that is sweet.

See related

Lime Application Rates for Pecan Trees

Soil pH, a measure of the acidity or alkalinity of soil, determines that the capacity of a plant to take in sulfur, phosphorous, potassium and other nutrients. Adding lime to acidic soil makes it more alkaline. The recommended soil pH varies with the species of plant. Since land pH varies by climate and geography there’s not any normal application speed for all pecan trees. Pecans (Carya illinoensis) have been grown commercially in the warm, humid climate of the Southeastern United States but can be increased in U.S. Department of Agriculture plant hardiness zones 5 through 9.

Soil pH and Pecan Trees

Soil pH is measured on a scale of 1 to 14. Some less than 7 is acidic or “sour” soil; acidic soils are usually found in areas with heavy rainfall. Some over 7 is alkaline or “sweet” soil; alkaline soils are usually found in arid climates with little rainfall. Pecan trees grow best in a soil pH of 5.5 to 6.5. If the pH is below that, adding lime will raise the number. Most garden supply centres sell soil test kits that may measure soil pH adequately.

Lime Kind

Powdered calcium carbonate, commonly called dolomitic lime, is made by grinding stone and is usually utilized to adjust soil pH to get pecan trees. The fineness of dolomitic lime powder is measured from the magnitude of the mesh the particles may pass through. Higher mesh numbers indicate comparable particles of lime that dissolve in the soil more quickly; for example, 40- to 50-mesh particles will dissolve in the soil more quickly and raise pH more quickly than 8- to 20-mesh particles. Dolomitic lime is often sold in the shape of pellets made from finely ground stone. They are easier to propagate and therefore are less dusty, but they’re more expensive and slower to alter soil pH. Should you use pellets, you should till the soil a couple of days after you use the pellets when they’ve had a chance to soften. You can sometimes buy lime suspended in a combination of water and particles of clay. While this is not difficult to apply, it doesn’t work any quicker than lime in a dust form.

How to Insert Lime

The right time to apply lime to the soil for pecan trees is prior to planting them. Commercial growers applying lime to many acres of pecan trees receive their land tested to acquire precise rates of program. A home gardener planting a few trees can mix dolomitic lime powder completely into the top 6 to 8 inches of soil and test the soil until the pH is in the optimal range. Even though a pH of 5.5 to 6.5 is great for a pecan tree, even if your soil pH is naturally between 5 and 7, adding lime won’t likely improve the development of your tree.

Lowering Soil pH

If your soil pH is above the recommended range for pecan trees, you can lower it by adding elemental sulfur. Apply the sulfur into the planting bed into the thickness of the pecan tree’s root zone until the soil pH is between 5.5 and 6.5. When applying it into an existing tree, then remove the soil from around the roots, then add sulfur till you reach the perfect soil pH and return the soil around the tree.

See related

How to Plant Tomato & Cabbage With

Most annual vegetables have another plant that’s believed to be a beneficial companion when grown in the same row, including tomatoes and cabbage. Companion planting will help to conserve moisture, supply nutrients to the soil and diminish disease and pest management without using substances. Quite often, companion planting increases vegetable production, resulting in a greater crop yield. For best results, cabbage plants should be cultivated by seed, while tomatoes are best planted as seedlings. They both prefer 8 hours of sun exposure per day and well-draining soil. Cabbage may be harvested twice a year in fall and spring, whereas tomatoes are harvested in the late summer through autumn, based on the variety.

Plant cabbage seeds to a depth of one-half inch, 12 inches apart, in early spring when soil temperatures have been above 40 degrees Fahrenheit. Water thoroughly using a garden hose set on a fine mist to a depth of at least 6 inches after planting.

Fertilize cabbage plants by hand sprinkling 5-10-10 granular fertilizer on each side of the row, one month after sowing the seeds. Continue fertilizing the cabbage plants once a month until the first crop. Follow all of manufacture directions listed on the fertilizer containers label.

Harvest each mature cabbage head from the plant using a sharp knife in the late spring, 63 to 88 days after planting by cutting in the lowest point possible, leaving the outer leaves attached to the stalk. Leaving the leaves will guarantee a second harvest to your cabbage plants which are left in the row prior to transplanting the tomato crops. When the cabbage head feels solid and firm to the touch it is mature and ready for harvest.

Eliminate every other cabbage plant from the ground after the first harvest, using a shovel, digging deep enough into the soil to extract the entire root system. Shake off as much soil as possible from the origins. Transplant 8-inch tall tomato seedlings between every present cabbage plant one-half inch deeper than the cover of the root ball. Lightly pack the indigenous soil around the root ball of the plant. Water thoroughly using a garden hose set on a nice mist after planting, to a depth of at least 6 inches.

Stake the 2-foot-tall tomato plant, then inserting a 2-by-2-inch, 5-foot tall wooden stake 1 foot into the floor and one-fourth inch apart from the stalk of the tomato plant. Tie the plant to the wooden stake freely with tie tape each 6 inches because it grows.

Fertilize tomato crops in transplant time sprinkling 5-10-10 granular fertilizer on each side of the row. Begin fertilizing the tomatoes and cabbage together once a month afterwards from early spring through fall.

See related

Trimming Scuppernongs

Scuppernong is arguably the most well-known assortment of muscadine grape (Vitis rotundifolia) climbed through U. S. Department of Agriculture plant hardiness zones 6 through 9. This fast-growing, hardy native American grape is a great selection for home gardeners who need lots of big grapes for making juice, jelly or wine. Even though they require less maintenance than bunching grapes, muscadines have to be pruned aggressively to keep them in perfect shape — also much old timber is detrimental to fruit production.

Prune a newly planted muscadine grape to a major stem with no more than two or three buds emerging from it. Allow the plant to climb to the very top of its support the first year, removing all but the strongest length of vine once it goes dormant in the late fall or early winter. Remove any portion of the major vine that reaches over a few inches past the cover of the wire at dormancy, to induce the formation of unwanted shoots.

Allow new buds to develop on surface of your vine at a 90-degree angle from the main back during the next season. Select the best two to four buds, depending upon your trellis style, and get rid of the remainder as soon as they are approximately 2 inches long. Remove any buds that develop below the top of your grape trellis or so are clustered close to other buds. Allow both to four sections you kept to develop along the surface of the trellis in various directions to their entire length during the next season.

Thin the buds that form along the lateral parts of the vine in the preceding year to no longer than approximately six, spaced evenly along the length of every section, early in the spring of the next season. At the close of the season, remove these six sections of vine to support fruiting the following year — muscadines fruit only on new wood, so these old fruiting canes are a naturally drag on the plant’s sources. Continue removing fruiting canes at the end of each growing season for the life of the muscadine vine.

See related

Darwin Hybrid Tulip Varieties

Darwin hybrid tulips (Tulipa spp.) Are long-blooming tulips valued for their large, glowing, cup-shaped flowers atop sturdy stems. At maturity, Darwin hybrid tulips reach heights up to 28 inches. The tulips, which come in an assortment of solid and and multicolors, grow in U.S. Department of Agriculture plant hardiness zones 4 through 7. It is possible to plant Darwin tulips in warmer climates if you give the bulbs a chilling time before planting.

Red Darwin Tulips

Darwin hybrid tulip cultivars incorporate a variety of reds, from glowing cherry red to vibrant red. “Apeldoorn” is a cherry red variety with bright red inner petals. The black bases display contrasting yellow bands. “Gordon Cooper” is a bright red tulip that fades to pink inside the blooms. The bases of this cup-shaped flowers are yellow and black. “Parade” has bright red blooms with a dark base and the edges of the blossoms are a vibrant shade of yellowish. “Bienvenue” is a bright red tulip with distinctive pink, flame-shaped variegation and also a greenish-yellow base. All four achieve mature heights of approximately 18 inches.

Yellow Darwin Tulips

Yellow Darwin hybrid tulips are bright, cheery blossoms that light up the garden in spring. For example, “Apeldoorn’s Elite,” which reaches heights of approximately 18 inches in maturity, is a bright yellow tulip with feathery red variegation and dark markings at the base. “Jewel of Spring” is a slightly shorter tulip at about 15 inches. The flowers are yellowish and the bases of the flowers are black and green. “Hans Mayer” is a vibrant yellow tulip with contrasting red flames and a green tinted base.

Gold Darwin Tulips

Some Darwin hybrid tulip varieties have rich, warm hues of stone, like “Golden Parade” a golden tulip using golden-yellow hues inside the dark bases. “Golden Apeldoorn” includes lemony-gold blooms with dark, star-shaped patterns on the foundation. “Gudoshnik” is differentiated by gold petals with reddish-orange, feathery splotches and dark markings at the bottom of their blooms. All grow about 18 inches tall.

Pink Darwin Tulips

You can select from a huge array of Darwin hybrid tulips in a variety of hues of pink. A tall variety measuring about 24 inches, “Big Chief” is a dark pink tulip with a light green tint. “Dawnglow,” which reaches heights of 18 inches, is a rosy-peach tulip using a green base and orange-yellow internal leaves. “Elizabeth Arden,” a smaller, 12-inch selection, displays deep peach-pink, violet-tinted blooms with yellow and white bases. “Pink Impression,” another 2-foot selection, creates pink blooms marked with rosy red and veins edges. The bases are black and greenish-yellow.

White Darwin Tulips

Although white Darwin hybrid tulips are fewer in number, they’re no less striking in appearance. “Ivory Floradale” is a creamy white variety using green-tinted base. It is mature height is approximately 2 feet. “Ollioules” also reaching heights of almost two feet, is a white tulip with eye-catching magenta flames. “Ollioules” is a great choice for warmer climates.

Chilling Darwin Tulips

Tulips, such as many other spring-blooming bulbs, need a period of cold to store energy for the coming blooming season. To replicate this natural chilling period, store the bulbs in the refrigerator for at least four to six weeks prior to planting time. Don’t store the tulip bulbs near apples or other fruit, as fruits emit emit ethylene gas that will damage the bulbs. Planting time starts in October. You may safely plant Darwin hybrid tulips as late as early December in climates where the ground does not freeze.

See related

Types of Yellow Daisies With Black Centers

Gloriosa daisies (Rudbeckia hirta), also referred to as black-eyed Susan or even brown-eyed Susan, have yellow petals with a dark or dark brown facility. They create an impressive addition to any flower bed and also attract butterflies. These cheerful flowers are 5 to 9 inches wide and perfect for container gardening and planting en masse or as a border. Gloriosa daisies tolerate drought, look great in cut flower arrangements and develop in U.S. Department of Agriculture plant hardiness zones 5 through 9.

Under 2 Feet Tall with Big Flowers

Several Gloriosa daisies have dark centres, develop about 2 feet tall and have big flowers. “Goldilocks” includes semi-double and double blooms and grows 20 to 23 inches tall by 12 to 18 inches wide. “Becky” produces a variety of petal colors, such as, gold, yellow, orange and bronze-red and its seed heads offer winter interest, also. It blossoms for many months and rises 10 to 16 inches tall by 12 to 16 inches wide.

Up to 3 Feet Tall with Double Blossoms

If you’re searching for tall plants with double blooms, plant “Double Gold .” This variety of Gloriosa daisy has big blooms with bright yellow petals and rises 29 to 35 inches tall by 12 to 18 inches wide.

Black Cones

A Gloriosa daisy with a black cone indicates the inner half of the petals has a dark colour that forms a dramatic ring round the eye. “Sonora” has very big flowers featuring gold yellow petals with dark cones and chocolate brown eyes. This bushy plant grows 12 to 16 inches tall by 12 to 18 inches wide. “Denver Daisy” has big golden yellow petals with mahogany-red eyes. It’s a bushy plant which produces blossoms for many months and rises 18 to 20 inches tall by 12 to 18 inches wide.

Under 2 Feet Tall with Dark Brown Eyes

Some small assortments of Gloriosa daisies grow less than 2 feet tall and have appealing, medium-sized blooms with brown eyes. “Toto Lemon” has lemon yellow blooms and “Toto Gold” has gold yellow blooms. Both varieties grow 12 to 16 inches tall by 10 to 12 inches wide.

Easy-to-Grow

Gloriosa daisies are easy-to-grow. These appearing flowers thrive in clay, loamy or sandy dirt with any pH and do not care if the soil moisture is dry, moist or just average. They thrive in full sun to partial shade and bloom from mid-summer to mid-fall, based on the variety. To stretch flowering time, clip off blossoms as their color starts to fade.

See related