How to Convert a Dining Room to a Reading region

What could be more comforting than to curl up in a cozy chair with a good book or magazine that has just been dropped into your mailbox? But locating space to your reading area takes some idea. A dining room might just be an extra room if your living style doesn’t involve large families or entertaining. Developing a reading area from this square footage is a superb way to personalize your lifestyle and to turn your home into what works best for you personally.

Plan Ahead

Whether you’re converting another dining room, a dining area or a little space adjacent to a kitchen into a reading area, fulfilling your wish for a cozy, private sanctuary is not a difficult task. Know what you want to add inside the room, and plan ahead, utilizing furniture you might already have and scouting for extra bits in nearby thrift stores.

Dining Room Conversion

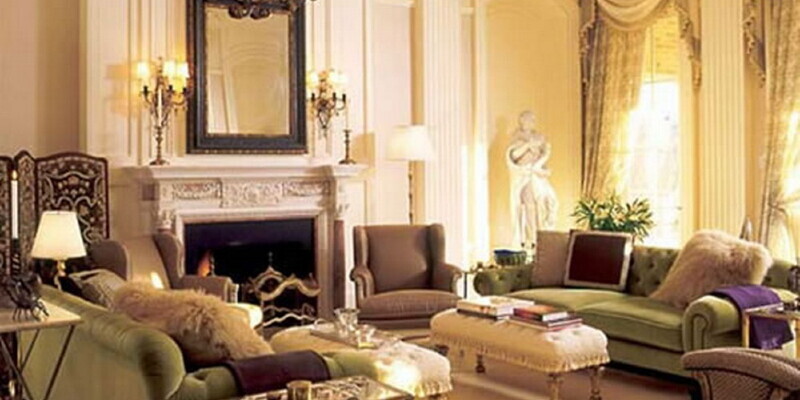
In case you have the luxury of another dining room but it’s wasted on a dining table you do not need, turn it into a reading area by moving comfortable furniture into the space. Pick a cozy reading chair, perhaps one that reclines in case your eyelids droop, and place a floor lamp nearby. Add a side table and magazine rack near the chair for convenience. Use the extra space for a little sofa and cocktail table in which novels and books can be exhibited, and place an area rug between the chair and sofa. Line the walls with bookcases, and include a writing table to finish your reading room.

Open Dining Area

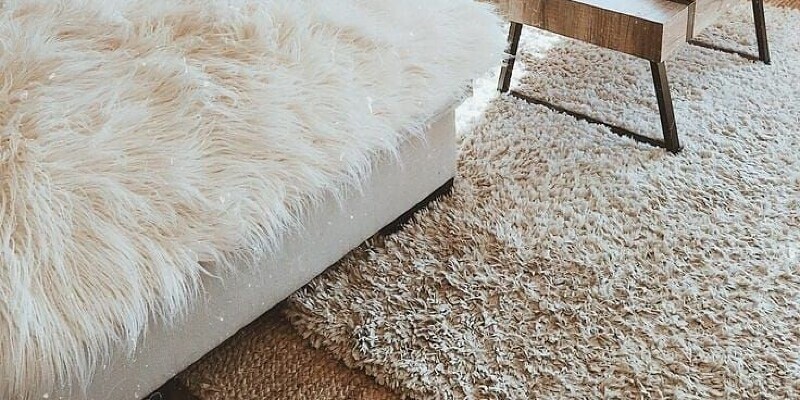
Adjacent to your own kitchen and behind the countertop barstools might be an extra dining area that is superfluous to your demands. Even though it’s accessible to the kitchen, then you can make a cozy reading area with the appropriate furnishings and accessories. A comfortable chair with either tabletop or floor lighting, an ottoman and a side table is all you will need to accomplish your objectives. Wall space is perfect for a little bookcase, along with the floor, covered with a casual area rug, specifies your reading area.

Kitchen Reading Nook

A counter runs the length of the kitchen workspace and is lined with barstools. A dining area is nearby, or a dining room is round the corner. Continuing the length of this kitchen is just another eating area. Not all of them are necessary. Turn the kitchen area that’s designed for a casual dining table into a perfect reading area. Put two reading chairs in the corners, turned inward toward the middle. Put a little table between them using a reading lamp, and cover the floor space between the seats with a room rug. Reclining seats or chairs with ottomans work best. Utilize wall hangings and artwork that are more in tune with reading and solitude instead of being kitchen-oriented, and your reading area becomes a distance unto its own.

See related

Bloodworm Larvae in Koi Ponds

As their name says, bloodworms are a blood-colored wormlike creature measuring about 1 millimeter long. These wiggly aquatic worms are a common sight in standing bodies of water, and though they might seem intimidating, they are usually not a cause of alarm. Actually, bloodworm larvae can be helpful to your koi pond.

Kinds of Bloodworms

“Bloodworms” can refer to the seams of a nonbiting midge (Chironomidae) along with the parasite also called blood flukes (Schistosoma). Even though chironomidae aren’t harmful to individuals, unless the man or woman is allergic to these, schistosoma — which is not found in the United States — has infected over 200 million individuals worldwide. Schistosoma, detectable only under a microscope, which is usually located throughout Africa, South America and Asia. This parasite lives in certain species of freshwater snails and contaminates the water.

Nonbiting Midges

The bloodworms in your koi pond are the pillars of nonbiting midges known as chironomids. These insects resemble tiny mosquitoes but don’t bite people or feed on blood. Nonbiting midges lay their eggs on the surface of ditches, streams and ponds. These eggs sink to the bottom of the pond and hatch a couple of days later. The larvae, known as bloodworms, consume organic matter in the pond, which helps maintain the water clean and clear. Bloodworms generally transform in the pupa stage about two to seven weeks following hatching. They remain in this stage for about three days before swimming to the water surface and also appearing as an adult chironomid.

Bloodworm Larvae and Koi

Bloodworms in your koi pond aren’t something that needs concern. The larvae don’t harm any plants growing in the pond and also are beneficial in many ways. As well as helping to keep the water clean, bloodworm larvae are a food source of fish like koi. Bloodworm larvae are high in proteinthat is essential for healthy koi. Frozen bloodworms are offered for purchase at pet stores, and also some pond owners increase bloodworm larvae for use as food for their fish.

Factors

If bloodworms aren’t welcomed guests, several control options are available that won’t hurt the koi. The bacterium Bacillus thuringiensis var. Israelensis targets only the pillars of specific pests, like nonbiting midges, and will not hurt the koi fish in the pond. Another option is to attract predatory insects to feed the nonbiting midges. Dragonflies and damselflies prey on the adult midges while their larvae feed on the bloodworm larvae. Submerged, marginal and floating aquatic plants added in and about the koi pond lure dragonflies and damselflies into the area.

See related

Fire Blight & the Podocarpus

Podocarpus, also known as African fern pine or yew pine, is an evergreen conifer that flourishes in U.S. Department of Agriculture plant hardiness zones 5 through 9, however Podocarpus henkelii is hardy to zone 12. The needles form dense spirals and are delicate, lush and pleasantly scented. Podocarpus takes well to pruning and can be grown outdoors or as a large houseplant. While fire blight is not normally a problem for podocarpus plants, correct treatment is critical.

Symptoms

Caused by the bacterium Erwinia amylovora, fire blight infection spreads through heavy rainfall or is vectored to vulnerable plants by insects. The bacteria overwinter in cankers and become active as soon as the weather warms in spring, multiplying and spreading the disease. When the podocarpus is actively growing in spring, then those small to large cankers begin to ooze light tan bacterial material which turns darker when exposed to the air. Fire blight is the most active when the temperature is between 75 and 85 degrees Fahrenheit and rainfall is frequent.

Damage

The tips of the leaves on the podocarpus plant’s new shoots can turn black and slowly bend in the shape of a shepherd’s crook. The disease may spread into twigs, limbs and branches. The blackened places remain on the plant rather than falling, giving it a scorched appearance. In case the disease spreads into the primary stem or roots, the podocarpus might perish. Fire blight generally goes from the leaf downward to the origins.

Control

Pruning out infected areas of the podocarpus in summer or winter, when the bacteria aren’t actively propagating, can help slow the spread of the disease. Pruning clippers or shears must be disinfected between cuts and between plants to avoid inadvertently spreading the pathogen to healthy podocarpus plants. The pruning cuts need to add more than only the canker. Cut off the division where the canker is and also the division to which it is attached, leaving only the branch collar of the main division. On the primary stem, you can scrape the illness by removing discolored tissue beneath the bark and also an extra 6 to 8 inches of healthy timber. Copper-based sprays might help slow the spread of the disease but generally can’t control it.

Prevention

Since lush new growth is especially vulnerable to fire blight infection, heavy nitrogen fertilization and hard pruning to encourage new growth only promote illness. Bordeaux combinations and copper-based sprays implemented since the podocarpus commences actively growing can help reduce the intensity of fire blight infection and supply some protection for plants that are healthy.

See related

How to Close in an Apartment Balcony

The traditional flat fireplace is an open environment surrounded by a waist-high wall of some kind. Sometimes this barrier is not anything more than a railing, but a lot of times it is a waist-high concrete block wall. If you want to enclose your flat fireplace, you will need to build a roof to enclose the whole project, providing privacy and a greater level of comfort within a controlled atmosphere.

Balcony Base

The fireplace base is the main part to any fireplace, because before you can build any walls or even a construction in addition to the balcony base, you must first ensure that the foundation is powerful enough to confirm what you want to place on top. Consult a structural engineer knowledgeable about city building codes and the building’s architect, if possible, to ascertain whether or not you need to make additional shoring steps to further strengthen the foundation of the fireplace. In most cases, balconies are built strong enough to handle some simple framing weight added on top, but always check first so that you do not have any injuries down the road with the fireplace falling out from beneath the weight.

Current Walls

If your existing balcony walls reach to about waist height, you can probably tie into the existing walls and then continue the setup up to the roof. However, in case there are just railings of some kind, these will have to be ripped out first so that you can build your walls. An existing basic block wall enclosing a fireplace is the best platform for wall framing to continue as much as a roof. From here, it is possible to mount wall framing with bolts and attach a roof to the top of the timber framework. Current wood frames can also be acceptable as a platform as long as they follow the traditional framing rules using vertical studs set at 16-inch intervals. From there you can just add fresh wall framing and then work your way up to the selected height of the enclosure.

Framing Versus Block or Brick

A fireplace enclosure isn’t the same construction as a full-length house that has an extremely heavy roof or even a second level above it. In short, the walls of the fireplace enclosure do not support tons of weight, however they’re still restricted in some aspects because they’re a part of the fireplace, meaning the help of the fireplace as it juts out from the building is that the support you have to work with. Though some improvements can be made to shore it up, the most suitable choice for balcony enclosures would be to utilize wood framing, just like wood is used in a normal dwelling. Full-height block and brick walls are too heavy to be considered because of the walls of a fireplace, because they would put too much weight on the foundation.

Roof

After you have framed the walls and the roof of the fireplace, you have to tie it into the present siding of the building so that it is possible to ensure everything stays waterproof. Install flashing and guttering around each one of the perimeters, and also install flashing underneath the wall siding of the building in which it meets the new roof of the fireplace, and down beneath the layer of shingles or other roofing material you use to cover the fireplace. All these could be asphalt shingles, clay or concrete tile shingles, or even raw all-natural stone shingles. Everything needs to be waterproofed, flashed and tied into the present siding for waterproof protection.

Siding

Protect the outside of the fireplace by installing some type of siding material. The very same principles apply as when siding a home, and that means you can use the same type of materials, like vinyl strip siding or wood shake siding. You can also opt for metal siding or for timber panelling. Tie in any new siding with the present siding of the building via flashing that underlies each separate material.

See related

The Best Bedroom Wall-to-Wall Carpets to purchase

Your bare feet deserve a cushy, comfortable surface to land on when you swing out of bed every morning. And your bedroom decoration requires the ideal colour and texture underfoot to ground it and help pull things together. Choosing wall-to-wall rug for the bedroom is easier when you examine your options and budget, before falling in love without thinking about the long-term dedication.

Ask the Right Questions

It is your bedroom, and your rug choice should make you happy and not blow the budget. Bedrooms are low-traffic areas so that you don’t require a rug together with the durability of cast iron. Just a little luxury is a much better choice. Consider the amount of sunlight the space gets and how much the light changes throughout the day when picking colors. Look for a rug that will dampen noise, cushion footfalls, wear well, not fade, and texture soft. Generally speaking, wall-to-wall carpeting blocks noise, insulates from cold or heat and conceals an unfinished ground, saving you the hassle and cost of replacing it.

Why Wool

Know your fiber to appraise possible bedroom rug. The fiber content is recorded on the company’s label on the sample in the industry. Wool is el supremo — it comes at every weave, colour and design; is naturally flame-retardant and stain-resistant; contains low-to-no toxins, based on the dyes used; also stays luxurious longer. Wool is hypoallergenic, resists crushing, helps to regulate humidity because the fiber breathes, and it even deters bacteria increase. The fiber sets the market standard, so that you may expect to pay more for the value in a nice wool rug. Regard wool Ebay as a investment. With normal maintenance and cleaning, wool rug will keep its attractiveness enough to add to the resale value of your house.

Acceptable Alternatives

Nylon is a crowd favorite; it has many of wool’s qualities with no high price tag. Nylon is easy to clean and very colorfast. It has great resilience so that you won’t put on a path from the door to the closet or the en suite toilet. The fiber adapts to most styles — shag, loop, textured and frieze. It may be recycled, a great attribute for Emptying buyers. A bit cheaper but still a reasonable choice, olefin or polyester is competitive with cotton but not as bouncy. It is a really soft fiber and cleans up well. Polyester carpet takes dye well and comes at a huge array of styles including cut and closed loop along with other plushy designs. Some polyester is created sustainably from recycled plastic pop bottles — a win for the earth and for your own bedroom and price range.

Trending at Toe-Level

The colour and weave is the place where you get to play with footfall and eye candy. Carpet comes in cut, looped, or cut and looped patterns, and carpeting finishes imply a deep lavish pile no longer takes full-time servants to keep clean. Cut pile is denser and much more resilient with higher spin levels. Velvet-soft plush shows footprints but can be easily fluffed back up. Textured plush is a bit more practical because it conceals vacuum trails and footprints but still pampers your feet. Berber is an elegant, compact loop pile that wears nicely but is harder underfoot than looser weaves. Shag is for your inner bohemian — the pile is long enough so that you’ll feel as if you are walking in tall grass. Because wall-to-wall is a huge design existence within the room, err on the side of selecting a subtle shade that will complement your current decor, and look just as great with your following color scheme.

See related

The way to Organize Dinnerware in a China Cabinet

A china cabinet gives you an perfect place to store your heirloom dinnerware, and if looking for display, it becomes a matter of beauty in your property. China cabinets typically have dinnerware storage space at the lower half behind closed cupboard doors, but also the upper half offers you the opportunity to exhibit your fine china, decorative plates, and teacup and saucer sets behind glass on lighted shelves.

Clean and Organize

Before you start to organize your fine china or dinnerware from the closet, eliminate everything to wash out the cabinet first. Wipe the shelves down with a damp rag to remove dirt and dust. In case you have glass shelves, then clean them with a solution of vinegar and water to avoid streaking. Arrange all of the dinnerware in accordance with type — big dinner plates, salad or dessert plates, saucers, cups and bowls. Set the serving utensils aside for the moment, like serving bowls, soup tureens and gravy boats.

Select Display Items

Based on the type of display areas in your china cabinet, choose individual pieces for exhibition under the lights. To show plates vertically, you’ll need special holders unless your china cabinet has a ridge to set them in and lean them against the back inside wall. You can use this area for seasonal accessories or alter it out as needed to enhance the decor in the room. Set the things for demo aside. When you have any specialty bowls or glassware, like hand-cut crystal or hand-blown glass bowls, then add these as accessories arranged in key places.

Dinnerware Storage Organization

Begin at the top of the storage region that’s behind closed doors. Leave a space to store your own silverware in its container to one of the top storage shelves. In case you have sufficient room, add fine crystal glasses you use only for holiday or formal dinners for safekeeping. Insert the dinner plates, salad and dessert plates, saucers, teacups or coffee cups to the second shelf. On the bottom shelves of the china cabinet in the storage area, store the dinnerware accessories not on display. Set the largest pieces in first, like large serving platters, to make room for things you will arrange on top of them.

Exhibition Pieces

Set the largest pieces for exhibit in the china cabinet to begin with to create the base. Center a big serving platter on the bottom shelf, a soup tureen over the shelf above with covered gravy boat and pitcher on the next shelf, if you have them. Insert a different serving platter or decorative plate or a favorite cut-crystal bowl on the upper shelf. When you have room to either side, then set a plate in a holder or include teacups and saucers on each shelf.

See related

My Pepper Plant Leaves Are Curled & Appearance Like Rust Areas

Brightly coloured and also a taste profile that could go from sweet to vegetal to blazing hot, peppers (Capsicum annuum) are comparatively easy to grow. All these warm-season vegetables are prone to diseases that could lead to brown spots and curled leaves. Pepper plants demonstrate those symptoms when they suffer from the mosaic virus or leaf spot diseases. The diseases can reduce your pepper harvest, or, in extreme cases, kill the plants.

Mosaic Virus

Mosaic virus is a incurable infection spread by aphids, tiny insects that suck on plant sap, and cucumber beetles. Both bugs will lead to damage to pepper plants, as well as other vegetable plants. The infected plants will have crinkled leaves that, with time, become curled. The leaves have also a greenish-yellow spotting, which later turn brown and rust colored. Pepper plants experiencing a mosaic virus infestation have poor growth and create fewer peppers. Because the virus can lie dormant over the ground in dirt, it can be hard to eliminate once established. To prevent the spread of the virus to healthy plants, uproot severely infected plants and throw them outside. Don’t add them to your compost pile. To reduce infestations of aphids and beetles, spray both sides of the leaves using a mix of dish soap and water. Mix 1 to 2 tablespoons of dish soap using 1 gallon of water. Stir and pour into a spray bottle, shaking well before applying. You can also plant resistant varieties of peppers.

Leaf Spot

Also called bacterial leaf spot, leaf spot first shows itself as brownish and greenish-yellow spots on the leaves and the fruit. Old leaves may have a watery-looking spot that turns brown and rust colored when it dries out. These watery spots can also appear on peppers if the bacteria strikes the plant after fruiting begins. The leaf spot bacteria can live in soil or seeds. To stop it from spreading or occurring, remove all contaminated crops and do not allow the debris or leaves remain on the ground, as the bacteria can live in the soil over winter. Purchase seeds that were treated for leaf spot bacteria to further decrease the threat. After planting, farther minimize risk by watering only at the base of the plant. Water that remains on the pepper plant’s leaves, stems and fruit increases the risk of infection.

Keep Soil Clean

Because both leaf spot germs and the mosaic virus can live in soil over the winter, it’s crucial to keep your lawn free of weeds. Remove contaminated crops — like any dead branches, leaves or fruit — as soon as you can. Weeds give a spot for the mosaic virus to live throughout the winter, and plant residue infects otherwise healthy dirt and provides protection for both the virus and bacteria throughout the colder months. Never place components of infected pepper plants on your compost pile.

Rotate Your Crops

To avoid infection, rotate your crops each year. This means growing your pepper plants in another area of the garden every year. For container gardens, throw out dirt that’s held infected pepper plants. By rotating your plants, you’re reducing the total amount of harmful bacteria that can lurk on your soil.

See related

The way to Eliminate Green Scale on Tree Bark

Scales might seem as a disease or fungus, but they are actually tiny insects. They have mouths which behave like straws that they insert to your plant to suck nutrients and water. Green scale (Coccus viridis) is a soft-shelled creature that may reduce a plant’s vigor, but will usually not destroy it. The ideal course of action for treating the infection is to manage environmental conditions and encourage natural predators to perform the work for you.

Green Scales

Green scales are accurate to the name, displaying a lustrous, pale green color when fully grown. At full maturity, they simply reach 2.5 to 3.25 mm. Because nymphs, they are oval, flat and yellow with six stubby legs. If you just happen to catch a glimpse of this very short-lived egg phase before they hatch, they are a very mild white-green and elongated.

Environmental Controls

Although green scales are generally not lethal themselves, they produce a great deal of honeydew. This byproduct can encourage mould growth and produce a second set of issues to your tree. Irrigation is extremely important in preventing and decreasing scale harm. Water-stressed crops are more likely to have difficulty during a infestation and are more receptive to secondary infections. The Arbor Day Foundation recommends soaking the ground for about 30 seconds using a garden hose and adding a thin layer of mulch into the base of this tree. The goal is to soak about 2 inches into the ground; you could check by inserting a ruler to the ground. Prune off any heavily infested branches. To eliminate individual classes of scales, then rub them off with a regular, hard-bristled toothbrush. This breaks their mouths and leaves re-infestation by them impossible, even when they look alive when they drop.

Predatory Insects for Control

Maintaining a healthy predatory bug population is maybe the very best remedy for green scales. What might look like nuisance pests might actually be helpful bugs which may rid you of the scales. Unfortunately, many well-meaning home gardeners spray off the very things which may balance their garden. Some common opponents to green stripes are beetles, lacewings, wasps and lady beetles. Ants are often linked to a infestation of scales because they’ll kill off and feed on a number of these predators. Should you visit many ants beneath your tree, eliminate them by placing ant traps. You can buy predator bugs to release for a short term repair, even though they will probably not last as long as indigenous bugs.

Spraying for Removal

If insecticides appear like the only viable choice for you, picked one of the least caustic ones like neem oil. Use a handheld sprayer and mixture 2 tbsp of neem oil to 1 gallon of water. Mix them together nicely and continue to mix them while spraying. In the winter, spray on the bark thoroughly. Spring and summer foliage necessitates spray under the leaves and around twig terminals where scales tend to gather. It might be applied every seven to 14 days, depending on the depth of the infestation. Do not spray neem oil when it is foggy, breezy, freezing, or above 90 degrees Fahrenheit.

See related

Table Setting to get a Five Course Meal

A supper served in classes makes any occasion feel special. The usual evening meal could be served in several classes that contain salad, an entree or main plate and dessert. A supper enlarged to six classes means adding an appetizer, soup and palate cleanser before the major class, and serving the salad after. The sequence is generally appetizers, soup, palate cleanser, entree, salad and dessert. Setting the table for multiple classes requires more parts of dinner ware, glass ware and flatware. With just a little preparation, it becomes easy.

For the Table

Begin with a tablecloth that curtains a minimum of 10 inches below the edge of the table. Place a low centerpiece which will not interfere with guests being able to see each other across the table. Insert candles for sparkle and flattering light. You’ll also need a large cloth napkin for each guest.The napkin may be put to the left side using the flatware, or folded magnificently on the upper plate. Place a cover plate or charger at each place setting.

First Plates and Flatware

The appetizer is served using predinner cocktails before arriving into the table. At the table, the soup bowl and its saucer have been set in addition to the charger. Place the knife into the right of the juicer, and then a teaspoon and the soup spoon. To the left, place the salad fork and the dinner. Place the dessert spoon and fork over the charger with the spoon over the fork and the spoon bowl facing left and the fork tines facing correctly.

Completing the Setting

Place a water glass to the right, over the flatware. Set wine glasses in the sequence they’ll be used, continuing to the right. The salad can be switched to after the palate cleanser, in which situation, exchange the ranks of the salad and dinner forks. When the soup class is done, the bowls and saucers are eliminated and replaced with a sorbet or fruit cup. These cups are eliminated to bring within another class, either entree or salad. The flatware is eliminated along with each program, and the chargers are eliminated before dessert.

Optional Pieces and Extras

If using a bread and butter plate, it is put over the flatware on the left. Place cards, if used, are arranged directly over the charger, and also a printed menu is rested on the soup bowl. In modern provider, it’s more common to function a second, seated appetizer in position of the soup course, and also to serve the salad before the main class. If this is the case, the second appetizer, salad and entree plates are stacked about the support plate, and the sorbet is brought in a cup resting on a saucer. If you bear in your mind to arrange flatware in the order of use for the supper, you’ll be OK.

See related

Railing Detail: The Diagonal Cross Balustrade

Our front porch railings are ornamental black wrought iron, and if they’re beautiful on many homes, they clash terribly with our cute little Craftsman. While traveling in Bend, Oregon, I seen a bungalow with angled cross balustrades and made it my life’s mission to switch out our wrought iron guys for timber railings with angled cross balustrades.

The wooden railing design features a X spanning the newel posts, fastened between the bottom rail and the handrail. It is frequently painted white, and the design is used on front, back and screened-in porches.

The following step in accomplishing this life mission is to convince my husband that it is also among his. I am certain these fine cases will do just fine.

Arcanum Architecture

It’s easy to see why diagonal crosses are usually referred to as farmhouse railings. Is this not the very quintessential modern farmhouse you have ever seen?

Texas Construction Company

The diagonal crosses within this balustrade mimic the angled lines of the exposed rafters above. Both in bright white, they pop from the darkened clapboard exterior.

Philip Clayton-Thompson

Designed for island alive, this fine railing is enriched with decorative post caps.

Michael Abraham Architecture

With carefully placed articles, the X’s on this Illinois house are taller than they are wide.

Siemasko + Verbridge

Combining quatrefoil railings, angled cross railings and ornamental porch brackets … this front elevation is a vintage woodworking fantasy!

Van Wicklen Design

With only one diagonal piece per part, this porch looks longer and leaner.

Ron Brenner Architects

Diagonal cross balustrades are perfectly appropriate to the traditional American Dutch colonial. Here they help sew a porch.

Rethink Design Studio

Greeted upon entrance by a custom screened-in front porch with angled cross balustrades, it is impossible to not fall in love with this Georgia house.

McHale Landscape Design, Inc..

It is a bonanza! This attractively landcaped Virgina home features diagonally crossed balustrades below, embellished Union Jack balustrades square and above spindles between.

Wayne Windham Architect, P.A.

Located in South Carolina’s Lowcountry, this small guesthouse porch covers the bigger porch of the sprawling principal residence for architectural continuity.

More:
Wraparound Porches Have Curb Appeal Covered

See related