Wood Stair Maintenance

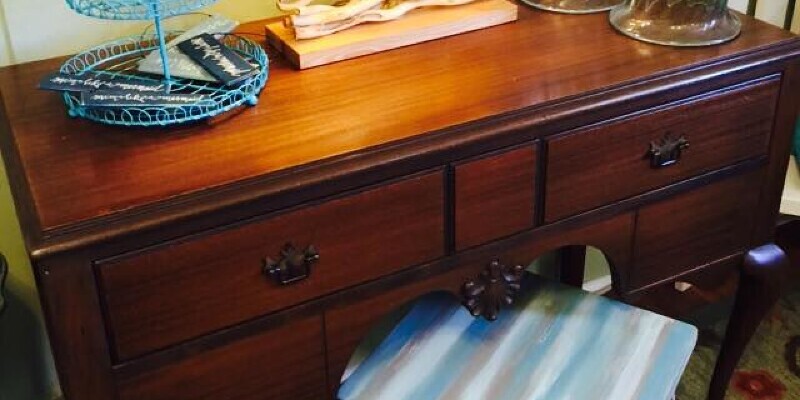
Care keeps wood stairs looking their best, and it can also help the timber itself last as long as possible. Standard cleaning, scratch-and-dent touch-ups and irregular refinishing are the principal processes that help keep wood stairs. Additional measures to prevent damage, like rugs to keep debris off the ground, also can help wood stairs stay in top form.

Regular Cleanup

Clean wood stairs regularly by vacuuming and sweeping them. Avoid leaving wet stains and spills on the timber for too long, since they can soak into the timber and warp it or leave spots. When the stairs require a good cleaning with something moist, use a cleaner designed specifically for the kind of floor finish on the stairs, such as a solvent-based liquid wax designed for waxed floors.

Damage Prevention

Prevent damage by placing rugs close entrances. Rugs help keep tiny pieces of gravel off the bottoms of shoes, which prevents them from scratching wood flooring and stairs. Avoid wearing dent-causing shoes, for example skinny and hard high heels, on soft wood stairs. Protect stairs from scratches when transferring furniture by padding the corners and legs of furniture with soft socks, foam padding or bubble wrap.

Scratch and Dent Removal

Hide tiny scratches and dents in stained hardwood flooring by implementing and buffing a new layer of wax on top of the damaged area. To eliminate a dent or scratch on stairs with a penetrating finish, rub the area with a few additional penetrating finish and steel wool.

Refinishing Wood Stairs

With a lot of heavy traffic, the finish on timber stairs might become worn or cracked. Penetrating finishes can be mended at worn spots without repainting the whole floor. To fix worn spots in a penetrating finish, apply new finish to the worn spots with steel wool. Surface finishes, like varnish and shellac, need to be entirely removed and replaced when they workout. Remove finish by sanding it away either by hand or with a oscillating tool armed with a sanding attachment. Start out with a relatively coarse 20- or 60-grit sanding abrasive and complete by smoothing the ground with 120-grit abrasive. Clean up all the dust and dirt, and then apply the new finish in accordance with its manufacturer’s instructions.

Mold Removal

In moist or humid locations, mold can start to grow on timber flooring. Although mold frequently seems to go away when wiped up, it normally continues to return until a disinfectant actually kills the mold spores. To kill mold spores on a timber floor, North Dakota State University recommends cleaning with a solution of 1/4 into 1/2 cup of bleach in a gallon of water. Before finishing or refinishing stairs in a home with a mold problem, start looking for a finish designed to help prevent mildew and mold from growing.

See related

How Restore the Finish on Kitchen Cabinets Without Stripping Them

When you get tired of your old, worn-out-looking kitchen cabinets, but do not have the budget to substitute or reface them, give them a mini-facelift instead. Kitchen cabinetry brings more wear and tear than closets at any other room in the house, often leaving them with a timeworn appearance in just a few years. But when your cupboards are still in decent shape, you do not need to strip them. By employing a one-step stain-and-finish solution, you can extend their usage until you’ve saved enough to the kitchen of your dreams.

Eliminate the hinges and pull on or handle hardware in the doors and cabinets. Place the doors onto a level surface or workbench in the garage. Place the hardware in another small can if you intend to bleach or paint it. A drill outfitted with the suitable screwdriver piece can speed the process along, but a screwdriver functions just as well.

Remove excess oil and grease residue in the cabinetry. A fresh rag dampened with mineral spirits cuts through the residue left from cooking. Wipe the dampened rag down and up to remove greasy residue. Turn the fabric over or substitute the rag. Repeat until the rag remains clean.

Sand the cupboards gently. Apply, long, even-pressured directly strokes, working with the grain of the wood with a 1/4 sheet of sandpaper folded in thirds. After turning the sandpaper above to utilize both exposed sides, then unfold the third side to expose it to use. Use your palms onto the sandpaper to get between molding and indentations in the cabinetry. Sanding roughens the surface to allow the combination stain-and-finish product to stick.

Apply a tack cloth to remove all the surface dust from the cabinets. If wanted, wipe out the entire cabinets with mineral spirits one more time.

Twist the cabinets up prior to employing the stain-finish combo product to them to ensure even color. Dab a touch-up pen for wood matched to the existing stain to fill in worn regions of the cabinetry that’s missing end and color. Let it dry for about 5 or 10 minutes. Wipe off the excess when warm and feather in the edges. A slight discoloration in the original color doesn’t make a difference. These pens operate similar to felt-tip pens.

Open the combination stain and polyurethane product. Stir the item to ensure it is completely mixed, as pigment settling can occur as it sits for too long. Make certain no pigment stays on the base of the can. Pick a stain color the exact same or a slightly darker than the existing cupboard stain for best outcomes. Don’t shake the can, as air bubbles in the stain-polyurethane combo leaves small bubbles on the surface of the cabinetry.

Paint the cupboard molding and trim regions initially, working with the grain. Then apply the stain-and-finish item to the flat regions of the cabinetry. Because this system involves a one-step procedure, maintain your breasts even and regular to receive the best results in the end coat. Employ the previous stroke in one direction — a technique called”striking off,” to get an even surface. Don’t over-brush the region. If you would like a deeper, more intense color, apply another coat after the first coat has dried out.

See related

Tips for Caring for Rattan Furniture

Rattan, that is made from plant fibers, is both flexible and durable, making it well-suited for use as furniture. In spite of these desired qualities, rattan furniture requires particular care to ensure its longevity. It is the Goldilocks of furniture substance, never happy unless it receives its favored treatment: moderate conditions which are neither too humid nor too dry to prevent mold, mildew or brittleness. Keeping the furniture storing it in a suitable environment ensure that it will last for many years to come.

Not Too Dry

Natural rattan or cane furniture is essentially dried, dead plant matter, which means it is subject to becoming much more dried out and brittle in certain problems. If used on a terrace or porch during warm weather, keep it out of direct sunlight to prevent fading or brittleness. In precisely the same fashion, keep it away from heating ducts or an indoor fireplace. If the atmosphere inside is dry, a humidifier helps moisten the atmosphere enough to keep the furniture from drying out.

Not overly Damp

Much like dry states, too moist conditions are not great for rattan. Extremely humid environments without ample lighting result in a mustiness on the furniture, which suggests mold or mildew. Exposure to rain or wetness with time also damages rattan, so it is best kept indoors or in a covered, moderate location when not in use.

Keeping It Just Right

Standard maintenance such as dusting or even a gentle cleaning retains that rattan in peak condition. Dust it gently with a a feather duster when you detect dust, or vacuum it with an upholstery brush attachment for the primary surfaces and a crevice tool for deep, hard-to-reach places. A slightly moist, soft cloth wiped within the rattan gives it a general cleaning, even though a bit of oil soap blended into water, then rubbed on the furniture with a toothbrush, helps clean those stubborn spots. If you use moisture to clean rattan, dry out the bit in a well-ventilated place so it does not remain wet long.

Mold and Mildew Maintenance

A vintage rattan seat or furniture left in storage a long time might have a musty odor. Small specks indicate mold and mildew; wash them away with a sponge dipped in equivalent parts of bleach and water, wringing out the sponge to keep it moist, but not soaking wet. A toothbrush comes in handy to eliminate stubborn mold or mildew. Wipe down the whole piece with a fresh moist cloth or sponge to remove any bleach residue, then allow the furniture to sit on a dry, breezy day. Repeat the cleaning process if the furniture still shows signs of mold or mildew.

See related

The Way to Repair a Ping-Pong Table Surface

Ping-pong tables aren’t complex. They include dense particleboard, satin paint with white lines, a net and thighs. When used by enthusiastic players that gouge, scratch and otherwise manhandle the desk, it gets worn or damaged over time. Repairing the table is basic, allowing you to turn to normal products and do-it-yourself practices.

Like Putty in Your Hands

Remove in the table. Inspect the table for deep scratches, gouges and cracks in the paint. Use wood putty to fill the cracks. Force the putty deep into flaws to make a smear of putty within the area using a putty knife. If the cracks in the paint are only hairline marks, do not be concerned about these; paint will burst to fill those. Check the putty after it’s dry. If you can observe a recess or dip larger gouges, apply another application of putty to measure the surface. Do not use caulk or anything with a rubbery feel to fill flaws. Look for putty that is made from timber and dries. Allow the putty to dry. Many putty dries within one hour, but based on humidity or depth, it might take longer. It ought to have a chalky, nearly brittle consistency when dry.

Sand and eloquent

Sand the tabletop by hand using 180-grit sandpaper. Begin by attaching the paper into a sanding block and removing the excess putty. Until it’s even with the surface sand it. Sand the remainder of the table using the hand block. If the block begins to slide and neglects to render a powdery substance, change the paper. When you have sanded over the entire top, resand it by hand using a folded piece of 220-grit paper. The finer grit paper helps to smooth and prep the top for paint. When the table is coated in a fine powder it’s finished. Wipe the powder off using a soft fabric. Do not use excessive force when sanding or lean on the desk too hard. Tables like this are not powerful enough with their spindly legs.

Rattle Cans

Aerosol cans are good for repainting the table. Blackboard or Utilize satin paint in any color you would like. Apply a thin, even coating of paint, working in sections, forth and back, until the tabletop is wet. Allow the paint to dry and add two coats. If it looks good you are prepared to add the lines. If you can see thin spots, it’s nice to add one or two coats. Allow the paint to dry.

Tape It

Use painter’s tape to hide the lines around the perimeter and across the sides. Press the tape down tough along the edges to prevent seepage of the paint below the tape. When you have established the lines, mask the interior of the table with paper, using the tape to hold it in place. Spray the lines using paint. One initial coat is most likely sufficient, but use two coats if lines appear thin. Peel off the paint if it’s dry. Allow the table before using it to cure overnight.

See related

The Way to Get a Stain Out of a Polyester Throw Pillow

Throw pillows add a punch of color and ornamental highlights to a sofa, chair or bed. But throw pillows from the living or family room can suffer more wear and tear compared to the pillows in your bed. Polyester — a man-made material — does not expect a lot of care to keep it looking nice. This durable fabric doesn’t wrinkle, making it an superb choice for throw pillows. When you discover a stain lurking on one of your favorite polyester throw pillows, you don’t have to eliminate the pillow, since you have several options for getting stains away.

Blot a wet stain with a clean cloth immediately. For dried stains, then break up the dried substance on the cloth by brushing with a hard bristle brush, using one with plastic or natural bristles.

Pretreat the stain before washing. Analyze the stain to determine its cause before pretreating. For oil-based stains, then add liquid laundry detergent or a pretreatment solution to a clean cloth and blot the stain repeatedly. You can also use this system to take care of lipstick or crayon stains. Use straight vinegar to remove wine, felt-tipped pencil or ink stains. Insert a ratio of 1 part ammonia to 1 part water and blot the area to eliminate blood or chocolate stains.

Fill a laundry room or big sink with warm water and a capful of liquid laundry detergent. Following the therapy sits on the stain for around 15 minutes, set the entire pillow at the warm water. Push it under the surface of the water until all the air bubbles escape and also the pillow stays under water. Pull the pillow out of their water to tighten the stain with a cloth and a bit of laundry detergent. Work round the stain at all directions.

Squeeze the pillow of surplus water and check the stain’s appearance. Scrub the stain with a soft cloth which has liquid laundry soap before the stain is gone. Diluting a bit of oxygen bleach in the water can also help remove the stain. Let the pillow soak in the warm water for around 10 to 15 minutes.

Empty the sink of dirty water, and then fill it with. Squeeze the pillow in the rinse water until all the soap is gone. You may need to refill the sink a few times with clear water to completely rinse the pillow.

Get rid of excess rinse water from the pillow by squeezing it completely. Hang the Cushion to dry out on the clothesline. Turn the pillow after about one hour outside to make sure it completely dries. Repeat until dried. You may also toss the throw pillow to the drier if the manufacturer label says it is alright to do so.

See related

Front-Loading Washer Seal Failure

The seal around the door opening, or gasket, in your own front-loading washer is there to store water inside the bathtub during the wash and spin cycles. If you notice water on the floor in front of the washer, rivulets of detergent and water or unexplained water marks across the door, the seal may have neglected.

Sealed Up

The very first symptom of seal failure on your front-loading washer is usually water dripping or fluid in the bottom of the door. This reduction of water indicates that the seal is torn, cracked or crumbling. Age, mould and mildew and improper cleaning can cause the seal to fail. Clean the seal frequently, but manage it gently and avoid harsh cleaners that break down the rubber. Once the seal has failed, it must be replaced. On all models, there are clips that hold the seal in place. Unplug the machine, then pull on the old seal from the clips and then carefully press on the new one into place. Make sure it’s secured with the clips to prevent leaks and damage to the brand new seal.

See related

How to Wash Up Milk Stains on Microfiber Sofas

Microfiber sofas are especially difficult to clean since the fabric itself bucks against norms. As an example, it stands to ensure cleaning something requires a little elbow grease, soap and water. But, this certainly isn’t the technique which should be employed when dealing with microfiber since water leaves rings or marks onto your fabric when left to air dry. But there is a fail-safe method for removing tricky stains — such as milk — from difficult fabrics like microfiber.

Equip your vacuum with its own brush attachment. Sweep any residual dirt, debris, pet hair or important spillage with the vacuum. Soaking milk up appears natural, but it is going to really push the slippery material farther into the fabric.

If your sofa is upholstered with slipcovers, remove the covers from unzipping them from the cushions. Put the slipcovers into the washing machine. Wash them with Tide or a name brand detergent on a warmer setting and dry them onto medium. Don’t let the slipcover air-dry or you’ll cope with water rings.

To wash the arms and the back of the microfiber couch, spray rubbing alcohol on the place you’re expecting to treat. Pinch or pull the fabric away from the padding. If you do not complete this step, you could pull stains from the padding underneath.

Use a white Scotch brand sponge to wash the effected area. Other colored sponges will bleed into your fabric. Scrub the place rigorously in circular motions. Allow the area to air dry. Please be aware that your sofa should not be in direct sunlight at this point. The sunlight will fade and damage the fabric.

After the couch is dry, run a wash brush with white bristles across the above stained area. Again, make certain you’re using a strong circular motion as you wash.

Put the slipcovers back on your cushions. Place your cushions on your newly washed sofa. If your washing machine did not rid the cushions of stains, then they may be spot cleaned using this method as well.

See related

Darwin Hybrid Tulip Varieties

Darwin hybrid tulips (Tulipa spp.) Are long-blooming tulips valued for their large, glowing, cup-shaped flowers atop sturdy stems. At maturity, Darwin hybrid tulips reach heights up to 28 inches. The tulips, which come in an assortment of solid and and multicolors, grow in U.S. Department of Agriculture plant hardiness zones 4 through 7. It is possible to plant Darwin tulips in warmer climates if you give the bulbs a chilling time before planting.

Red Darwin Tulips

Darwin hybrid tulip cultivars incorporate a variety of reds, from glowing cherry red to vibrant red. “Apeldoorn” is a cherry red variety with bright red inner petals. The black bases display contrasting yellow bands. “Gordon Cooper” is a bright red tulip that fades to pink inside the blooms. The bases of this cup-shaped flowers are yellow and black. “Parade” has bright red blooms with a dark base and the edges of the blossoms are a vibrant shade of yellowish. “Bienvenue” is a bright red tulip with distinctive pink, flame-shaped variegation and also a greenish-yellow base. All four achieve mature heights of approximately 18 inches.

Yellow Darwin Tulips

Yellow Darwin hybrid tulips are bright, cheery blossoms that light up the garden in spring. For example, “Apeldoorn’s Elite,” which reaches heights of approximately 18 inches in maturity, is a bright yellow tulip with feathery red variegation and dark markings at the base. “Jewel of Spring” is a slightly shorter tulip at about 15 inches. The flowers are yellowish and the bases of the flowers are black and green. “Hans Mayer” is a vibrant yellow tulip with contrasting red flames and a green tinted base.

Gold Darwin Tulips

Some Darwin hybrid tulip varieties have rich, warm hues of stone, like “Golden Parade” a golden tulip using golden-yellow hues inside the dark bases. “Golden Apeldoorn” includes lemony-gold blooms with dark, star-shaped patterns on the foundation. “Gudoshnik” is differentiated by gold petals with reddish-orange, feathery splotches and dark markings at the bottom of their blooms. All grow about 18 inches tall.

Pink Darwin Tulips

You can select from a huge array of Darwin hybrid tulips in a variety of hues of pink. A tall variety measuring about 24 inches, “Big Chief” is a dark pink tulip with a light green tint. “Dawnglow,” which reaches heights of 18 inches, is a rosy-peach tulip using a green base and orange-yellow internal leaves. “Elizabeth Arden,” a smaller, 12-inch selection, displays deep peach-pink, violet-tinted blooms with yellow and white bases. “Pink Impression,” another 2-foot selection, creates pink blooms marked with rosy red and veins edges. The bases are black and greenish-yellow.

White Darwin Tulips

Although white Darwin hybrid tulips are fewer in number, they’re no less striking in appearance. “Ivory Floradale” is a creamy white variety using green-tinted base. It is mature height is approximately 2 feet. “Ollioules” also reaching heights of almost two feet, is a white tulip with eye-catching magenta flames. “Ollioules” is a great choice for warmer climates.

Chilling Darwin Tulips

Tulips, such as many other spring-blooming bulbs, need a period of cold to store energy for the coming blooming season. To replicate this natural chilling period, store the bulbs in the refrigerator for at least four to six weeks prior to planting time. Don’t store the tulip bulbs near apples or other fruit, as fruits emit emit ethylene gas that will damage the bulbs. Planting time starts in October. You may safely plant Darwin hybrid tulips as late as early December in climates where the ground does not freeze.

See related

Types of Yellow Daisies With Black Centers

Gloriosa daisies (Rudbeckia hirta), also referred to as black-eyed Susan or even brown-eyed Susan, have yellow petals with a dark or dark brown facility. They create an impressive addition to any flower bed and also attract butterflies. These cheerful flowers are 5 to 9 inches wide and perfect for container gardening and planting en masse or as a border. Gloriosa daisies tolerate drought, look great in cut flower arrangements and develop in U.S. Department of Agriculture plant hardiness zones 5 through 9.

Under 2 Feet Tall with Big Flowers

Several Gloriosa daisies have dark centres, develop about 2 feet tall and have big flowers. “Goldilocks” includes semi-double and double blooms and grows 20 to 23 inches tall by 12 to 18 inches wide. “Becky” produces a variety of petal colors, such as, gold, yellow, orange and bronze-red and its seed heads offer winter interest, also. It blossoms for many months and rises 10 to 16 inches tall by 12 to 16 inches wide.

Up to 3 Feet Tall with Double Blossoms

If you’re searching for tall plants with double blooms, plant “Double Gold .” This variety of Gloriosa daisy has big blooms with bright yellow petals and rises 29 to 35 inches tall by 12 to 18 inches wide.

Black Cones

A Gloriosa daisy with a black cone indicates the inner half of the petals has a dark colour that forms a dramatic ring round the eye. “Sonora” has very big flowers featuring gold yellow petals with dark cones and chocolate brown eyes. This bushy plant grows 12 to 16 inches tall by 12 to 18 inches wide. “Denver Daisy” has big golden yellow petals with mahogany-red eyes. It’s a bushy plant which produces blossoms for many months and rises 18 to 20 inches tall by 12 to 18 inches wide.

Under 2 Feet Tall with Dark Brown Eyes

Some small assortments of Gloriosa daisies grow less than 2 feet tall and have appealing, medium-sized blooms with brown eyes. “Toto Lemon” has lemon yellow blooms and “Toto Gold” has gold yellow blooms. Both varieties grow 12 to 16 inches tall by 10 to 12 inches wide.

Easy-to-Grow

Gloriosa daisies are easy-to-grow. These appearing flowers thrive in clay, loamy or sandy dirt with any pH and do not care if the soil moisture is dry, moist or just average. They thrive in full sun to partial shade and bloom from mid-summer to mid-fall, based on the variety. To stretch flowering time, clip off blossoms as their color starts to fade.

See related

What Type of Algae Can Grow on Trees?

Although algae is usually an aquatic plant, some species can receive free of the water and develop terrestrially on the bark, stems and leaves of trees. Algae most commonly develop trees in moist tropical climates, but many species can develop trees also in temperate subtropical climates.

Trentepohlia

Trentepohlia is a genus of algae that includes about 40 species that frequently grow on trees in tropical and humid subtropical climates. This algae is free-living and terrestrial, and in temperate climates it is most frequently found growing on the bark of trees ; in wetter tropical climates, it may also develop on leaf surfaces. Most species contain an orange pigment that conceals the green colour of their chlorophyll; the algae grows in long filaments, and colonies of the algae seem as brightly coloured orange mounds on the tree bark.

Cephaleuros

Algae of the Cephaleuros genus, together with Trentepohlia, are part of the order Trentepohliales. Like Trentepohlia, Cephaleuros are terrestrial species; they only require water to germinate, therefore they are well-adapted to living on trees instead of in an aquatic environment. Cephaleuros species, like Trentepohlia, contain a orange pigment, and they vary in color from yellow-green to orange. Some species of Cephaleuros may cause blurred red spots on tree leaves, and the infection may be known as “red rust”

Stomatochroon

Stomatochroon is just another part of Trentepohliales, but it differs from Trentepohlia and Cephaleuros in that it grows not to the surface of bark or leaves, but inside the leaf itself in the chambers beneath the pores, or stomata, on the leaf surface. The algae is visible only as it sends up an enlarged “central mobile” that endeavors through the stoma.

Phycopeltis and Physolinum

These two genera are also part of Trentepohliales. The species within these genera typically develop on the surface of leaves, but in humid areas where moist surfaces are common, they can develop everywhere, even on tree permeable and bark objects.

Lichen

Lichen is a structure that commonly grows on trees; it’s due to a symbiotic relationship between fungi and algae. The fungus provides a construction that collects water and nutrients that the algae takes advantage of ; the algae in turn uses its chlorophyll to produce food for both the fungus. Species of the Trentepohlia genus are commonly found in lichens.

See related