Jambu Fruit Plant Truth

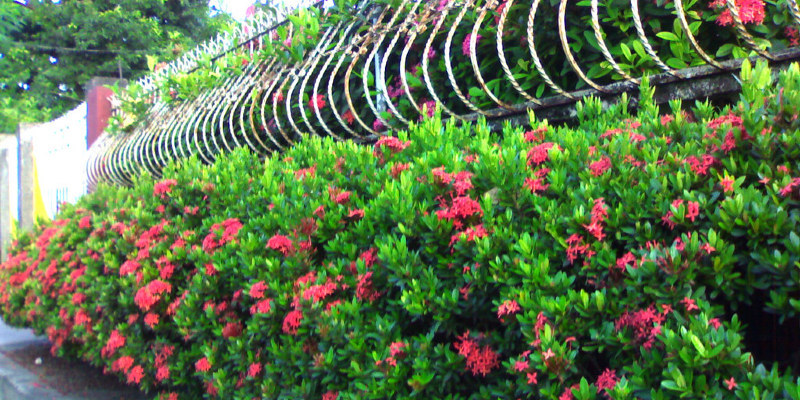
Jambu fruit (Syzygium samarangense or Eugenia javanica) goes by many common names, including wax apple, java apple, samarang rose apple and jumrool. Although rare in cultivation outside the tropics, they are grown as trees in warmer climates where frosts are rare. Jambu fruit trees endure conditions under which other fruit trees will endure. But, handsome appearance and their fruit will suffer if increased in poor, sandy soils.

Physical Description

Jambu fruit trees vary considerably in height, from 16 to 50 feet. But all include a stout, 10- to 12-inch trunk and a spreading canopy like a shrub. Their oval leaves contrast nicely providing them an ornamental appearance year-round. Panicles of pompom-like, mild yellow flowers type each measuring 3/4 into 1 1/2 inches broad. The flowers grow into fruit, if pollination occurs. The fruit starts out green or white ripening into a glossy, brownish-red color.

Climate Considerations

A native of southeastern Asia, the jambu fruit tree’s marine areas is accommodated to climates. It grows best within U.S. Department of Agriculture plant hardiness zones 10a to 11, where it will withstand minor cold snaps if coated. Gardeners in colder climates can develop fruit plants in containers for many seasons, overwintering them in a greenhouse or a hot, bright room indoors. But , they will outgrow a container and need a situation to endure.

Growing and Care

Jambu fruit plants grow best in full sun with moist, fertile soil. Bad soil lowers the quantity and quality of the fruit. Although jambu fruit plants benefit from twice feeding using balanced, 15-15-15 analysis fertilizer to encourage their development garden-grown trees require very little care apart from occasional watering and annual mulching. One factor when developing fruit plants that are jambu is temperature. They need temperatures above 60 degrees Fahrenheit to successfully fruit, which proves challenging in temperate climates. Pot cultivation allows for more easy access to their fruit, as well as easier control over their growing states during harvest.

Fruit Information

The fruit of trees that are jambu have slightly insipid, spongy flesh which ranges . Fruit tend to be of greater quality than those harvested in summer, even though the quality varies with their growing requirements. The varieties are consumed raw, stewed with apples or served with sugar, while the greenish fruit is used in a succulent fashion in sauces or consumed with salt. Mature fruit trees may endure a hefty crop, producing up to 700 fruits by their fifth year if increased in fertile soil. Jambu fruit’s skin is thin, so care has to be taken when harvesting them to prevent bruising or puncturing their flesh.

See related

The very best Chemical to Control Yellow Jackets

Yellow jackets (Dolichovespula spp., Vespula spp.) , black wasps with jagged yellow markers, are considered beneficial because they feed on large numbers of pest infestation. Nevertheless, many people view yellow jackets as pests themselves, because they can deliver wicked stings when hardened. Although yellow jackets typically prefer nesting in quiet, out-of-the-way places, some colonies develop in areas that experience a lot of human action. Those nests will need to be eradicated to avoid painful and potentially dangerous stings. The ideal chemical for the job depends on whether you’re dealing with a curved aerial nest or a single unseen beneath the ground.

Aerial Nests

A few yellow jacket queens build exposed nests that hang out in the open from tree limbs, shrub branches or roof eaves. The University of Idaho Extension recommends treating aerial nests using a pyrethroid-based insecticide. Pyrethroids quickly kill yellow jackets but only have reduced toxicity for people, birds and pets. The common names of pyrethroids always end in “-ate” or “-thrin,” like “cypermethrin” or “lambda cyhalothrin,” both widely used to eliminate the stinging pests. To treat the nest from a safe distance, then pick a pyrethroid product that comes at a ready-to-use aerosol format using a jet propelled trigger that sprays a stream of insecticide at least 20 feet away. Take the pesticide right into the entrance, typically located at the bottom of the nest, and then completely soak the outside of the nest as well. Wait at least 24 hours before returning to the treatment site in order to check for yellow jacket activity. Repeat the spray treatment every 3 days until you no more spot live yellow jackets in the nest area.

Subterranean Nests

Ground-dwelling yellow jackets are somewhat more challenging to control than people residing in aerial nests because they are often located in hard-to-find abandoned rodent burrows and other cavities that are protected. Carbaryl-based dust pesticides effectively control subterranean yellow jacket populations, but you have to get the dust inside the nest in order for it to work. As soon as you find the nest entrance, wait until dusk, and until you do not see yellow coat action, to sprinkle carbaryl dust around the entrance hole. Then use a hand duster or a moist liquid detergent bottle half filled with the insecticide product to get several puffs of their dust inside the opening. Instantly leave the treatment area, and don’t return for at least 24 hours. Duplicate the dusting process about every 3 days for as long as you visit yellow coat activity at the nest area. Once you successfully remove the stinging insects, seal the entrance hole with soil treated with carbaryl dust or a pyrethroid-based aerosol insecticide. This should maintain any surviving yellow jackets from reestablishing a colony.

Timing Chemical Treatments

Mid- to late spring is the ideal time to chemically treat a yellow jacket nest because the queen has started establishing her perverse but its numbers are still quite small. If you find a curved airborne nest earlier in the season, only knock it down with a powerful blast of water from a garden hose. Apply chemical therapies in dusk or after dark when cold night temperatures arrive and the majority of the foragers are calmly resting from the nest. Yellow jackets are sluggish and also have trouble flying as soon as the temperature falls below 50 degrees Fahrenheit.

Personal Safety

Yellow jackets attack as soon as they sense their nest being threatened by poison. Protect yourself from both stings and compound exposure by wearing heavy clothes, goggles, thick work gloves, socks and shoes, a hat, and a face mask or bee veil. Wear a long-sleeved shirt and pants, taping the cloth around your ankles and wrists to keep the agitated insects from getting beneath your clothes. Light may startle yellow jackets into aggressiveness, so avoid shining a light source straight at a nest opening. If you have to use a torch, cover it with red cellophane because the insects can’t see red light. Never, ever try to deal with a nest if you’re allergic to yellow jacket venom. Enlist the assistance of a non-allergic individual or a professional exterminator rather.

See related

How to Remove Body Odors Out Of Sheets and Pillows

The typical person spends about 7 hours sleeping in bed every night. During sleep, your body has plenty of time to move monies, perspiration, skin cells and germs to sheets and your pillows, which results in odors. Knowing the cleaning methods that are right allows you to sleep on bedding, and cuts through odor-creating germs.

Soak in Vinegar

The properties of vinegar can help cut through and remove the bacteria and residues which are causing odor from your sheets. Fill a bucket, bathtub or other container with 5 components water plus 1 part white vinegar. Permit your sheets and pillowcases soak for a couple of hours. It is also possible to add the washing machine and the vinegar and allow them to soak before washing.

Heat Them Up

After scrubbing the sheets for sheets that are colorfast, add detergent and warm water into the washing machine. Kills any bacteria. And by adding a half cup of hydrogen peroxide into your laundry load, it is helpful to lift stains and brighten the sheet colors. After washing if the odor remains , wash another time without detergent. Occasionally detergent remains on the face of cloths, which makes a body odor-containing residue.

Require Them Outdoors

Hang them out to dry in direct sunlight for up to three hours Following your sheets have been thoroughly cleaned. The ultraviolet rays of the sun disinfect and kill any remaining germs that could be causing odor. String a rope tight between two points to create a clothesline. Drape the sheets or hang them up . It not only, by hanging the sheets outside in the sun to dry airs out the fabric, but it provides sheets.

Protect the Pillows

Review the care tags onto your pillow washed. Insert two pillows at a time on your washing machine and wash water which exceeds 140 degrees F. Down and man-made fiber fill pillows are usually machine washable, though cotton and silk are generally not. Dry them onto a fluff setting or low heat setting with two tennis balls put to keep pillows fluffy. Let them stand in the sun for over three hours to kill any remaining germs. Cover your pillows with instances before adding pillowcases to keep body odor. Pillows with covers should be washed and those without should be cleaned at least four times annually.

See related

Crops That Improve the Nitrogen Content of Soil

Rather than allowing your garden to lie fallow throughout the off-season, develop a cover crop that will increase the soil’s nitrogen degree. Select a legume, or member of the bean family, to accomplish this, since beans have nitrogen-fixing bacteria in their roots which take free nitrogen and fix it to compounds readily available for plant use. Nonlegume cover crops help enhance the dirt, but they don’t enrich the nitrogen. Since cover plants are tilled into the soil, they also enhance soil permeability, structure, organic matter and nutrient-holding ability.

Annual Clovers

Clovers have benefits for home gardeners since they’re quick-growing annuals which are easy to cut down before they’re added to the soil. Berseem clover (Trifolium alexandrinum), a Mediterranean native, grows in mild winter areas as a cool-season crop as well as a summer annual in areas with cool summers. It increases soil nitrogen by 2.6 percent. The 24-inch-tall clover doesn’t volunteer and does well in most soil types. Shorter rose clover (Trifolium hirtum) reaches 3 to 18 inches tall and weighs two percent nitrogen. A cool-season crop, rose clover tolerates any well-draining soil type.

Vining Vetches

Vetches (Vicia spp.) Possess a vining habit. The annual plants are cool-season plants, sown in fall and cut down and dug beneath before they blossom in spring and until stems become hard. Hairy vetch (Vicia villosa) is 12 to 20 inches tall and has many cultivars, like “Lana,” “Oregon” and “Auburn.” Common vetch (Vicia sativa) is approximately 22 inches high and is also referred to as spring vetch or Oregon vetch. It does nicely in mild winter areas. Both these species contribute 4 percent nitrogen into the soil.

Bean and Pea Crops

Field peas (Pisum sativum) and bell beans (Vicia faba) are cool-season annuals and, as with other cover crops, aren’t allowed to blossom or form fruit until they’re tilled under. Bell beans have large seeds and large, fleshy leaves. They require fertile, well-drained dirt and enrich the soil with 1.2 percent nitrogen. A vigorous grower, field pea requires well-draining dirt conditions. The cultivar “Austrian Winter” is most common, but two newer kinds, “Miranda” and “Magnus,” mature earlier. Field peas enrich soil nitrogen by about 3 to 4 percent.

Warm-Season Crops

A warm-season, annual cover crop, sunnhemp (Crotalaria juncea) grows 39 to 117 inches tall. It tolerates drought and infertile soil. Sown in summertime, it grows quickly, suitable for tilling beneath in 60 to 90 days, contributing 1.7 percent nitrogen enrichment. Cut down the plant before stems become woody. Another warm-season annual, cowpea (Vigna unguiculata) grows between 19 and 24 inches tall, usually tilled under approximately 60 days after sowing. A number of cultivars exist, and soil nitrogen increases 1.4 to 1.5 percent. It grows well in light or heavy soil types, but requires good drainage.

See related

Why Does My Fig Tree Have White Spots?

Few insects or diseases cause white spots on fig trees (Ficus carica). Fig trees grow in the warm areas of U.S. Department of Agriculture plant hardiness zones 8 through 10 and can be invasive in some places. Scale insects and mosaic virus can cause pale yellow, almost white spots to form on leaves. Pale leaf spots are fatal and therapy might not be vital.

Scale Insects

Young scale bugs are light in color and feed on the foliage, which can cause discoloration and light-colored spotting. Scales, which feed on branches and twigs, develop a coating and a dark brown color. Scales don’t move once they mature, so they don’t always resemble insects. Look for the presence of young and both scales if they are the reason for the spotting to determine. Because scale insects controlled are usually kept by predators, you do have to see to your fig tree. Employ a horticultural oil throughout the season, if scale insects persist and thoroughly saturate the trees foliage, including the bottom of leaves. Don’t apply the oil if temperatures are above 90 degrees Fahrenheit, rain is expected or states are foggy. Wait 30 days if another type of fungicide was applied before spraying on the tree with foliage damage or oil can happen. After applying, wear a shirt, jeans, socks, socks, eye protection or a gloves. Keep pets and people out of this area until the spray has dried.

Mosaic Virus Symptoms

Pale is the symptom of mosaic virus. The spots range from light yellow to bright yellow, with the paler spots appearing nearly white. The rest of the foliage around the stains remains a vibrant green, providing a clear contrast. Mosaic also spreads into the fig fruits. Mosaic virus isn’t fatal, but it can diminish your fig harvest. The the fig mite spreads mosaic virus.

Fig Mite Problems

Therefore the tree stays effective, fig mites can decrease the spread of mosaic virus. The mites are exceptionally small and light yellow. They mostly feed on leaves and buds, which can give rise to portion or a russetting of the foliage in which they are most active. Mites attack fig trees roughly one month after the new leaves unfurl in spring. Inspecting the leaves with a magnifying glass every day in this period allows you to catch mite problems before they have a chance to infect the tree with virus.

Mosaic Virus Remedies

When it is infected with virus, There’s no cure or treatment for a fig tree. The disease isn’t fatal if you don’t need to disperse mosaic virus into some other 28, but it’s ideal to ruin the tree. The fleas are killed by Implementing a sulfur spray in the first signs of a mite disease and can keep them. Dissolve 3 teaspoons of lime sulfur in 1 gallon of water, and place it into a sprayer. Spray the foliage of this fig, coating it evenly on the bottom and upper surfaces of the leaves. Put on the sulfur, if you find fleas following 15 days. After applying, wear a shirt, jeans, socks, socks, eye protection or a gloves. Keep pets and people out of this place until the spray has dried.

See related

Is It Good to Insert Shredded Leaves to Garden Soil & Till?

A walk across a forest floor carpeted with leaves in a variety of stages of decomposition gives a visual illustration of how character uses leaves to gain. In case you have trees in your house or have access to a supply of leaves in autumn you can replicate transfer and the woodland activity that benefit to your garden. In their natural environment, leaves can take one year or more time to decompose, but you can speed the process by shredding them adding them directly to the soil of a garden.

Nutritional Benefits

Leaves are storehouses for most of the nutrients that plants will need to survive. As they break down, the nitrogen, phosphorous, potassium and trace nutrients they contain are discharged into the soil from the action of germs and fungi that have the leaf tissues and residue their rich waste. Decomposers, such as earthworms and insects, are drawn to the nutrient-rich soil produced that aerate the soil and contribute their own waste and by the rotting leaves.

Structural Benefits

Shredded leaves improve the structure of garden soil by taking up space between particles that are dense, such as those located in heavy clay soil. These small openings allow water, air and nutrients in, turning unworkable soil into a rich moderate that is fluffy. In loose sandy soils with poor water retention capabilities, the decomposed leaf mold functions as a binder that partly seals off the openings between the particles, slowing the rapid movement of water and making it more accessible to plant roots. Working shredded leaves into rich soil on a regular basis can help to keep the soil rich, making sure the fertility of that the soil through growing seasons.

Leaf Processing

In comparison to entire leaves, shredded leaves incorporate with soil more easily, simply by mowing them as they gather on the yard and it’s possible to shred leaves. A lawn mower bagging attachment makes fast work of collecting the shredded leaves because you can easily deposit them anywhere you like without having to rake them . Then ditch if the mower doesn’t shred all the leaves its bag collects and spread out the leaves, and mow them again. Short of working with a collection bag in your lawn mower, consider coordinating the mower’s release chute so that mower-shredded leaves accumulate in a relatively compact area as you mow, then mow them a second time to break up staying entire leaves before raking up the shredded leaves and transferring them into the garden.

Decomposition Considerations

Working leaves right into garden soil offers advantages, but adding leaves that are shredded may a produce nitrogen depletion from the soil as they decompose. The only way to know for sure whether or not your backyard soil lacks nitrogen is to perform a soil test using a kit or by sending a soil sample into a county Cooperative Extension Service or a soil testing lab. Otherwise nitrogen into the garden soil at a rate of 1 1/8 pounds for each 500 square feet of garden space can counteract any possible imbalance if you added the ground and plenty of leaves.

See related

The Way to Construct a Canopy Bed with Satin and Sheers

If you are decorating a room for a princess or adding love in the master bedroom, a canopy creates a timeless appearance on any bed. You can receive this look even in the event that you don’t possess a canopy or four-poster framework on your bed. Sheer canopies may be hung from the ceiling, using different procedures, depending on the type of canopy. Even regular curtain panels may shroud your bed in puzzle if them hang from ceiling curtain poles.

Four-Poster Frames WCross Bars

Install two on each side crossbar the lace waterfall valances and two on the crossbar.

Jump to Steps 2 and 3 in the event that you have absolute canopy panels. By draping it on the framework of the bed over the four corner post finials, install the four-poster canopy. Use the lace ribbon to tie the canopy at each corner post. Jump to Step 4.

Drape one canopy panel that is complete over every crossbar at the bed’s head. Permit the fabric to dip slightly in the middle, ensuring that you have an equal amount of fabric on all sides of the bed.

Drape the absolute canopy panel over every crossbar at the foot of the bed, adjusting it in precisely the same fashion as the primary panel.

Gather each panel at level that is mattress and connect a lace ribbon to hold it or allow the panel if desired to hang naturally.

Scatter lace assorted shapes and sizes and accent cushions in colors that are complementary at the bed’s head. An elegant lace throw over the foot of the bed.

Ceiling Installation With Hooks

Hold the front corner loop of the canopy over the front corner of the bed whilst standing on a step ladder and have a spouse do the same on the other side of the bed, standing on the bed or a seat to help determine the positioning of the ceiling hooks. Mark the ceiling lightly with a pencil.

Drill a pilot hole. Insert the hook and toggle through the hole, then screwing the hook far enough in before the wings open. Continue is flush with the ceiling.

Drill a pilot hole for the front ceiling hook and install the hook. Put the ribbon loops. The procedure for the bottom hooks at the foot of the bed.

Use the lace ribbon to tie the corner canopy drapes as if were a post , providing the identical appearance as though the canopy were set up on a four-poster framework.

Repeat Step 4 in the four-poster setup.

See related

How to Estimate the Cost of Wood Blinds

Installing wood blinds could instantly update the appearance of a home, improve privacy, and enhance energy efficiency by preventing light. Wood blinds come in a large number of colours — with colors ranging from dark walnut to brownish chestnut to golden walnut — which will match any decor scheme, vintage, whether modern or rustic. Homeowners can gauge the cost of adding wood blinds.

Determine Quantity and End

By deciding in the event that you would like to install wood blinds in each room in your home or just on windows or in certain rooms calculate quantity. What to consider are whether you need cordless blinds, and if you would like to install coordinating valances over windows. You will need to settle on a slat dimensions for those blinds; 2 inches is the most frequent. Selecting wood blinds with features such as valances or slats that are bigger will increase costs.

Quantify for Inside-Mount Wood Blinds

At bottom, middle and the top to the closest 1/8 inch, assess the diameter of the window frame for blinds mounted within the window frame, and write down the width for your measurement. Calculate the height by measuring from the surface of the inside window frame — in the left, middle and right — down to the bottom, and write down the longest measurement, deducting 1/4 inch should you prefer the blinds don’t touch the window sill. Avoid confusion and maintain calculations organized by writing the name of every room — such as”Dining Room” or”Upstairs Bedroom” — above the corresponding window dimensions.

Quantify for Outside-Mount Wood Blinds

Where you want the blinds to expand beyond the sides of the window, for blinds find the width by measuring to the nearest eighth of an inch. Step 1 to 3 inches beyond the surfaces of the window to get optimal light blockage. Calculate the height by measuring from above the surface of the window — typically 1 to 3 inches above the window frame — down to the window sill.

Estimate Costs

As of the time of publication, the cost per blind could range from about $42 to as large as about $200, depending on the brand, colour and size, and the average cost for a professional contractor to install blinds ranges from around $140 to $225 per blind. Professional installation contains the cost of labour the blind and supplies. Homeowners may choose to install the blinds themselves to save on labor expenditures. Phone or visit hardware stores and compare the prices of installed or wooden blinds to get the cost whether self-installed.

See related

Propagation of the White Hydrangea

Hydrangea (Hydrangea spp.) When added into the landscape provide an amazing bounty of interest and flowers. White bigleaf hydrangea (Hydrangea macrophylla) blossoms are usually selected for decorative bouquets or used as cut flowers. These plants are easy to disperse, allowing gardeners to increase their number of blossoms. Hydrangea can be propagated from cuttings, by layering or by branch. They root making them plants on which to learn an assortment of propagation techniques.

Seed

Another hydrangea will be produced by any hydrangea seed, but only those that come in non-hybrid forms can be relied on to be identical to their parents. Hydrangea seeds planted immediately without preparation and can be shaken from flower heads that were dried. They should be scattered over the top of a moistened seed starting medium and placed in a secure, but glowing, location. Seedlings emerge after 10 to 14 days in a temperature around 80 degrees Fahrenheit. Keep from washing off the medium moist, but not wet, being careful to water from underneath to protect against the seeds.

Softwood Cuttings

Softwood cuttings are made early in the season, as new shoots begin to harden. Examine the plant for openness by bending it sharply and selecting a take that is green. The shoot is prepared to be used for propagation, if it pops like a green bean. Remove of a non-flowering take at least three leaves, with rooting hormone, dust and push it into a pot of moistened peat. Capping the pot using a plastic tote can promote rooting and simplify care since the cuttings must remain moist so as to trigger successfully.

Simple Layering

Accidents that occasionally occur in nature, making it an effective method to propagate a wide selection of shrubs are mimiced by layering. The drawback of this process is that only a few plants may be propagated in a time due to space constraints. Dig a trench about 4 inches deep near enough to the hydrangea that you want to clone that a branch can be bent and partly buried in it. Remove a ring of bark about 1 inch wide prior to burying the section that is injured from the trench, but allow the branch to stick from the soil’s end. Leave the coating set up until the hydrangea goes dormant, then carefully remove the dirt from the area. Provided that roots have formed, cut at on the plant that was about 1 inch below the rootball and replant it immediately.

Division

Many hydrangea may also be propagated by clump division. Use a sharp shovel to slice through the center of the plant in two directions, making four bits that are equal, After a plant is dormant. This is significantly easier if your hydrangea dies back to the ground every year, but you can cut back the plant to no longer than 18 inches above the floor before dividing. Replant the clumps away after branch and water thoroughly.

See related

The Way to Install a Dishwasher Trim Kit

Dishwasher door trim kits hide the dishwasher allow you to customize the appearance of your kitchen or coordinate with your appliances. Kit options include either fiberglass entrance panel or a steel cover, spring assemblies that are heavy handed or access panels to accommodate to the weight added to the doorway. The real tool knowledge you need to install the kit is to use a screwdriver. This setup will be completed by an average homeowner in about an hour.

Shut off the water supply. Close to the door and engage the door lock.

Remove the screws. Remove and set them apart. Loosen the screws between the entrance panel and the doorway. These screws do not come all of the wayout, out so do not attempt and eliminate them. Remove the toe kick as well as the access panel.

Grab one of the door springs, situated near the back of the dishwasher’s end, and push toward the rear of the machine. Dislodge the hook by pulling toward the inside of the machine. Unhook the spring’s front end in the door and eliminate it. Repeat this process the door spring to eliminate.

Connect the spring to the door frame with the hook itself facing toward the exterior of the machine’s conclusion. Stretch the spring to the hole in the pair of four holes in the back of the machine as indicated by the kit instructions. Open the door. The doorway will not fall too heavily When the springs are installed with the tension that is correct. Once opened, it will not close by itself. Into the fourth or third hole, relocate the end of the spring to increase tension.

Peel off the tape covering the adhesive strips on the rear of the new door panel cover. Hold the cover in a 45-degree angle and slide it up to and underneath the escutcheon. Snap the panel and install the screws included with the kit to the base of the cover.

Tear the protective plastic coating off in the new door panel cover and discard.

Place the toe reunite in the base of the machine. Place the new entrance panel. Tighten the two screws between the entrance panel and the doorway. Install retainers at the peak of the access panel.

Reinsert the screws. Adjust the toe kick to lessen the gap in the ground level and tighten screws.

See related