The best way to Brighten a Brick Exterior

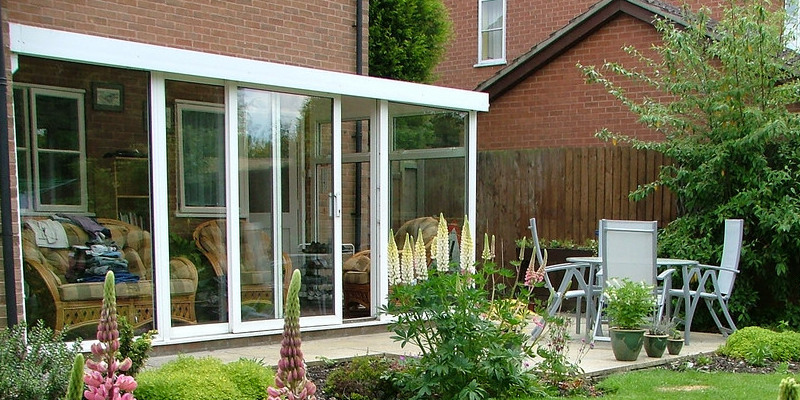
Years of grime and dirt can steal an exterior brick-Wall luster. Keep them looking their best by cleansing them regularly in case your house functions traditional brick partitions. Over time and due to outside components, exterior brick partitions can change into a dingy hue from a stylish red colour. It’s possible for you to brighten the partitions your self using a hose or power washer, an easy cleaning solution as well as a little manpower.

Prepare the Workshop

Safeguard any around surfaces from spraying particles before cleaning the the outside brick. Place a tarp over any landscaping that is near-by, including bushes and flower gardens. Door and window trim with strips of painter’s tape. In the event that you are using a hose to clear the brick, equip it having a high pressure nozzle. Attach a pressure-washer to its container or a garden hose, with respect to the product kind. Avoid using a pressure washer if any crumbling or of the bricks are broken.

Using a Hose

In the event that you are using a hose to loosen and remove grime and dirt, direct the water spray on top of the wall and work your way moving-in a side-to-side path. When you experience brick that is particularly filthy, permit the water to linger on the the location to get a more complete cleansing. Clean the brick.

Using a Pressure-Washer

Dirt and particles might depart from your house brick partitions seeking unattractive and dark. It’s possible for you to use a brick as well as a pressure-washer -cleansing remedy to clear heavily-soiled bricks which are in excellent problem. The water spray can do the trick in the event you favor maybe not to use chemicals. Use an electric washer using a stress of 3,000 lbs per inch or less to prevent damaging the bricks. You can hire one from a Do-It-Yourself retailer in the event that you do not own a pressurewasher.

Removing Moss, Mould or Mildew

Any areas of brick that receive restricted sunlight publicity could be vulnerable to mildew, mould or moss development, that’ll appear as black or green patches. To eliminate the places that are ugly, blend 1 cup of chlorine bleach in a bucket with 1-gallon of water and utilize it to the bricks using a normal- or artificial-bristle brush. Avoid utilizing wire- brushes, which might create rust stains. Spray the brick before cleansing it with the bleach remedy with water. Wear rubber gloves and security goggles to safeguard epidermis and your eyes.

See related

The best way to Lay Staggered Routine Flooring Tiles Outdoors

Flooring tiles that were staggered aren’t installed in a grid-pattern, but but rather are off-set so the edges of the tiles aren’t in a straight-line. Staggered flooring tiles are simpler to install when compared to a grid since there’s absolutely no pressure to ensure all your gaps and conceal imperfections are completely even. The tiles will appear stunning installed on porch or an outdoor patio.

Smooth out the sub-floor and level off any high places utilizing filler that is concrete. To get a wood sub-floor, complete and tape over any joints between floorboards and drive nails which are sticking up down.

Calculate exactly how many tiles by dividing the width of the patio, you’ll need to spot one row on the other side of the width of the patio. Cut that amount of tiles in two using a tile saw. Sand away the tough edges of the tiles with 80-grit aluminum oxide sandpaper.

Lay the full-sized tile without thin-set in the corner of the patio. Laying the first row of tiles over the period of the patio, inserting 1/4 inch spacers between each tile.

Set one of the half tiles in the beginning of the second-row. Place a full-sized tile next to it. Insert a spacer between the tiles. Continue installing tiles in this way before you’ve got finished dry environment the second-row. There’ll be another tile by the end of the second-row. Before you’re comfortable using the design, keep dry rows.

Create a paste using water and the thin-set. Refer to the manufacturer’s packaging for certain mixing quantities. Only make just as much as it is possible to use in 3 minutes, as it is going to thicken and begin setting by that time.

Lift the three dry- tiles on each one of the two rows and set them a-side. Where the tiles were were utilizing the flat fringe of of a trowel spread the thinset. Rake through the thin set using the notched fringe of of the trowel.

Set the tiles straight back in spot just as you’d them dry- . Press them down. Set an even over the tiles to confirm they’re le Vel. Faucet the tiles having a rubber mallet till they’re le Vel if un even. Insert a spacer between the tiles. Continue spreading thin-set lifting the tiles and re installing the tiles in this way before you’ve got completed the first two rows.

Spread mo-Re thin-set and install the third-row of tiles, you start with having a complete-sized tile. Alternating rows, together with the odd-numbered rows utilizing all complete-sized tiles as well as the even-numbered rows you start with having a half tile until the flooring is accomplished. Leave the flooring to remedy in accordance with the thin-set manufacturer’s guidelines.

Remove the spacers from between the tiles.

Mix the powder with water until a paste is shaped. Hold the rubber float a-T a 4-5-diploma angle and drag it across the areas involving the tiles. Leave the grout to set for 2-0 minutes.

Wipe excessive grout a way from your most effective of the tiles using a moist sponge, rinsing the sponge often. Leave the grout to remedy according to manufacturer’s guidelines. Protect the whole region with unfastened plastic sheeting to preserve air-flow if rain is anticipated but nonetheless keep the water out.

See related

Flowers That Sense Like Velvet

Some produce mesmerizing tactile encounters while the senses can be dazzled by flowers. Contact is invited by plants with textures. The most popular names of several plants are based on their characteristics that are fuzzy. Fortunately in zones with temperate climates, plant catalogs and backyard stores promote a lot of the easy and soft crops for outdoor and indoor cultivation for gardeners of abilities.

African Violet

The texture of heart shaped leaves on African violets (Saintpaulia ionantha) offers a calming tactile encounter. The dark-green leaves of the the lower perennial feel smooth and soft and have small hairs when rubbed. When stored wholesome primarily developed as house plants, gardeners around the world prize the African as it flowers constantly. While it may survive USDA hardiness zones 1 4 through 15, it is usually bought by buyers for in-door containers. It’s low maintenance and needs not much more than store bought potting typical watering mix and sunlight. It’s ideal for training kids the best way to take good care of plants since it it takes little treatment. New violets can be successfully started by you . Some cultivars of the plant generate other flower colours including pink, blue and white.

Lamb’s Ears

The velvety spiked flowers of lamb’s ears (Stachys byzantine) have an other-worldly look. Used as groundcover, the plant has -green foliage and small pink- blossoms. Lamb’s ears mature into huge mounds. Plants grow to over a foot-tall with a 2- to 3-foot spread. They’re perennials and fare best in well-drained soil under partial shade or full sunlight in USDA hardiness. They bloom throughout the summer months.

Cockscomb

Indicative of its own name, the cockscomb (Celosia cristata) has a striking resemblance to some rooster’s comb. The flowers bloom in to oblong formations that are puffy. Upon contact, its flowers that are crested sense like velvet. Potpourri lovers use the heads of cockscomb in mixtures that are colourful. The plant’s stem is a deep-red hue and leaves have red veins. Grown both indoors and outside, the simple-to-develop yearly comes in a number of colors for example pink, yellow, red and orange, supplying a pleasant touch of colour to gardens and rooms. It’s finest to plant a cockscomb soon after after acquiring the the plant in nicely-drained s Oil with full-sun or reasonable shade. The cockscomb develops to one foot tall.

Velvet Flower

Called velvet flower, the Salpiglossis sinuate is a yearly flower that is visually-striking. Its trumpet-formed petals have veins working down the middle, providing still another one of its own names, the tongue that is painted to the plant. The petals will be pink, red, orange or other shades and have a texture. The natives grow to more than 36 36-inches tall. They prosper under full-sun with typical watering in Sun Set zones 1 to 2 4, in loam. They bloom from spring to drop.

See related

Peat Moss Vs. Paper Vermicompost

Worm composting, or vermicomposting, enables one to recycle your kitchen waste with no need to get a big outside compost pile into a soil modification. A worm bin will fit right into a cupboard or closet, making it a great option for condo gardeners and occupies minimum space. Worms need bedding as they eat up the kitchen scraps to reside in. Deciding between the two well-known options, peat and paper, demands understanding of the worms’ needs.

Cost and Availability

Peat moss bedding is more costly than paper. It is harvested from slow-developing peat bogs in restricted quantities, which raises its price. As it is possible to recycle paper you currently have on hand, paper is reduced to no expense. Computer paper and newspaper perform properly, even though you are unable to use these printed with coloured ink or shiny papers. Peat moss comes in in the garden center in bags or bricks. Use a medium- free peat in bagged or brick form. The mats offered for flower-pots that are lining will not perform as worm bedding.

Preparation

Minimum planning is required by paper. Shred it in to 1-inch strips, moisten it carefully and after that fill the box that is vermi compost loosely using the bedding that is ensuing. Peat features a high-acid content that may harm or destroy the worms if not pre-treated. Soak the peat over-night and wring the water out. This minimizes problems in the bin and leeches some acidity in the peat. To help minimize issues that are acid, mix the peat with the equal quantity of paper.

Moisture Retention

Both paper and peat keep moisture. Worms can eat up the paper as the food scraps in the worm mattress as well as the prey on it, ultimately turning equally into compost. Peat does not compact, while paper might compact and need fluffing and retains moisture. One advantage of peat is that it is useful as a soil additive, so the compost can be used by you if the worms n’t however consume every one of the bedding. This can be a a small advantage, because uncomposted paper will not harm crops and finishes rapidly when added to a backyard mattress composting.

Choosing Bedding Substance

Paper gives the ideal bedding for worms when preparing, availability and price are considered. Paper is mo Re for Giving, as it will not pose an problem that could hurt the worms. Peat usually needs the addition of paper to perform nicely as bedding. Unlike paper, peat is a gradual-to- re-Source. Paper gives an option that is mo-Re sustainable compared to harvesting.

See related

The best way to Create a Planter From a Soda Bottle

By recycling plastic soda bottles in to planters for house plants, you are provided with planters that virtually water themselves. Not only do they offer a useful answer to your own plant’s needs, since they’ve a develop-in reservoir for water, your crops never experience in the effects of dry soil, and you’re free to leave them unattended for many days without issue. It is possible to safely show planters outdoors, but repeated re-fills may be required by the reservoir in summer.

Remove the label from a 2-liter soda bottle using a pair of knife or scissors. Remove the cap and discard.

Wash the soda-bottle in warm water. Allow it to soak for 15 minutes to remove residue in the label, if required. Scrape using the knife in the event your efforts are resisted by the residue.

Rinse the bottle with water to remove any soap residue and allow to air-dry.

Draw a line across the circumference of the bottle four inches in the underside. This is the line.

Puncture a hole that is little at stake together with the level of the scissors or knife. Cut across the line to eliminate the very top of the bottle.

Set the water reservoir to be a-side made by the bottom .

Puncture three to four holes across the neck of the bottle using a nail that is little, roughly two inches in the cap. These type drainage holes for the planter.

Place a cotton ball in the mouth of the container to act as a wick to siphon dampness in the reservoir of water, also to stop soil from falling out from the planter.

Turn the very best down and fill it roughly three fourths full with potting media.

Therefore the crown of the crops relaxation at soil level, plant seedlings in the soil. Fill in with your fingers to secure the plant in down gently around the roots with soil and organization.

Add 2″ of water to the reserved bottom of the bottle. This types the water reservoir for the planter.

S O the neck faces place the planter within the bottom. The bottom should be touched — or not exactly contact — by the mouth of the bottle .

Water your crops by incorporating fresh-water to the reservoir and lifting the planter.

See related

The best way to Remove Weeds

Establishing groundcover AIDS in preventing erosion, enhances the curb appeal of your house and addresses places where grass does not grow properly. Weeds released to the region dominate the groundcover, making the region appear unkempt and remove nutrients. Weeds in groundcover proceeds with normal servicing on the region and commences using the site planning.

A weedkiller that is systematic like glyphosate before planting the groundcover to eliminate any weeds currently in the region to the region. Wait depending before planting the groundcover on the instructions on the herbicide.

Work the floor using a tiller to eliminate any weeds on the plot.

Apply mulch to the bottom to help until they over take the groundcover, decrease weeds. In the event the original layer becomes thin, particularly if the groundcover is new, add mulch.

The groundcover often to recognize weeds as quickly as they start developing. Learn the method by which the ground cover discusses different levels of development so that you’re able to recognize and eliminate weeds.

The roots as well as weeds when you you place them. Grab the weed from the stem at ground le Vel so that you’re in a position to pull the roots out. Dig the roots up using a little backyard shovel if essential. Multi ply and swiftly you want to get cleared of the weeds until they fall mo-Re seeds.

Spray a herbicide on the weeds. Verify the herbicide is risk-free for the specific sort of groundcover you’ve. Consult having a nursery worker when choosing a herbicide that is risk-free.

The proven groundcover as essential market new progress and to keep the crops powerful. In the event the groundcover crops prosper, they they provide less of a possibility to develop to weeds.

See related

From Rotting on the Vine, the best way to Keep a Pumpkin

A favorite among gardeners and kids is a quick grower that offers plenty of fruit. An abundance of fresh fruit can equal a harvest of pumpkins, before they’re prepared to choose, but usually, the pumpkins rot. Excessive soil moisture, that’s a breeding-ground for maladies generally causes rot. Adopt several tricks to help stop your your pumpkins as well as your harvest needs to be plentiful.

Prune away a few of the vine across the pumpkins as they start to develop, to improve sunlight and air circulation across the fruits. This assists the soil dry after rain, watering and morning dew and stops the big leaves from shading the region close to the pumpkins.

Place a bit of cardboard or wood under pumpkins that are growing. This elevates the pumpkins to help prevent rot.

Water the pumpkins close to the bottom of every plant as opposed to watering on the whole patch. Mark the area of sown seeds or seedlings with sticks in order to apply the water in which it’s needed, even following the the area has been stuffed in by the vines.

Grow pumpkin types that are little or in a tomato cage. The vine will develop cage or the trellis as well as the pumpkins will hang the floor, where they’re likely to rot off. It is possible to also stake little pumpkin by lifting the vine off the floor types where the pumpkin tying it loosely and is developing.

See related

The best way to Keep Animals

Fruit trees provide growers having a supply of meals that are organic and enjoyable shade for the lawn. Orchards, even new ones, entice animals using the guarantee of an easy-to-achieve, tasty meal. Shooing animals away isn’t a great strategy of protection. By considering just like a animal protect fruit-trees — identify all entry points. Find and tackle susceptible places in your tree protection to avoid a lack of damage and harvest to your own home. Having a little yardwork as well as a great evaluation of the lay-out it is possible to stop the invasion of scavengers.

Cut tree limbs away from one another and structures, when feasible. By leaping from rooftops and tree tops squirrels obtain entry to some trees. Create a length of eight to 10-feet between the trees. Use a handsaw or chainsaw to cut the limbs back.

Place live bait traps in the bottom of each trees. Lure little animals to the snapback stay traps by putting nuts at the back of of the traps. Allow the animals to become familiar with all the traps before putting those in the established place. Set the traps. Animals were captured by carry at least five miles out of your home. Wear gloves when opening the trap and release the animals into an agreeable atmosphere like other non-agricultural region or a park.

Cover fruit-trees and bushes with chicken- proof netting when the fresh fruit first seems. Before you’re prepared to harvest the fruit leave the netting set up.

Remove pet feeders and birdfeeders in the area. Removing these temptations that are visible reduces some encounters with pests.

Place A2-foot-extensive steel band across the trunk of every fruit tree in a peak of 6 to 8-feet. Overlap the ends and use tiny nails to fasten the band round the tree, allowing for trunk progress. This makes climbing tougher for squirrels and chipmunks. Trim limbs that method the floor to keep A6-foot length involving the tree limbs and also the ground.

Pour pepper juice throughout the bottom of the trees to deter deer and rabbits. By mixing three peppers, make your own pepper juice. Pour the combination right into a jar and a DD several drops of dish washing fluid. Shake nicely. Place a tablespoon of the combination in a bucket of water. Pour the foamy -water round the root of the tree. Some animals are stopped by this normal deterrent from raiding your trees.

See related

The best way to Cut Philodendrons

As crops, philodendrons function best as house plants in places with moderate temperatures and thrive in warm temperatures. These plants are simple to care for and develop rapidly, meaning you may need to reduce them straight back occasionally to include them to to suit your room. Prune leaves away or reduce extended, branches that are healthy and re-plant them to propagate a philodendron that is new. The crops do not need pruning to develop, but crops tend to appear awkward and spindly if not cut back periodically.

Cut a way leaves and stems which can be yellow from age or injury using a knife, scissors or pruning shears. Grasp the stem that is yellow and pull it away from your plant. Cut the stem at its base, where it connects to the trunk or a different stem of the plant. If only one leaf on a stem is yellow, cut it off just over the joint where the plant is attached to by a wholesome leaf. Water the plant soon after after pruning to reduce any tension to the plant.

Contain the plant by cutting-off the stems, which are the oldest and most probably, into a size that matches the the size of your space to to show yellow. They’re the most ugly, usually seeking with slim stems weighted down by heavy and huge leaves. Use a knife, scissors or pruning shears to reduce where they satisfy the primary crown of the plant, these stems in the joints. In the event the soil is descended below by the stems, reduce them in the soil line. Water the plant soon after after pruning.

Cut stems by selecting a long stem with at least three big leaves for re-planting. Cut the stems immediately above a leaf, if feasible, or minimize them in the joint that satisfies the primary crown. The stem that is propagating should be between 3 and 6″ long. Water the plant that is primary. Place the cut water before the soil is moist but maybe not wet and stem in planting medium a-T least 8″ deep. Keep the s Oil moist, spot the pot in about two months should form in roots and vibrant sunlight.

See related

The best way to Save Lots Of Magnolia Seed

Magnolia trees, big and well-known for his or her foliage – flowers, give a unique appearance to your own garden or lawn. The magnolia genus includes more than 100 species of trees, including Magnolia stellata and Magnolia grandiflora. Magnolias have variable hardiness depending on the species, but a lot of cultivars prosper in U.S. Department of Agriculture zones 6 through 10. Magnolias grow easily from seed received from a magnolia tree that is mature. Storing and cleaning the seed from its cones raises the possibility of germination.

Before they open completely collect mature seed cones in the magnolia tree.

Put the seed cones. Wait to open; this often takes requires several times.

Take the seeds from the cones. Fill a bowl with luke warm water and place the seeds. This helps loosen the seed coat. Soak the seeds overnight or for several times.

Put a colander in the sink from falling down the drain to stop seeds. Gently clean the magnolia seeds to eliminate the outer-coat. Use a hardware cloth to rub the coat if desired.

Fill a container with water and drop the magnolia seeds in. Discard floating seeds; they’re not generally viable and will not likely germinate.

Spread the seeds that were magnolia on a paper-towel. Allow the seeds to dry over-night.

Fill a bag. Cover the magnolia seeds with moist peat moss. Seal the bag.

Store the magnolia seeds in the fridge at 32 to 41 degrees Fahrenheit. Don’t place the seeds.

Leave the seeds in the fridge for at least 60-days. When prepared to plant remove the seeds.

See related