Great Design Plant: Manzanita

Like the furniture that fills your home, the plants chosen to increase in your yard are a investment, both aesthetically and financially. A tree or shrub may inhabit your premises so long as you possibly can, or even longer, and may speak firmly of your style character and point of view. Dr. Hurd manzanita (Arctostaphylos manzanita‘Dr. Hurd’) is definitely a botanical investment that is guaranteed to attract attention and secure any landscape.

Debbie Ballentine

Botanical name: Arctostaphylos manzanita‘Dr. Hurd’
Common name: Dr. Hurd manzanita
USDA zones: 7-10
water necessity:Low to none
Sun requirement: Full sun to partial shade
Mature size: 12′-16′ tall x 10′-15′ spread
Tolerances: drought, and coastal climates, most soils, deer
Security benefits: Attracts hummingbirds, butterflies and bees; slope stabilizer

Debbie Ballentine

Distinguishing traits. A hybrid treelike shrub, Dr. Hurd is one of the biggest species of manzanita, reaching up of 15′ in height. Open and multi-branched, ovate glossy green leaves fill its branches year-round. Mid-winter beckons little white flower clusters on the tips of Dr. Hurd’s branches, lasting well into early spring.

Huettl Landscape Architecture

Few plants can equal the distinguishing feature that manzanita is known for: its bark. A fine textured color of dark red mahogany, it’s easy to forget that the surface is natural, unfinished and untreated. As an evolutionary means of shield the bark peels away yearly, revealing a new layer. As revealed in this picture, the effect is quite impressive.

Huettl Landscape Architecture

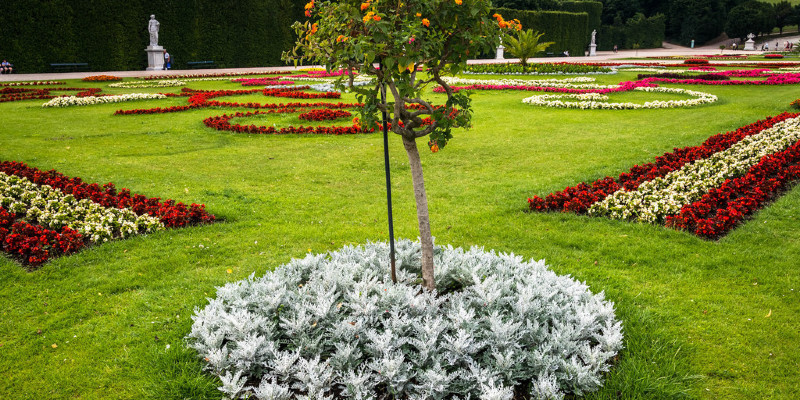
The best way to utilize it. Native into the rugged slopes and chaparral woods of California, Dr. Hurd is a tree designed to handle arid landscapes. Its low, open structure and jagged architectural limbs allow Dr. Hurd are the perfect specimen or focal plant to get a landscape with a rugged Mediterranean theme. Manzanita is also generally trained as hedges and may be used as rather an imposing display.

Look to Dr. Hurd’s natural surroundings for design inspiration. Paired with ornamental perennial blossoms, hulking boulders along with other low expansion wash, attaining a superbly dynamic and water-wise landscape is possible almost anywhere.

Debbie Ballentine

Before you plant. This plant is great news for home anglers hoping to create a Mediterranean chaparral landscape but who might not necessarily live in that specific climate. Even though Dr. Hurd does thrive in warmer weather, it’s one of the very tolerant manzanita species there is — reliably hardy to 10 degrees Farenheit. It’s tolerant of clay soils and summer watering. And while manzanitas are typically slow-growing, Dr. Hurd is faster to reach adulthood.

More excellent layout trees:
Japanese Maple | Persian Ironwood | Smoke Tree | Bald Cypress | Tree Aloe

Fantastic layout plants:
Black Mondo Grass | Feather Reed Grass | New Zealand Wind Grass | Red Kangaroo Paw | Blue Chalk Sticks | Catmint | Slipper Plant

See related

Zen Gardens: Serene Outdoor Spaces

Considered by many as the epitome of minimalist design, Japanese Zen gardens were created in ancient Japan to assist Zen Buddhists invoke deep meditation by closely manicured sand and strategically putting rocks to evoke serenity and beauty. The raked gravel signifies flowing water and the rocks represent mountains; together attaining a slick look perfect for garden design.

Although a Zen garden is rooted in monastic life, you can make the most of its curative powers by incorporating a few straightforward materials: gravel, stone and wood. Exotic gardens are simple to create and require little upkeep. See how Houzz designers employed the Zen garden aesthetic to those houses, and create your own respite of peace and calm.

Daryl Toby – AguaFina Gardens International

Try to observe rocks as islands and gravel as water which surrounds them. With just a little creativity it is possible to get a sense of water flowing around the beautiful rock in this relaxing Zen garden made by AguaFina Gardens International.

Daryl Toby – AguaFina Gardens International

This”combination garden” is just another project by AguaFina Gardens. When designing your Zen garden, always look for ways to create meaning with your design. Rocks can signify many things, and dirt gives you the freedom to mould the landscape with designs you can later change for another appearance.

Urban Earth Design

Let your Zen garden glow through your house with this clever design idea made by Urban Earth Design. This window inset adds dimension and light to the interior design while letting the relaxing atmosphere of a Zen garden traveling inside.

Bamboo is frequently the tree of selection in a Zen garden. It is simple yet elegant; exotic yet attainable. Complemented by gray gravel and rocks, this backyard — made by Ververka Architects — reveals how a modern house can benefit from a centuries-old concept.

Wind & Weather

Wind Gong – $49.95

This delicate wind chime adds yet another Japanese component to your garden while de-stressing your life with its soothing sound.

kim E. rooney

A Japanese message carved into a rock completes the serene spirit of this Zen garden designed by Kim. E Rooney.

Frank & Grossman Landscape Contractors, Inc..

This alluring Zen garden, made by Frank & Grossman Landscape Contractors Inc., features an ultra-modern fire pit, which makes good use of this garden’s space.

1800Lighting

Kichler 15071 Zen Garden 1 Light Outdoor Post Lamp – $261

A Japanese-inspired outdoor place lamb does its job without disrupting the Zen mood.

Laidlaw Schultz architects

This version of the standard Zen garden design, made by Laidlaw Schultz Architects, incorporates other components such as seats and a fire pit to create a Zen garden more livable.

Carson Poetzl, Inc..

You can mould the notion of a Zen garden into one which shows your imagination. Rather than Zen stone, designer Carson Poetzl created a soothing appearance with ice-like sculptures and onto a bed of sand.

More: Browse Asian-inspired landscapes

See related

The best way to Exterminate Yellow Jackets & Maybe Not Destroy Ever Green Bushes

Yellowjackets are a ground- team of wasps of the the family, which contains paper wasps and hornets. They’re about 1/2 inch and have a black and yellow striped stomach. These usually dangerous and frustrating pests produce nests from saliva and wood fibers in tree stumps, abandoned burrows and other guarded areas, under or usually near ever-green bushes. Crops are damaged by some sprays. There are techniques while sustaining the wellness of flora for exterminating wasps.

Commercial Lure Traps

Add little bits of meat where wasps often seem, and hang them. Traps, available in garden facilities and most home, are funnel-shaped containers filled with attractants. Meat in the trap aids lure the yellow jackets.

Meat every couple of days. Yellowjackets aren’t interested in meat.

Remove and dispose of wasps that are dead in the traps as required.

Pour warm water through the trap to destroy any wasps inside.

Homemade Lure Traps

Fill a bucket with water.

Tie a bit of meat into a string and suspend it several inches above the water.

Place where wasps are frequently observed or the bucket near a wasp nest. Wasps interested in the meat be unable to to flee and will fly downwards in the bucket.

Replace the meat and soapy water as required.

Insecticidal Sprays

Various chemical sprays that kill yellow jackets are obtainable at most home improvement, gardening and hardware shops. Check the label of the anti-wasp spray to produce sure it will not harm plants. When bugs are inactive the wasp nest with spray in late-evening or before dawn.

Approach the nest guardedly a long time after spraying to determine whether there’s any more action.

Until no wasps stay, repeat the spray program as required.

See related

Landscaping Utilizes for Damaged Bricks

Bricks that are broken are annoying since they can not be be utilized to develop buildings and can be very ugly. Because you can use damaged bricks in various techniques to improve the look of your lawn or backyard, do not simply toss them, nevertheless. Is utilizing bricks that are damaged a wise choice that is cost-effective, but re using them is better for the atmosphere.

Pathways

Lay bricks that were damaged strategically to produce walkway or a stylish route throughout your lawn or garden. Dig walkway or a path enough so you could place the bricks level together with the top. Place the bricks with all the sides that are damaged down or line the edges that are damaged up to mask the cracks. Sand across the bricks to keep them. The sand will complete the places across the edges that are damaged, making them less obvious. Line the damaged edges of the bricks toward the not in walkway or the route and plant a variety of plants over the edges to to cover up the sides that are damaged.

Walls

Walls enclose specific aspects of your yard or backyard, keeping them independent from your lawn. Bricks make an excellent medium for creating quick partitions to edge the border of your lawn or taller walls that act similar to flowerbeds that are raised. Stack the bricks with all the damaged edges facing toward the rear of the wall. It’s going to be mo-Re more appealing in the event the un-broken edges are in the very front of the wall. When you place crops and flowers over the fringe of of a border or wall, they are going to help mask the edges that are broken too.

Planters

Arrange damaged bricks in to planters to improve the looks of your lawn also to make mo Re area for crops and flowers. Stack the bricks with all the damaged edges facing toward the within of the planter. The damaged edges will no lengthier be obvious as soon as you fill the planter with potting s Oil and crops. Stack the bricks using the damaged edges facing out to generate a fascinating planter that h AS texture and mo-Re depth than bricks that are flawlessly formed.

Decorations

Paint bricks that are damaged and arrange them through the duration of your lawn for decorations that are desirable. Spell out phrases, for example “wel come,” with one-letter on every brick. Arrange the letters near an entry way flowerbed. Paint bricks that are damaged to seem like bugs and animals, for example squirrels, rabbits, lady bugs and bumblebees. Scatter them among your flower-beds or vegetable patch.

See related

The best way to Get Cleared of Agaves

Agave’s simple-to-develop and difficult-to-destroy make attributes make it a favorite for a lot of gardeners. Sometimes developed in containers, it’s a typical plant in the house landscape in average to warm climates. A backyard- agave become and will self-propagate an out-of-control mess — that may be harmful to animals and kids due to the sharp, sword like foliage. With perseverance and hard work, it is possible to get rid for excellent.

Wear a very long sleeve shirt, heavy duty backyard or leather gloves, long pants, boots and goggles. Agaves are sharp and pointy, and a juice that usually irritates the skin is excreted by cut foliage.

Examine the perimeter of your plant to appear for suckers or tiny plant pups that develop in the bottom. Dig out these using a shovel and eliminate. They can be given by you or plant them in another area of your landscape.

Prune the foliage cautiously to the floor, preferably using a specific pruning device designed for for succulents and cacti. Start in the fringe of of the agave and prune your path to the middle. Toss the clippings on a tarp toss them directly into a cardboard box you could easily get rid of, or to discard later.

Dig the agave down and across using a shovel, heading about 8 to 12″ deep. Cut the shovel to the floor within an arc toward the middle of the agave. Raise it from the ground when the root ball is free. S O you can easier raise it from the soil, it is possible to separate the root ball in to mo-Re manageable sections. Slice through the roots having a spade or minimize them using a pruning observed.

Monitor the location for agave progress that is new. Remove progress swiftly so remaining stay roots starve to dying as it seems. In the mean time, plant backyard options to assist use up water and the nutritional elements in the s Oil.

See related

The best way to Kill Conifers

Trees, often described keep their leaves through the entire year as opposed to shedding those in the drop. A few of the most frequent species belonging to the group of trees include spruce, cypress, cedar and pine. Because several conifers can increase upward of more than 20-feet broad and 100-feet tall, it might become necessary at some stage to remove trees which have become too big. Frilling is a standard method of trees like conifers, and the stump may be eliminated to avoid sprouting once the trunk was killed.

Cut as a lot of the big branches off the conifer can using a chain saw. So you have access it’s especially essential to eliminate the lower branches.

Use your chain saw to cut a groove round the circumference of the trunk below the cheapest set of branches. For small-diameter trees, the grooves should be-at least 1/2 inch-deep; in bigger , that are trees they should be between 1 and 1 1/2 inches deep.

Create a collection of cuts involving both grooves all of the way using a hatchet. This method is called frilling, that’s a kind of girdling commonly used to eliminate trees.

Leave the strips of bark attached to to the tree. You might be exposing the cambium — the internal tissue by cutting to the bark.

Mix up a batch of watersoluble herbicide in accordance with the directions of the manufacturer’s, and pour it right into a spray bottle that is handheld. You could possibly be in a position to seek out a herbicide labeled for frilling or girdling a T your nearby residence and garden-supply store.

Before the area is moist spray the herbicide immediately onto the uncovered cambium of the conifer. The cambium should absorb the water soluble herbicide, transporting it through the duration of the interior tissue of the tree.

Allow many weeks for the conifer. The tree is most probably lifeless when the foliage on the tree turns brown as well as the bark is brittle.

Cut any limbs off the tree utilizing your chain-saw. Cut the limbs off near the trunk of the tree as achievable.

In the event the tree is 6″ or less in diameter create a cut via the trunk of the conifer utilizing your chain-saw. Cut the trunk of the tree around 1 foot up from your bottom of the tree.

Make a cut in a downward 4 5-diploma angle in regards to a foot from your root of the conifer whether its diameter is higher than than 6″. This can be called an under-cut. The undercut should lengthen through about one third the thickness of the trunk.

Create a backcut about the other side of the tree by producing a straight-cut through onethird the thickness of the trunk. Position the backcut about 2″ above the underside of the under cut.

The under-cut by produce a cut via the conifer trunk in keeping with all the bottom of the under cut. If you are finished, you ought to be able to eliminate a Triangle Shaped chunk from your trunk.

Turn your chain saw off and transfer swiftly a-way from your tree as soon as it begins to drop. Maintain a risk-free distance of a-T least 1 1/2 instances the peak of the tree till it h AS fallen.

Use your chain saw to slice the off the conifer stump a T groundlevel.

Five or six 1 inch holes positioned about 3″ within the perimeter of the stump utilizing an electrical drill having a bit. Each hole should be about one foot deep. You could need a bit extension to make this happen.

Use your energy drill and spade bit to drill extra holes during the not in the stump in a downward angle, connecting them to the established of holes you drilled.

Pour slow release fertilizer or stump remover to the holes, and mound s Oil within the stump. Some stump removers suggest after pouring in the merchandise, filling the holes. Within the next few months, the stump must start to rot. You need to be in a position to dig it from the ground once it h-AS rotten through.

See related

Companion Perennials for Maiden Grass

Maiden grass (Miscanthus sinensis) co-ordinates nicely with several kinds of perennials. The blades of grass have delicate plumes that curl as they dry out and become gentle and appear in summer. It usually is useful in landscaping jobs as it could be used to to hide soil or as a decorative filler between crops and rocks. Maiden grass grows through 2-4 in Sunset’s Environment Zones 2. Appear for anyone suited for your climate that have similar needs when selecting companion crops for grass.

Echinacea

Echinacea is a plant that gives the backyard with stunning white, purple or purple – flowers. Echinacea prefers a soil that is neutral though grass grows in acidic, alkaline or neutral soils. Try to to plant echinacea in an in a manner that that permits for water drainage since echinacea grows when drained of water and grass is useful in drought or common water problems. Place echinacea in Sunset zones 2 through 2-4.

Rudbeckia Hirta

Black-eyed Susan (Rudbeckia hirta) grows nicely with maiden grass and thrives in the sam e Sunset zones. For best results, pick a selection that grows tall to over come the peak of the grass that is maiden. Look for types that have huge flowers to guarantee a contrast using the grass that is dry. Black-eyed Susan’s have gorgeous leaves that develop more than 6 6″ long and achieve over 3 3-feet tall.

Liatris

Blazing star (Liatris) is an outstanding companion to maiden grass in Sunset zones 1 through 10 and 14 through 24. Hardy, crops that are tall and flowering combine nicely using the tall, fast growing grass that is maiden. It offers a perfect distinction considering that the amazing flowers stand out of the green grass. The flowers create shades of purple, white and pink. Blazing star are designed for partial or complete sunlight – maintenance and crops that are easy to develop, although they do require water that is regular.

Gaillardia Aristata

Common blanketflower (Gaillardia aristata) is effective in all Sunset zones and needs only a moderate quantity of water to endure. The flower provides the the colors red, yellow, orange and burgundy. These perennials have comparable necessity that is expanding and co Ordinate nicely with echinacea. Getting somewhere to plant blanketflower that is frequent should be simple simply because they do well in a fan of full-sun. Plant blanketflower around the border of the grass or use them as a function flower that is carefully-placed.

See related

Companion Plants to get a Queen Palm

Queen palm-trees (Syagrus romanzoffiana) develop rapidly into a mature height of 20 to 70 feet in Sunset’s Environment Zones H1, H2, 12, 13, 15, 16, 17 and 19 through 23. The region under the the tree could possibly be exposed to sunlight in the morning or night or, in the event the tree is tall, might be stored in shade all day. Determine before choosing what things to plant, just how much sun-exposure the companion crops will get.

Shrubs with Colourful Foliage

Copperleaf shrubs (Acalypha wilkesiana) typically increase to between 10 and 15 feet tall in Sunset’s Environment Zones H1 and H2, and 17 through 24. Colourful foliage will be provided by these evergreen shrubs across the queen palm trunk all-year. Their leaves are splotched with purple, burgundy, copper, green, orange, pink, bronze and white. The copperleaf is drought- . Plant copperleaf shrubs 5 to 10-feet away from your queen palm to enable the mature width of the shrub.

Shrubs That Bloom

Gardenia or Cape Jessamine shrubs (Gardenia augusta or G. jasminoides) thrive in Zones H1, H2, 7, 8, 9, 12 through 16 and 18 through 24. They are able to be planted near queen palm-trees provided that they get several hours of sunlight in the morning or night. Gardenias increase to between 1 and 10-feet tall, with respect to the cultivar, and bloom in the spring, fall and summer. While Veitchii grows to 4-feet tall the August Elegance cultivar grows to a peak of 3 to 4 feet. Gardenias flower greatest when the soil is kept moist which is great for the queen palm. Just like copperleaf, plant gardenia shrubs 5 to 10-feet away from your queen palm to enable its mature width.

Partial-Shade Perennials

Aloe crops (Aloe spp.) are succulents that can be planted around the queen palm in Zones 8, 9 and 12 through 24. They choose night or morning sunlight with shade in the afternoon. The lace aloe or torch plant (A. aristata) grows in round, rosette type to your height of 8 to 12″, creating red flowers in the spring and summer. Soap aloe (A. maculata or A. saponaria) grows wide, lance-shaped leaves into a height of one to two feet and produces pink, red or orange spring and summer flowers. Zanzibar aloe (A. zanzibarica) matures to between 4 and 8″ tall with wide, lance-shaped, toothy leaves and blooms in red in the spring. Aloes may be planted alongside the queen palm-tree.

Full-Shade Perennials

Ferns may be planted in full-shade locations around a queen pal-M in Zones H 1, H 2, 5 through 1 4 and 9 through 2 4. Japanese hollyfern (Cyrtomium falcatum) grows to 2 toes tall and 3-feet extensive. Christmas ferns (Polystichum acrostichoides) are 1 to TO AT LEAST ONE 1/2 toes tall and 1 1/2 to 3-feet broad. Makinoi’s hollyfern (Polystichum makinoi) is 1 1/2 to 2-feet tall and extensive. Dragon Wing begonias (Begonia “Bepapink” and B. “Bepared”) are flowering perennials that bloom in pink or red through the growing period in Zones H-1, H 2 and 1 4 through 2 4. They’re going to thrive in are as underneath the queen pal-M. Plant ferns and begonias three to five toes a-way in the tree.

See related

The best way to Reduce Water Alkalinity for Gardening

Irrigation water is an essential aspect of gardening. Water differs in content that is alkalinity similar to soil, and at times it has to be modified to offer the results as well as the most circumstances on your garden plants. It’s important to know what precisely alkalinity ranges these crops favor and what kind of plants you have in your backyard. Your irrigation water-supply may be modified to match.

Fill water tank or a big barrel with all the water in need of adjustment that is alkalinity. Measure the dimensions of the container so the correct calculations may be created when incorporating the chemicals that were required.

Add the acidic chemical of your choosing to the water tank or barrel therefore the pH level of the water within is lowered to the the most well-liked irrigation common of 5.8. The increase in acidity will also reduces the levels in the water. Each kind of acid should be employed in accordance with its own ratio centered on one thousand-gallon water-supply, and each one is available in home improvement facilities and most gardening.

Before operating with acids, Don your security equipment. Add 9.1 ounces of citric acid per 1000 gallons of irrigation water, 6.6 ounces of nitric acid, 8.1 ounces of phosphoric acid or 1 1 ounces of sulfuric acid. Add only one of the substances for your water supply and never try to to combine a lot more than one. Multiply lessen them appropriately for smaller materials, and these ratios to fit-for water materials that are bigger than 1000 gallons. By way of example, should you be treating 100 gallons of water, you’d add 0.91 ounces of citric-acid and therefore on.

Stir the combination gently using an extended-handed shovel s O the acid operates its way through the water-supply. Test the water-supply for alkalinity and pH. The I Deal pH le Vel lies between 5.2 and 6.8 for most crops, and the I Deal alkalinity ranges from 3 to 6 calcium-carbonate parts-per million in most instances. Use garden hose and a water-pump to distribute the water throughout the garden.

See related

The best way to Plant Zoysia Grass

Not only will a well-groomed garden offer aesthetic charm to your own home, your house worth can be also enhanced by it. A low-maintenance grass-like zoysia is great for high-use locations, offering a carpet-like appear. Its characteristics will also group out crops that are unwanted while its warmth tolerance makes it a great option for the majority of California.

Have your soil. This can let you know the particular kind of fertilizer you’ll need for its ideal development as well as to create your zoysia. Follow the tips you might be given to prepare the soil; start the location where plugs will soon be placed together with the garden fork, mixing it using fertilizer before planting into a depth of 3 to 4 inches.

Use long-handled or the plugger bulb planter to eliminate a core of soil at least 2″ in diameter and 3″ deep. Make holes that are related 6 to 12″ apart. A fertilizer suggested for beginning crops.

Place a plug to the hole — Zoysia matrella Zoysia japonica and Zoysia tenuifolia are the most frequent types — of zoysia grass so the tops of the plugs are using the ground. Tamp the soil round the plants to secure the plugs.

Water the plugs carefully for three months or the first two to assist the plants establish themselves.

See related