The best way to Plant Willows Next to Black Walnuts

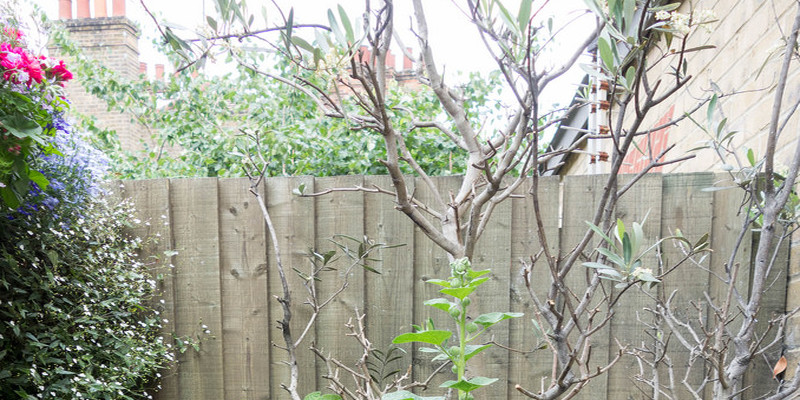
Black walnut trees (Juglans nigra) are appealing for his or her tasty nuts as well as the hard-wood, which makes gorgeous furniture. However, they’re often poisonous to trees and nearby crops. Black walnut trees exude toxic juglone (5-hydroxy-alphanapthaquinone) to the soil, which stunts the development and and finally kills most near-by crops and trees. Some trees, like willow, are more tolerant of juglone and may be developed having several precautions, near black walnut trees.

Planting Areas

When choosing where to plant your walnut tree, select an area that offers adequate drainage, ideally away from trees and crops in your lawn. This may help flush from crops that are delicate. Also much in the soil might nevertheless damage the plant although willow trees are tolerant of juglone. Place your tree outside the area that can serve as the drip line of your walnut when it matures — an average of about 60-feet. Juglone enters the soil when rain washes over the leaves also as from branches that are fallen. It is also exuded in the root program, which usually extends about to the drip line of the tree.

Keep It Clean

Reduce by keeping the floor free of particles in the walnut tree, the quantity of juglone that enters the soil. Quickly eliminate branches and sticks along with nuts and hulls. These may roll close to your own willow tree, growing the amounts that are juglone in the soil close to the willow. Look for black walnut seedlings that appear; eliminate any roots which have shaped as well.

Mulch

Stay away from woodchips that contain branches or other debris out of your walnut tree in the event that you use mulch all around your willow tree. Also, do not use black walnut leaves that you program to distribute your willow tree around. This may concentrate juglone in the s Oil close to the roots of the willow.

Drastic Actions

Other plants which you may want to grow round the bottom of your willow tree may not be tolerant although willow trees are tolerant of juglone in the majority of situations. For the reason that case, it is possible to take some measures to keep the trees separated. Build a huge, lined elevated mattress for the willow tree, and dig a trench involving willow trees and the walnut. Fill the trench with concrete, that will keep the roots of the walnut from extending close to the willow tree. The mattress that is elevated aids keep the roots separated in the soil close to the black walnut of the willow. You nevertheless should choose up particles or walnut branches that land in the elevated mattress of the willow to avoid contamination that is juglone.

See related

Fertilizers for Broccoli

Broccoli is simple rich in anti-oxidants and to develop in the house garden. This vegetable thrives in accordance with the Ohio State University web site. It’s huge feeding plant that needs regular applications of fertilizer throughout the growing cycle. Broccoli plants prefer a soil pH range of 6.0 to 6.8.

Fertilizer Options

Gardeners can select from natural or synthetic fertilizers, in slow-release formulations or quick-release. Synthetic fertilizers so are manufactured to produce rapidly to the soil and are made out of chemicals. Organic fertilizers break down more gradually than artificial fertilizers, therefore less chemicals runoff into waterways. Crops like broccoli need normal fertilization but gardeners should prevent the over-use of fertilizers that could cause “eutrophication,” an over-growth of vegetation that may cause fish kills in rivers and streams. Use fertilizers only as directed. Some communities limit the use of phosphorus- .

Starting Fertilizer

The program of a fertilizer that is beginning can assist to make sure that the transplants have adequate nutrients rooting and available for quick development. Apply a quality that is good, all purpose 20-20-20 fertilizer during the package instructions. the transplanting, following Goods are available and could cost less, although liquid fertilizers are usually the most convenient type to use. After fertilizing to enable the nutrients to soak down to the root zone, water the plants.

Side Dressing Fertilizer

Side dressings of fertilizer are usually added to supply extra nutritional elements as their good fresh fruit is produced by the plants. Ammonium sulfate, added in a price of 1/2 cup per 10-feet of row keeps an offer of nitro Gen obtainable to the crops. Add still another feeding of heading of the plants during the time, suggest the Mississippi State-University Extension Service website.

Micronutrient Fertilizers

Trace quantities of other chemicals assist veggies like broccoli to increase nicely and generate good good fresh fruit that is good. For instance, plant deformities can be caused by lack of adequate molybdenum . Lack of boron can trigger bronzing of the fresh fruit. Most fertilizers don’t include components for example copper, manganese, boron, molybdenum and iron. These compounds might be given micro-nutrient fertilizers. Always study the label in your fertilizer to know what what nutritional elements are integrated in the formulation.

Container Fertilizing

Container planting of broccoli can trigger issues that are developing since the restricted quantity of soil can swiftly become become depleted of nutritional elements. Use timed-release fertilizers including 101010 or 141414 formulation during planting, combined in carefully with the potting combine. After that you can fertilize using a water soluble fertilizer mixing it in accordance with label guidelines mid-way during the developing time and including it.

See related

The best way to Enclose a Veranda

Just like deck or a porch, a veranda can include useful outside living area to your own home. Since it is a construction that is coated, it might even provide higher use when compared to a deck or porch that does not feature a roof. However, you are able to make your veranda even more useful by enclosing the construction improve its privacy or to offer protection in the elements. It’s possible for you to choose from several alternatives in regards to enclosing your veranda, in order to locate a a method that enables one to get the most out of the the room and suits your requirements.

Surround With Lattice

In the event that you would like to enclose your veranda for improved privacy while nevertheless keeping a see of your lawn, including lattice panels is an ideal and budget- approach. Panels feature an criss-cross pattern, hence the breeze can go through and also you will partially see-through them. It’s possible for you to choose from panels made from wood or vinyl – vinyl is more durable and easier to sustain, however you can paint wooden lattice to custom match your house and lawn. Use the lattice panels in case you choose complete privacy so your veranda is entirely shielded from view by lush greenery, and train climbing flowers and vines to increase over them.

Hang Mosquito Netting

If guarding your veranda from bugs is your principal interest, mosquito netting is an expense-efficient, alternative that is adjustable. Attaching mosquito-net curtains to the roof of your veranda having a track system lets you open and near the netting depending on your own needs, while utilizing cloth hook-and-loop fasteners to to put on them in location permits one to put them up and consider them down when the feeling strikes. Mosquito internet curtains are typically accessible in neutral shades like beige and white, but for additional privateness curtains are your most useful choice. Best of all, mosquito-net curtains are device washable s O they’re easy to keep clear.

Use a Display Package

Doit a permanent enclosure blocks rain and wind can enjoy your veranda even in climate, a, so you porch screening package is a perfect choice for doit – yourself-ers. The package contains every one of the supplies essential to to install screens straight to your veranda’s railing or alternative framing pieces, along with instructions which make the procedure simpler. Most screening kits are manufactured from polyvinyl chloride (PVC), therefore they can be extremely durable. They are also made of neutral shades like white, beige, brown, grey and black, to help you choose an alternative that complements your home’s exterior. If you’re perhaps not confident with with doit-your-self jobs, you can employ a contractor to construct and install a custom display method to your veranda, though it’s definitely a mo-Re more expensive alternative.

Convert to Sun-Room

When you want to a DD an additional area to your own home, converting your veranda to your sunroom by enclosing it having a modular sun-room package is a perfect method to a-DD area – and worth – for your house. Kits an average of perform most useful in the event that you if you wish to to produce a three-time porch considering that glass windows, the partitions and ceiling aren’t fully-insulated. By incorporating partitions of windows for your veranda, it is possible to enjoy the the room in milder climate therefore it functions properly as a family area or eating region that is added. In the event that you’d like to to show your veranda right into an area which can be employed year round, including a home-office, it’s greatest to employ a contractor to totally insulate the partitions, ceiling and windows. A contractor can also prolong your home’s heating and cooling methods to your own enclosed veranda, therefore the new area is comfy no issue exactly what the season.

See related

Peppers as Perennials

Chili and bell peppers are planted by most people enjoy the fruits before the first frost from midsummer after which pull the plants up. In frost-free locations, peppers are pleased to behave such as the perennials they are. You can trundle your amount of peppers in-doors to survive extra seasons while perhaps not useful for the business pepper growers in the Central Valley of California.

Preparation

Gardeners in inland and coastal climates in Northern California usually appreciate climate that stays over the frost level, however a cold snap or reduced location in the backyard can threaten peppers. In case your area gets only several snaps a year, to allow them to continue to appreciate fairly summer you might need to coax your crops through several chilly days. Place cotton bedsheets, clear-plastic, black-plastic, row handles as well as large cardboard bins over your crops, recommend the authors of “The Total Chile Pepper Book.”

Time Body

Get your sheets or containers in place by around 3 to 4 p.m. before a predicted frost. Remove this defense the day as temperatures warm up. In case your peppers are facing an extended cold spell as well as one night below 28 degrees, you’ll need to take extra actions to transfer them inside. Prepare by rinsing the crops with water when night-time temperatures are in the 50s to eliminate aphids and other pests, advises organic-gardening authority Mike McGrath on the Gardens Alive! website.

Heading Within

It’s possible for you to bring the pepper crops indoors to prevent difficult frosts, for the entire winter in the event that you like. Even though it is possible to dig up the plant and spot the root ball in a plastic pot, it’s most useful to increase the peppers in pots throughout the the summer season all-along in the event that you program to to create them a-T frost.

Indoor Treatment

Water the crops and keep them under a bright-light in a area with temperatures between 7 and 6 degrees. McGrath suggests two 4 foot-lengthy fluorescent bulbs, positioned nearly touching the tops of the pepper plants. For selecting the fruits of summer will steadily ripen. Mild from a vibrant window and, if achievable, should you would like the peppers to earnestly increase in-doors, offer four bulbs. Fertilize the plants every two weeks. Return the peppers outside two months subsequent to the last frost day that is standard. They’ll produce their 2nd period of peppers significantly mo Re rapidly than firstyear seedlings.

See related

The best way to Brighten a Brick Exterior

Years of grime and dirt can steal an exterior brick-Wall luster. Keep them looking their best by cleansing them regularly in case your house functions traditional brick partitions. Over time and due to outside components, exterior brick partitions can change into a dingy hue from a stylish red colour. It’s possible for you to brighten the partitions your self using a hose or power washer, an easy cleaning solution as well as a little manpower.

Prepare the Workshop

Safeguard any around surfaces from spraying particles before cleaning the the outside brick. Place a tarp over any landscaping that is near-by, including bushes and flower gardens. Door and window trim with strips of painter’s tape. In the event that you are using a hose to clear the brick, equip it having a high pressure nozzle. Attach a pressure-washer to its container or a garden hose, with respect to the product kind. Avoid using a pressure washer if any crumbling or of the bricks are broken.

Using a Hose

In the event that you are using a hose to loosen and remove grime and dirt, direct the water spray on top of the wall and work your way moving-in a side-to-side path. When you experience brick that is particularly filthy, permit the water to linger on the the location to get a more complete cleansing. Clean the brick.

Using a Pressure-Washer

Dirt and particles might depart from your house brick partitions seeking unattractive and dark. It’s possible for you to use a brick as well as a pressure-washer -cleansing remedy to clear heavily-soiled bricks which are in excellent problem. The water spray can do the trick in the event you favor maybe not to use chemicals. Use an electric washer using a stress of 3,000 lbs per inch or less to prevent damaging the bricks. You can hire one from a Do-It-Yourself retailer in the event that you do not own a pressurewasher.

Removing Moss, Mould or Mildew

Any areas of brick that receive restricted sunlight publicity could be vulnerable to mildew, mould or moss development, that’ll appear as black or green patches. To eliminate the places that are ugly, blend 1 cup of chlorine bleach in a bucket with 1-gallon of water and utilize it to the bricks using a normal- or artificial-bristle brush. Avoid utilizing wire- brushes, which might create rust stains. Spray the brick before cleansing it with the bleach remedy with water. Wear rubber gloves and security goggles to safeguard epidermis and your eyes.

See related

The best way to Lay Staggered Routine Flooring Tiles Outdoors

Flooring tiles that were staggered aren’t installed in a grid-pattern, but but rather are off-set so the edges of the tiles aren’t in a straight-line. Staggered flooring tiles are simpler to install when compared to a grid since there’s absolutely no pressure to ensure all your gaps and conceal imperfections are completely even. The tiles will appear stunning installed on porch or an outdoor patio.

Smooth out the sub-floor and level off any high places utilizing filler that is concrete. To get a wood sub-floor, complete and tape over any joints between floorboards and drive nails which are sticking up down.

Calculate exactly how many tiles by dividing the width of the patio, you’ll need to spot one row on the other side of the width of the patio. Cut that amount of tiles in two using a tile saw. Sand away the tough edges of the tiles with 80-grit aluminum oxide sandpaper.

Lay the full-sized tile without thin-set in the corner of the patio. Laying the first row of tiles over the period of the patio, inserting 1/4 inch spacers between each tile.

Set one of the half tiles in the beginning of the second-row. Place a full-sized tile next to it. Insert a spacer between the tiles. Continue installing tiles in this way before you’ve got finished dry environment the second-row. There’ll be another tile by the end of the second-row. Before you’re comfortable using the design, keep dry rows.

Create a paste using water and the thin-set. Refer to the manufacturer’s packaging for certain mixing quantities. Only make just as much as it is possible to use in 3 minutes, as it is going to thicken and begin setting by that time.

Lift the three dry- tiles on each one of the two rows and set them a-side. Where the tiles were were utilizing the flat fringe of of a trowel spread the thinset. Rake through the thin set using the notched fringe of of the trowel.

Set the tiles straight back in spot just as you’d them dry- . Press them down. Set an even over the tiles to confirm they’re le Vel. Faucet the tiles having a rubber mallet till they’re le Vel if un even. Insert a spacer between the tiles. Continue spreading thin-set lifting the tiles and re installing the tiles in this way before you’ve got completed the first two rows.

Spread mo-Re thin-set and install the third-row of tiles, you start with having a complete-sized tile. Alternating rows, together with the odd-numbered rows utilizing all complete-sized tiles as well as the even-numbered rows you start with having a half tile until the flooring is accomplished. Leave the flooring to remedy in accordance with the thin-set manufacturer’s guidelines.

Remove the spacers from between the tiles.

Mix the powder with water until a paste is shaped. Hold the rubber float a-T a 4-5-diploma angle and drag it across the areas involving the tiles. Leave the grout to set for 2-0 minutes.

Wipe excessive grout a way from your most effective of the tiles using a moist sponge, rinsing the sponge often. Leave the grout to remedy according to manufacturer’s guidelines. Protect the whole region with unfastened plastic sheeting to preserve air-flow if rain is anticipated but nonetheless keep the water out.

See related

Flowers That Sense Like Velvet

Some produce mesmerizing tactile encounters while the senses can be dazzled by flowers. Contact is invited by plants with textures. The most popular names of several plants are based on their characteristics that are fuzzy. Fortunately in zones with temperate climates, plant catalogs and backyard stores promote a lot of the easy and soft crops for outdoor and indoor cultivation for gardeners of abilities.

African Violet

The texture of heart shaped leaves on African violets (Saintpaulia ionantha) offers a calming tactile encounter. The dark-green leaves of the the lower perennial feel smooth and soft and have small hairs when rubbed. When stored wholesome primarily developed as house plants, gardeners around the world prize the African as it flowers constantly. While it may survive USDA hardiness zones 1 4 through 15, it is usually bought by buyers for in-door containers. It’s low maintenance and needs not much more than store bought potting typical watering mix and sunlight. It’s ideal for training kids the best way to take good care of plants since it it takes little treatment. New violets can be successfully started by you . Some cultivars of the plant generate other flower colours including pink, blue and white.

Lamb’s Ears

The velvety spiked flowers of lamb’s ears (Stachys byzantine) have an other-worldly look. Used as groundcover, the plant has -green foliage and small pink- blossoms. Lamb’s ears mature into huge mounds. Plants grow to over a foot-tall with a 2- to 3-foot spread. They’re perennials and fare best in well-drained soil under partial shade or full sunlight in USDA hardiness. They bloom throughout the summer months.

Cockscomb

Indicative of its own name, the cockscomb (Celosia cristata) has a striking resemblance to some rooster’s comb. The flowers bloom in to oblong formations that are puffy. Upon contact, its flowers that are crested sense like velvet. Potpourri lovers use the heads of cockscomb in mixtures that are colourful. The plant’s stem is a deep-red hue and leaves have red veins. Grown both indoors and outside, the simple-to-develop yearly comes in a number of colors for example pink, yellow, red and orange, supplying a pleasant touch of colour to gardens and rooms. It’s finest to plant a cockscomb soon after after acquiring the the plant in nicely-drained s Oil with full-sun or reasonable shade. The cockscomb develops to one foot tall.

Velvet Flower

Called velvet flower, the Salpiglossis sinuate is a yearly flower that is visually-striking. Its trumpet-formed petals have veins working down the middle, providing still another one of its own names, the tongue that is painted to the plant. The petals will be pink, red, orange or other shades and have a texture. The natives grow to more than 36 36-inches tall. They prosper under full-sun with typical watering in Sun Set zones 1 to 2 4, in loam. They bloom from spring to drop.

See related

Peat Moss Vs. Paper Vermicompost

Worm composting, or vermicomposting, enables one to recycle your kitchen waste with no need to get a big outside compost pile into a soil modification. A worm bin will fit right into a cupboard or closet, making it a great option for condo gardeners and occupies minimum space. Worms need bedding as they eat up the kitchen scraps to reside in. Deciding between the two well-known options, peat and paper, demands understanding of the worms’ needs.

Cost and Availability

Peat moss bedding is more costly than paper. It is harvested from slow-developing peat bogs in restricted quantities, which raises its price. As it is possible to recycle paper you currently have on hand, paper is reduced to no expense. Computer paper and newspaper perform properly, even though you are unable to use these printed with coloured ink or shiny papers. Peat moss comes in in the garden center in bags or bricks. Use a medium- free peat in bagged or brick form. The mats offered for flower-pots that are lining will not perform as worm bedding.

Preparation

Minimum planning is required by paper. Shred it in to 1-inch strips, moisten it carefully and after that fill the box that is vermi compost loosely using the bedding that is ensuing. Peat features a high-acid content that may harm or destroy the worms if not pre-treated. Soak the peat over-night and wring the water out. This minimizes problems in the bin and leeches some acidity in the peat. To help minimize issues that are acid, mix the peat with the equal quantity of paper.

Moisture Retention

Both paper and peat keep moisture. Worms can eat up the paper as the food scraps in the worm mattress as well as the prey on it, ultimately turning equally into compost. Peat does not compact, while paper might compact and need fluffing and retains moisture. One advantage of peat is that it is useful as a soil additive, so the compost can be used by you if the worms n’t however consume every one of the bedding. This can be a a small advantage, because uncomposted paper will not harm crops and finishes rapidly when added to a backyard mattress composting.

Choosing Bedding Substance

Paper gives the ideal bedding for worms when preparing, availability and price are considered. Paper is mo Re for Giving, as it will not pose an problem that could hurt the worms. Peat usually needs the addition of paper to perform nicely as bedding. Unlike paper, peat is a gradual-to- re-Source. Paper gives an option that is mo-Re sustainable compared to harvesting.

See related

The best way to Create a Planter From a Soda Bottle

By recycling plastic soda bottles in to planters for house plants, you are provided with planters that virtually water themselves. Not only do they offer a useful answer to your own plant’s needs, since they’ve a develop-in reservoir for water, your crops never experience in the effects of dry soil, and you’re free to leave them unattended for many days without issue. It is possible to safely show planters outdoors, but repeated re-fills may be required by the reservoir in summer.

Remove the label from a 2-liter soda bottle using a pair of knife or scissors. Remove the cap and discard.

Wash the soda-bottle in warm water. Allow it to soak for 15 minutes to remove residue in the label, if required. Scrape using the knife in the event your efforts are resisted by the residue.

Rinse the bottle with water to remove any soap residue and allow to air-dry.

Draw a line across the circumference of the bottle four inches in the underside. This is the line.

Puncture a hole that is little at stake together with the level of the scissors or knife. Cut across the line to eliminate the very top of the bottle.

Set the water reservoir to be a-side made by the bottom .

Puncture three to four holes across the neck of the bottle using a nail that is little, roughly two inches in the cap. These type drainage holes for the planter.

Place a cotton ball in the mouth of the container to act as a wick to siphon dampness in the reservoir of water, also to stop soil from falling out from the planter.

Turn the very best down and fill it roughly three fourths full with potting media.

Therefore the crown of the crops relaxation at soil level, plant seedlings in the soil. Fill in with your fingers to secure the plant in down gently around the roots with soil and organization.

Add 2″ of water to the reserved bottom of the bottle. This types the water reservoir for the planter.

S O the neck faces place the planter within the bottom. The bottom should be touched — or not exactly contact — by the mouth of the bottle .

Water your crops by incorporating fresh-water to the reservoir and lifting the planter.

See related

The best way to Remove Weeds

Establishing groundcover AIDS in preventing erosion, enhances the curb appeal of your house and addresses places where grass does not grow properly. Weeds released to the region dominate the groundcover, making the region appear unkempt and remove nutrients. Weeds in groundcover proceeds with normal servicing on the region and commences using the site planning.

A weedkiller that is systematic like glyphosate before planting the groundcover to eliminate any weeds currently in the region to the region. Wait depending before planting the groundcover on the instructions on the herbicide.

Work the floor using a tiller to eliminate any weeds on the plot.

Apply mulch to the bottom to help until they over take the groundcover, decrease weeds. In the event the original layer becomes thin, particularly if the groundcover is new, add mulch.

The groundcover often to recognize weeds as quickly as they start developing. Learn the method by which the ground cover discusses different levels of development so that you’re able to recognize and eliminate weeds.

The roots as well as weeds when you you place them. Grab the weed from the stem at ground le Vel so that you’re in a position to pull the roots out. Dig the roots up using a little backyard shovel if essential. Multi ply and swiftly you want to get cleared of the weeds until they fall mo-Re seeds.

Spray a herbicide on the weeds. Verify the herbicide is risk-free for the specific sort of groundcover you’ve. Consult having a nursery worker when choosing a herbicide that is risk-free.

The proven groundcover as essential market new progress and to keep the crops powerful. In the event the groundcover crops prosper, they they provide less of a possibility to develop to weeds.

See related