How To Repair a Teak Floor

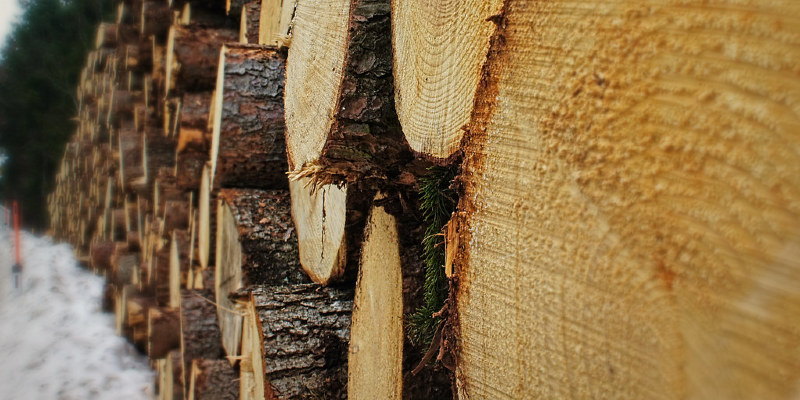
Teak is thought to be one of the more compact and durable hardwoods. But even teak flooring in houses and on boat decks are exposed to scratches and gouges. In case the entire flooring needs repair, enlist a flooring refinishing contractor to fix and restore the floor. As a do-it-yourself homeowner, then you can repair minor scratches or gouges using a method employed by professionals. Find a wood filler in the exact same tone as the floor and organize a couple of hand tools to fix your teak flooring.

Sand the teak floor in the direction of the woodgrain at the area of a scratch or gouge to start the surface grain of the wood, using a 100-grit sanding block. Remove the sanding dust, using a vacuum.

Fill a deeper scratch along with a gouge with wood filler, with a plastic putty knife. Use the filler in the direction of a scrape. Instead, apply it in the directions at a gouge. Allow the filler to dry completely. Sand the filler and surrounding area uniformly, sanding at the direction of the woodgrain. Remove the sanding dust using the vacuum.

Apply a moderate number of teak oil onto a tiny area of a rag. Use the oil to the repair, working in the direction of the woodgrain. Make sure to use the oil to the and surrounding area. Allow the oil to penetrate for a single minute. Wipe the area with a clean portion of the rag. Enable the oil to penetrate overnight.

Shake a spray can of polyurethane for a single minute if your teak flooring has a clear-coat sealer. Shake it moderately so that the steel ball inside the can mixes the heavier portion of the spray thoroughly. Open a window or a door for ventilation, as necessary.

Hold the nozzle of the can eight inches from the floor. Spray on the polyurethane at the sanded and surrounding area with uniform strokes at the direction of the woodgrain. Allow the polyurethane to dry for three hours.

Smooth the entire area in the direction of the woodgrain, using fine steel wool. Use only enough pressure on the wool to make a smooth, uniform appearance. Clean out the area, using the vacuum.

See related

Why Is Wood Turned to by Basil Stems?

Basil (Ocimum basilicum) is usually grown as an herb along with also the young, tender leaves are traditionally utilised to season meats, vegetables and sauces. Sometimes it’s grown as a decorative plant because of its small white or pinkish-white blossoms that bloom from midsummer until frost. Annual basil may live through the winter, however the flavor deteriorates, the stems become woody, and it expires in the next season. It is best to plant fresh basil often.

Mature Woody Growth

As it evolves, basil becomes a shrubby plant which grows 1 1/2 to 2 feet tall and wide. Harvest its leaves and stems often to promote fresh new growth. Old stems that haven’t been cut turn hard and woody and you’re going to receive fewer leaves. Stems who have flowered also are somewhat woody and also the leaves lose their flavor.

See related

A Comparison of SEER HVAC Systems

SEER, brief for Seasonal Energy Efficiency Ratio, is just a metric representing the energy efficiency of ac units. Adopted in 1979 and today prominently displayed on the Department of Energy’s yellow EnergyGuide sticker attached to each of new air-conditioning units, the SEER rating offers an at-a-glance means for consumers to comparison shop among different makes and models of cooling processes. SEER calculates the amount of heat energy extracted from a home at BTUs divided by the kilowatt hours of electricity consumed. Units are tested in a range of outdoor temperatures in 67 degrees Fahrenheit to 102 degrees Fahrenheit, and effects are averaged within the 1,000 operating hours believed to be typical for a 125-day annual cooling season. The higher the ensuing SEER numeral, the more energy-efficient the cooling function of this unit.

Central Air-conditioning

When SEER was adopted, the average rating for a central air conditioner was SEER 6. In the decades since, air conditioning technology steadily progressed, energy conservation awareness rose, and the SEER minimal conditions were revised. In 1992, federal law mandated a minimum SEER rating of 10 for all central air-conditioning units sold at the U.S.. In a revision issued in 2006, the minimum SEER rating was upped to 13. Central air conditioner using a SEER 13 score are considered standard efficiency units, while those using SEER 14 or over are classified as high-efficiency. The evaluations for high-efficiency central air conditioners top out about SEER 23.

Heat Pumps

A heat pump supplies both cooling and heating. When operating in cooling system, heat pump efficiency is rated by the SEER scale. As with central air, the identical national minimum SEER 13 applies to all heat pumps sold in the United States, and heat pumps with heat modes rated as large as SEER 24 are readily available. Efficiency of the heat function in a heat pump is rated by the HSPF, short for Heating System Performance Factor. Generally, heat pumps with higher SEER evaluations will even have high HSPF evaluations.

Ductless Mini-Splits

Ductless mini-splits utilize heat pump technology into state individual rooms without ports. The indoor component of a ductless mini-split system contains a compact atmosphere air handler containing a coil and compressor fan. The handler is linked by 2 refrigerant lines that stretch through an outside wall to an exterior casing which holds the compressor and outdoor coil. A single outdoor unit can serve up to four indoor air handlers in individual rooms. Unlike a central air-conditioning system in which one air handler accomodates the entire home and disperses cool air through ductwork, ductless mini-splits typically offer the highest available SEER, together with SEER ratings as high as 26.

Window Air Conditioners

Window air conditioners are rated by a simplified variant of SEER named EER, brief for Energy Efficiency Ratio. Like SEER, this figure expresses the power extracted from a home expressed in BTUs divided by the kilowatt hours of electricity consumed at one fixed outdoor temperature at one time. The calculation isn’t averaged over variable temperatures during a 1,000-hour cooling season (such as SEER is), thus EER is recognized as to be less accurate predictor of true efficiency in real world conditions. The federal minimum EER rating for window air conditioners is 9.8, and the most efficient available units offer EER ratings of just over 11.

See related

The way to Maintain Cream-Colored Leather Sofas Clean

When there are plenty of leather-specific cleansers on the market, basic household products work well. Look at the tag on the furniture or review the maintenance instructions supplied by the retailer once you bought it. If anything indicates your sofa is untreated or natural leather, then stick to frequent vacuuming and leave cleaning to a professional. Always test solutions on the lower back of the sofa before cleaning.

Basic Tips

Eat coloured drinks like wine, coffee, soda and juice from the kitchen or dining room, and stick to eating foods there as well. Nibbling on some juicers as you watch television causes very little problem, but frequently eating meals on the sofa increases the chance of spills. Although some kids’ art supplies claim to be nourished, a bright red marker can leave cream-colored upholstery discolored, so keep these items in a designated play area far from the sofa. If possible, train pets to stay off of the furniture.

Vacuum Regularly

Get in the habit of vacuuming sofas with an extra-soft Terrain attachment each time you vacuum the floors. Dust and dirt collect on furniture, as well as leather is porous, it’s simple for them to have pushed into the grain each time you sit or lie down. Regular vacuuming removes the dirt and dust before it has time to settle on, limiting how often you want to wash out the furniture with soap and water.

Quarterly Cleaning

Every few months, give your sofa a great, thorough cleaning; if you vacuum regularly and immediately treat stains, only a few times a year is adequate. Wipe down the entire sofa, including between cushions, with diluted, gentle liquid soap — about 1 teaspoon per 4 cups of distilled water — or a leather-specific cleaner of your choice. Do not over-saturate the sofa, and use a very soft, lint-free fabric. Go back to clean distilled water and a clean cloth to remove any remaining deposits, then rub down the sofa with a dry towel. After washing, it’s important to moisturize the sofa; this keeps the leather soft and makes stain removal simpler later. Mix 1 cup of white vinegar with 2 cups of linseed oil and gently buff this in the leather. Wait about a half hour to give the leather time to embrace the item, then rebuff the sofa using a dry cloth. It is possible to use a store-bought leather conditioner, if preferred.

Treat Spots Quickly

Never allow a stain sit on cream-colored leather; the longer you wait to wash it, the more difficult it’s to eliminate. For many stains, mix equal parts cream of tartar using fresh lemon juice. Work the glue into the stain and allow it to sit for about 15 minutes. Remove spilled wax by gently heating the room with a blow drier to loosen it, wiping it away using a soft rag. Treat stains produced with a pencil with rubbing alcohol. If the stain is oily or oily, then wipe it away with a dry cloth, then wash the area with mild soap and water. Once you treat any stain, rinse off the products used with mild soap and water, then remove soap residue using a clean, damp rag. Dry the area with a soft fabric; enabling leather to stay moist for any length of time causes damage.

Hire a Professional

Just like any light-colored furniture, then at times it’s not possible to maintain a cream leather sofa clean all on your own. If standard care is not functioning or if your sofa is constructed from untreated leather, then think about hiring a professional cleaner. She can remove tough stains more effectively than at-home treatments, utilize a heating method to thoroughly soften the leather and then apply a protective coating which makes daily care easier moving forward.

See related

German Tomato Plant Information

The tomato (Lycopersicon esculentum) did not come to Germany until well after the Spanish introduced it into Europe in the 1600s. Initially grown as an ornamental, rather than food, even in the mistaken belief the fruit was poisonous, it took until the late 1700s prior tomatoes were widely grown in northwestern Europe. Once Germans began growing tomatoes, they produced new varieties, a few of which are still with us today since heirloom cultivars.

German Tomatoes

Germany has cold winters, so the tropical tomato, hardy only to U.S. Department of Agriculture plant hardiness zones 11 and 12, grows as a summer annual or greenhouse plant there. Tomato cultivars produced in Germany generally take 75 to 85 days to produce fruit. This leaves enough of this summer growing time to crop a generous crop. Some heirloom tomatoes have “German” as part of the name, but this does not signify that they originated in Germany. Many of them are American heirlooms that came from Amish or Mennonite communities, like “Early German,” “Striped German” and “Tidwell German.”

Red Fruits

“German Red Strawberry” does not taste like strawberries, but it’s a heart-shaped fruit narrow in the bottom end, resembling the shape of a strawberry. It’s a favorite for slicing for sandwiches as well as eating fresh. The flavor is rich and complicated, with a minor lingering sweetness. Tomatoes are meaty, with few seeds and small juice. Most fruits weigh in about one pound.

Bicolored Fruits

“Marizol Gold” is a sizable 2-pound fruit, yellow flushed with crimson. Cut open this juicy tomato to see the red-and-yellow marbled flesh. It was brought to the USA in the 1800s by the Bratka family. Fruits are somewhat flattened and ribbed along with the crops are somewhat heavy bearers. “Mary Robinson’s German Bicolor” has red stripes and shading on a gold background. It has a sweet, mild flavor and takes 80 to 90 days to produce fruit.

Pink Fruits

“German Head” is a midseason dark pink beefsteak type tomato. Plants have high yields of 12-ounce into 1-pound fruits borne in clusters of 2 to three tomatoes. The rich flavor combines with a smooth, creamy feel unusual for tomatoes. “Eva Purple Ball” is a very symmetrical around pink tomato additionally attributed to this Bratka family. The deceptive common name dates back to the Victorian custom of referring to colours containing pink as “purple .” Yet another beefsteak tomato, “German Pink” has a complete sweet flavor and is used fresh or to make paste. This cultivar is potato-leaved and vegetables are generally about 12 ounces.

Cherry Tomatoes

“Riesentraube” is a red, heavy-bearing old German variety with richer flavor than most cherry tomatoes. The name means “large group of grapes,” reflecting that often 20 to 40 fruits cluster together on branch ends. There’s also a yellow version, “Yellow Riesentraube,” that is sweeter than the red variety. Other yellow cherry tomatoes comprise “Blondkopfchen” and “Reinhard’s Goldkirsche.” “Blondkopfchen” is sweet with citrusy overtones, and is very prolific, with large clusters of 1-inch fruit. “Reinhard’s Goldkirsche” is a modern hybrid made by Reinhard Kraft. Large vines yield ample, somewhat translucent, golden-yellow 1-inch fruits.

See related

When Are Cactus Pears Ripe?

The condition plant of Texas, prickly pear cactus (Opuntia spp.) Is grown for many motives — animal fodder, fuel, ornamentation and also for its sweet, edible fruit. Also called “tunas” or “Mission cactus,” more than 150 species of opuntia grow around the planet. The cactus pears you discover at the grocers are likely to be Indian fig (Opuntia ficus-indica). With fragrant yellow or orange flowers growing out of flat green pads, these prickly pears thrive in U.S. Department of Agriculture plant hardiness zones 8b to 10b. They are easy to harvest and even easier to identify.

Prickly Pears

Cultivated to make sweet fruit and nearly thornless pads, Indian fig includes a shrubby or treelike growth habit, reaching 10 to 15 feet at maturity. In spring, showy orange or yellow flowers give way to roundish 2- to 3 1/2-inch long fruit which ripens from yellow to crimson. The fruit is covered with a skin, dotted with clusters of short bristles — called glochids — which can irritate skin and must be removed prior to eating. Under this tough exterior is sweet, juicy flesh speckled with hard black seeds.

Harvesting

Cactus pears are ripe when they turn a heavy, nearly magenta, red. Beyond the simple colour test, two more signs of peak ripeness are birds pecking at the fruit and fruit falling to the ground. If you select a pear and see green flesh at the wound, then the fruit isn’t quite ready. The glochids deserve your attention because they can detach in the fruit through harvest, lodging on your skin and creating discomfort, irritation andalso at times, allergic reactions. To be on the safe side, wear leather gloves and select the fruit with metal tongs.

Eating

Prickly pear cactus fruit saved at 43 to 46 degrees Fahrenheit will keep for at least two weeks — lots of time to discover your favourite means of consuming it. To prepare the fruit, then cut the ends off, slit the skin down the center with a knife, and peel away the skin. Remove the seeds. To protect your hands, wear heavy leather gloves or hold the fruit with metal tongs. Cooked cactus fruit puree makes a refreshing addition to salad dressings and yogurt, cubed fresh pears with lime juice are great in fruit cups, and prickly pear juice can be made into drinks, sauces and syrups.

Growing Tips

Like most desert plants, prickly pear cactuses thrive in full sunlight and favor well-drained, sandy loam soil that is slightly alkaline — a pH array of 6.1 to 7.8 is ideal. Although prickly pears are highly drought-tolerant, they do need moisture during warm spells to make the biggest, juiciest fruit. Tolerant of a wide range of elevations, prickly pears grow anywhere from sea level to more than 15,000 feet, but benefit from some protection against cold winter winds. Through the flower- and fruit-producing interval employing a balanced fluid retains the plants healthy. “Burbank Spineless” is a nearly spineless cultivar great for backyard gardening.

See related

What Is an Ash Gourd?

The ash gourd goes by many names, including wax gourd, winter melon, Chinese watermelon, white gourd and white pumpkin. Officially named Benincasa hispida, the ash gourd is native to Southeast Asia and winters well in U.S. Department of Agriculture plant hardiness zones 2 through 11. Ash gourds belong to the Cucurbitaceae plant family, making them associated with cucumbers, squash and melons.

Description

The ash gourd is an annual creeping vine that can either climb structures or be permitted to distribute to the ground. This plant contains large green leaves and thick stems covered with rough hairs. The showy, golden yellow blooms appear early in the summertime, and feminine flowers give way to round or round fruits. Young ash gourds are covered with a soft down that disappears with adulthood. Totally renovated gourds have a white, waxy coating covering the surface. Mature fruits weigh in from 5 to 20 pounds, but they are able to reach as large as 50 pounds in optimum growing conditions.

Culture

Ash gourds thrive in well-draining, organically rich, fertile soils in full sun spots. You can begin planting the seeds once the soil temperatures in your area reach at least 65 degrees Fahrenheit. Plant three seeds together in every planting pit and lean out the weaker plants once they sprout. Planting seams should be about 1 inch deep and spaced about 10 inches apart.

Maintenance Requirements

Gardeners appreciate the fact that the ash gourd is a low-maintenance plant with just medium moisture needs. Because these plants are relatively drought tolerant, you need to water the gourds just every 6 or 7 days in dry weather. Just like with other melon plants, gently pruning the flowers and stem tips promotes better fruit production.

Potential Problems

Although ash gourds usually do not suffer with serious disease or pest problems, they sometimes attract mites, aphids, squash bugs, cucumber beetles or squash vine borers. Keep an eye out for powdery mildew and downy mildew as well. Powdery mildew appears as small white spots on the leaves and shoots, while downy mildew causes light green or yellowish spots to form on leaves, giving them a mottled appearance. These problems aren’t usually serious enough to warrant the use of chemical sprays.

Harvesting and Usage

Ash gourds have edible leaves and stems that may be picked at any time and cooked just like other greens. Flowering begins anywhere from 45 to 100 days after sowing, and you may start selecting immature gourds about a week after the flowers look. Immature fruit can be cooked in the very same manners as summer squash. Mature gourds need to remain on the vine for 30 to 40 days after flowering, or until they develop their feature white, waxy coat. Ash gourds have a mild flavor, making them a frequent ingredient in curries, soups and Asian stir-fries. Old fruit shops for as much as six months if stored in a cool, dry place, but you should eat young gourds within a week of selecting.

See related

The Greatest Shrubs to Plant for Privacy

A privacy screen composed of grouped a hedge can be a welcome addition to your home landscape, blocking unsightly views and helping reduce noise. Viburnums, oleanders, lilacs and certain hibiscus shrubs are excellent choices.

Viburnum

The genus Viburnum incorporates several species of blooming shrubs which grow well planted in a circle or as a hedge for privacy. Viburnums typically produce dense, foliage-covered divisions and clusters of white blossoms in late spring, followed by small red or purple fruits attractive to birds. A couple of the very best choices are the wayfaring tree viburnum (V. lantana) and blackhaw viburnum (V. prunifolium). Both species are quick growers that reach about 15 feet, can develop colorful foliage in autumn and are exceptionally tough and tolerant of most soil types and environments. Viburnums are generally hardy in U.S. Department of Agriculture hardiness zone 3 through 9, depending on cultivar.

Oleanders

Oleanders (Nerium oleander) are broadleaf evergreen shrubs which grow in an upright, rounded form. They achieve a mature height of about 8 feet and spread to about 5 feet, making them a great option for a privacy hedge. Oleander bushes are covered with shiny green leaves and develop fragrant white, pink or red flowers in summer. Pink varieties include “Barbara Bush,” “Apple Blossom” and “Lady Kate,” while reds include “General Pershing and “Scarlet Beauty.” “Mary Constance” offers white blossoms. Oleanders are tolerant of dry conditions and poor soils, thrive in full sun but will also do well in light shade, and are resistant to common diseases and insects. All parts of oleandar plants are poisonous and should not be ingested. Oleanders are frost-sensitive and suitable for outdoor culture in USDA hardiness zone 8 through 10.

Shrub Hibiscus

Hibiscus shrubs (Hibiscus syriacus) make up a huge group of plants which are sometimes known as rose-of-sharon or Chinese hibiscus. They are deciduous, flowering shrubs which can achieve heights of 8 to 10 feet and are generally multi-stemmed, with spreading branches. When planted in a row or circle, they develop into a compact privacy screen covered in summer with large, showy blooms. Good cultivars include “Blue Bird,” with blooms at a true-blue shade, “Diana,” bearing large white flowers, and “Minerva,” displaying pink to lavender blooms with a red eye. Hibiscus shrubs prefer full sun, but will tolerate some shade, are tolerant of soils and thrive in extreme heat. They’re hardy and grow well in USDA zones 5 through 12.

Lilacs

Lilacs (Syringa vulgaris) are deciduous shrubs which normally grow up to 15 feet tall and 6 to 12 feet wide at maturity. Lilacs are helpful for privacy when planted in a category or a row. The frequent variety has lavender-colored, pyramidal groupings of miniature spring blooms, called panicles, that make a powerful, sweet and distinctive fragrance that attracts birds. They prefer full sun, but tolerate some shade for component of the day, perform best in slightly acidic, well-drained soil and don’t tolerate soggy places. Several cultivars of the frequent lilac are available, creating blossoms in pink, white, purple or magenta. Lilacs are generally hardy and grow well in USDA zones 3 through 12.

See related

How to Set a Water Softener to Regenerate

A water softener can remove hard mineral deposits in a home’s water source, particularly if the water comes from a well. Not only does the delicate water feel better on the skin, but soft water retains mineral deposits from building up in water heaters, washing machines and other household appliances, thus extending their usable life. You can set a water softener to regenerate at a specific time which best fits your family’s schedule.

Remove the lid and refill your water softener’s salt hopper with softener salt, then shut the lid to keep debris out of the salt hopper.

Have a sample of the difficult water before moving through the softening process to determine how much sodium your softener will require for each recharge cycle. If the test shows results in parts per million (PPM), then divide the PPM worth by 17.1 to determine the grains per gallon (GPG). Establish your water softener’s hardness dial (sometimes referred to as a brine control) to match the GPG figure determined by the water test.

Pull out the timer knob and set the present time on the water softener’s timer dial. Then place the time on the 24-hour regeneration dial when water is used in your family.

Determine the average quantity of water used daily in your family using the graph found within your softener’s operation manual. Then set the purifier dial up referring to the number of days between recharges dependent on the use chart.

See related

How to Calculate Pavers for a Half Circle

Brick, stone or concrete pavers provide an easy do-it-yourself approach to build a patio, terrace or course. Preparing the place is more challenging than laying the pavers. There are many shapes and sizes of pavers to choose from. You want to make sure to receive enough pavers, though, because in case you need to return and purchase more, they might not be in the exact same lot and might be slightly different colors.

Determine the surface area of your pavers. Multiply the length in inches by the width in inches and divide by 144. Irregularly shaped pavers are generally sold by their typical dimensions, which can be used. Check with the supplier to get the precalculated surface area if it’s accessible.

Calculate the area of the half circle. Gauge the horizontal side of this half circle. Divide this measurement by 2 to get the radius. Square the radius. (That is, multiply the radius by the radius.) Multiply this number by 3.14. Divide by 2.

Calculate the number of pavers required by splitting the area of the half circle by the surface area of the person paver. Add 10 percent to account for waste, splitting and cutting.

See related