How to Landscape Close Sewage Pipes

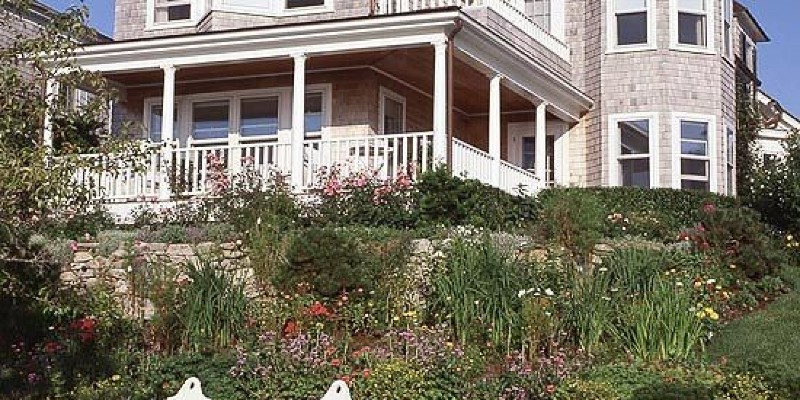
The last thing anyone wants in their front yard is a little pond of sewage, that is why it is a fantastic idea to decide in advance what types of plants work best about sewage and water pipes whenever you’re planning your landscaping. This helps prevent roots from growing toward and wrapping about pipes, or in some cases trying to develop into the pipes for the water.

Contact the appropriate utility company to locate your sewage pipes in addition to other hidden obstacles such as cable and gas lines. They will mark the places. Avoid digging in areas where wires are marked and dig just shallow holes above pipes.

Decide where to locate natural areas. Generally it is better to have mostly grass over sewage pipes, but because the pipes do operate in the home, that is not possible in all cases. Use spray paint to outline natural areas and step back to look at the plan and make adjustments.

Select flowers, ornamental grasses and low shrubs to plant near sewage pipes. Avoid planting fast trees, which have deep roots and are more likely to cause damage such as roots tangling around the pipes. If you have to have trees, then select slow-growing ones such as a saucer magnolia (Magnolia x soulangiana).

Stagger the plants for a more natural look, setting flowers and tiny plants in between little shrubs, or even zigzagging vegetation in order that it is not in a direct line.

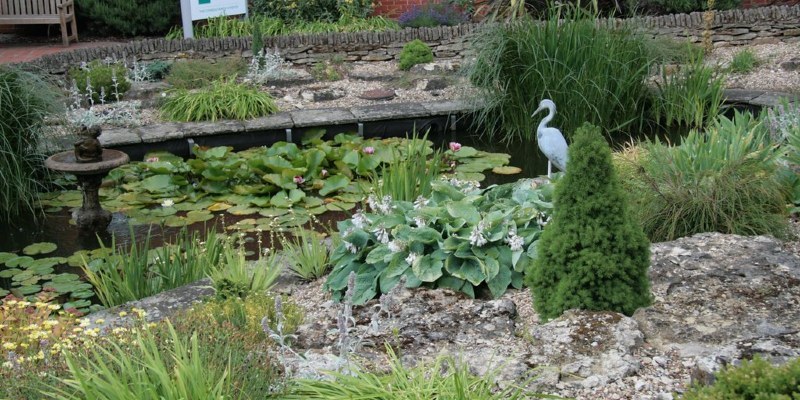
Use rocks and other ornaments such as bird feeders or glass globes to fill in organic areas. These constructions will not result in any harm to the sewage pipes and include a bit of attention to the overall look. When installing bird feeders or other things on a article, locate the post many feet in the sewage pipes, so the digging does not disturb them.

See related

How Much Water Do Survive Oaks Drink?

The native live oaks of California’s coast and interior grow tall and broad, not just in the country’s oak forests, but in many urban parks and suburban yards. It is likely to eliminate these live oaks with kindness in a dry, warm Mediterranean climate, however. Take your advice from their natural habitat to determine how much water all these evergreen giants must drink.

Live Oaks and Water

Live oak trees are accustomed to sipping, not drinking, water — they’ve adapted to low to moderate rainfall in the warm, dry Mediterranean climate of California’s coastal ranges and valleys. These big, broad-crowned trees grow deep tap roots when young, but as they mature, their roots grow only under the soil’s surface, extending past the drip line of the crowns. Young trees may need irrigation once or twice monthly to become well recognized in dry years, but mature live oaks grow best in well-drained, moist soil. An excessive amount of moisture, whether from too much rain or well-intentioned irrigation, contributes to oak root rot. In addition, it can nourish Phytophthora ramorum, the fungus pathogen associated with Sudden Oak Death, which thrives in cool, foggy coastal weather. Nearby structure, compacted or clay soils and turfgrass lawns may also hurt the extensive root systems of live oaks.

Coast Live Oak

California, or shore, live oak (Quercus agrifolia var. agrifolia or Quercus agrifolia var. Oxyadenia) rises up to 100 feet tall in its native habitat, but in urban areas it rises 20 to 50 feet, frequently spreading as wide as it’s tall. Its brief trunk splits into several crooked divisions. Thick, glossy evergreen leaves keep water, which makes coastal live oaks moderate consumers of water, some of it provided by coastal fog. Provided your place receives 20 to 30 inches of annual precipitation, a coast live oak should not need extra water except in very long time. During droughts, moisten the top 8 to 10 inches of soil once a month with a drip hose.

Canyon Live Oak

Canyon live oak (Quercus chrysolepis) has gnarly limbs and compact size — the tree might grow as a tree no taller than 15 feet, a fantastic size for suburban lots and urban spaces. In its natural habitat as mountain ridges and in canyons along riparian borders, the tree might grow as tall as 60 feet. Its holly-like leaves are hairy when its own yellow acorns take two years to mature. Canyon live oaks need small water beyond that provided by winter rains and foggy days on the coast.

Interior Live Oak

Interior live oaks (Quercus wislizeni, Q. parvula, Q. shrevei) grow in shallow, dry soils and are low water-use trees, indigenous to interior regions with as little as 5 to 10 inches of precipitation per year. Such as the canyon live oak, interior live oaks grow in several varieties, some growing in 35 to 70 feet tall — and almost as wide — along with others growing just up to ten feet. Like other live oaks, they need well-drained soil for survival.

See related

How to Pave With Pebbles

Using seams, frequently referred to as gravel, may also be a cost-effective means of creating a walkway, driveway or pad. Most homeowners in decent physical health may complete this project on their own, but larger jobs will likely take more time and potentially help. Any specialized tools, like hand tampers, may often be rented from the regional hardware shop, and in most places, the lowest prices on both crushed stone to your base and larger pebbles for the top-most layers is just a nearby quarry as opposed to a house and garden facility.

Make an overview of the area you need to pave with line-marking spray paint. Measure the longest and widest points, and multiply these dimensions to ascertain the square footage of the area.

Eliminate the sod and dirt in the area, digging down 4 inches. Rake the trench smooth, and check various places to ensure the depth is even with a tape measure. Do a final raking and use a hand tamper to compact the soil, creating an even, sturdy base.

Contact your gravel company and request enough crushed stone to create a 2 1/2-inch-thick layer and enough pebbles to produce a 1 1/2-inch surface layer. Utilize the square footage you measured to estimate the quantity you’ll need. Have the stone delivered to your residence, dumping it (in two separate stacks) as close to the area you’re going to be working as possible to limit the amount of manual labor needed.

Put in a stone or brick border all the way round the outside of the area you’re paving. The stones have to stick up at least 1 inch beyond the proposed height of the path or pad. Use a mallet to press the border into the ground. If you are using a metal border, wait till after you install the crushed stone layer to install it.

Fill in the trench with the crushed stone, dumping a full wheelbarrow to the trench and smoothing it out with a rake before dropping more. Utilize a board and degree to check the path or area in various places, making adjustments with the rake as necessary, to make sure that there are no dips in the center of the area that could lead to water set. Compact the path or pad with the hand tamper.

Install metal edging along the outside of the course or pad you’re paving, cutting pieces to size with a hacksaw so that they readily fit together the form of the path or pad. Metal edging is usually set up by pushing it between the edge of the trench along with the fill stone, hammering it with a mallet to press it in the soil. Like the stone or brick, it needs to be at least 1 inch above surface flat to maintain the pebbles in place. If you’ve already installed a stone or brick border, you can skip this.

Cut a sheet of landscaping lining to match the walkway or pad, and lay it across the base of crushed stone, securing sheets with wood or metal stakes directly into the soil. This will prevent weeds or grass from growing up through the pebbles, saving you a reasonable amount of work in the future.

Fill in the path together with the seams of your choice, dumping a wheelbarrow’s worth into the trench and smoothing it out with a rake before adding more. Check that it is level at various points with a board and degree, then use a hand tamp to compact your path or pad once all the pebbles are set.

Maintain your pebble paving by pulling weeds once a month (some stray ones will likely break through the landscaping material) and raking the pebbles smooth.

See related

Price to Replace a Boiler Circulator Pump

A circulator pump moves hot water through the radiators to heat the rooms, back into the boiler to be reheated of the household, in the heating . A circulator is made up of an electric motor coupled to a water pump, with the motor switched on when the thermostat calls for heat and turned away again as soon as the heating requirement was satisfied. Circulator pumps continue for several years but eventually will wear out and require replacement.

Replacement Price

Estimated costs of replacing a boiler circulator pump vary based upon the model and make of pump that your system demands and the quantity of labor involved with the replacement. Replacing a circulator pump can cost as much as $750 as little as $400 or more for the parts and labor in the time of publication. Price of the circulator pump itself drops based on the version your machine requirements.

See related

How can I Clean Microfiber Couch Seat Covers?

If you’ve ever marveled at the ability of a gecko to walk on walls as a result of tiny sticky fibers in their feet, you’re close to appreciating and understanding the physics of microfibers — and also why your microfiber sofa seat covers need special care. Microfiber literally attracts dirt, but it does not make the cleaning scenario hopeless — far from it. If you wash frequently, you will not find your microfiber seat covers any more challenging to keep clean than the rest of your furniture.

It is Science

Microfiber is a synthetic material made from plastic, like polyester and cotton, which can be woven into grasses which are 100 times thinner than a human hair. Whenever these strands are woven into fabric, microscopic attractive forces called van der Waals forces — following Dutch chemist Johannes Diderik van der Waals — become significant. Each fiber makes a small — nearly negligible — attractive force, but also the sheer amount of these fibers magnifies this power dramatically, turning the fiber into a dirt magnet. This principle is supporting the potency of microfiber cleaning cloths, and it’s why geckos can walk on walls, the suction created by the densely packed, tiny fibers in their feet.

Regular Cleaning

Because they pull dust in the air, your microfiber sofa covers are sure to get dirty, even in the event that you don’t use them. Remove the dirt by vacuuming the cushions regularly. Put a brush attachment on the vacuum, and use a light touch when running it on the cushions. If you press too hard, you’ll probably press the dirt deeper into the fiber. Avoid attempting to brush dirt off microfiber — it’s somewhat like trying to rub glue; you’ll likely succeed only in spreading it about.

Read the Tag

Vacuuming will not take care of all of the dust, and a stain is bound to happen. It is important that you be aware of the ideal approach to handle ground-in dirt and stains. The safest way to clean most fabrics would be to work with a damp cloth, but that is not always true with microfiber. Read the label before using water or a knitted cleaner. Should you see “W” or “S-W” on the label, it’s safe to proceed. “S” means that you should use only solvents, like alcohol or dry cleaning fluid. “X” means that neither solvents nor water are safe — vacuum only.

Alcohol to the Rescue

You can use isopropyl alcohol to clean any microfiber cushion cover that does not have an “X” on its own label, and alcohol is the go-to cleaner for water and other types of stains. Spray the alcohol on the stain, using a spray bottle, and rub the spray with a white sponge; avert colored sponges, since the color might rub off. Give the fabric about 20 minutes to dry; subsequently brush up the flattened fibers with a white-bristle brush. If your cushion covers are water-safe, you can clean them in the washing machine with cold water on a delicate washing cycle. Hang them up to dry — don’t put them in the dryer.

See related

The way to eliminate Calcium Chloride Residue From Floors

Calcium chloride is a salt, like stone salt — or sodium chloride — and it can come into your home on your own shoes, through pores at a concrete pad or in hard water. The streaks look simple to remove, but they aren’t. Scrubbing them with water and soap may function, but it requires a massive amount of energy on your part. An effective way to handle these salt deposits is to neutralize them with acid.

Winter Water Streaks

Calcium chloride pellets melt snow and ice quickly than rock salt, plus they do not do as much damage to vegetation. Since they’re more capable of colder temperatures than rock salt, slush can collect on your own shoes also in very cold weather, and it’s simple to track calcium chloride-laden water to your home. When the water evaporates, the salt stays on the ground and leaves white stripes. Your garage or basement floor may also demonstrate these stripes when water seeps through from the ground underneath, plus they have a similarly high concentration of calcium chloride.

Dissolve Calcium Chloride With Acid

Salt deposits has a high pH, which makes it caustic, and calcium chloride particularly has a propensity for pulling water. Consequently, calcium chloride deposits can harm the ground finish, plus they make the ground slippery. A neutral or alkaline detergent cleaner will not have a lot of cleaning effect; you want a low-pH cleaner to neutralize the salt deposits. Vinegar, which contains acetic acid, is acidic enough for the majority of your floors. It requires a stronger vinegar solution to handle efflorescence on concrete basement and garage floors than to remove streaks from inside floors.

Cleaning Interior Floors

As it’s acidic, vinegar can also harm your floor finish, which means you should avoid applying it full-strength; rather, use a solution of about 5 or 4 oz in a gallon of warm water to wash inside, non-concrete floors. Mop this solution liberally on vinyl or tile floors; enable it to sit for a couple of minutes, and mop with clean water. Avoid allowing water to stand on hardwood floors, since they can be damaged from excessive moisture. Wash a rag or microfiber cloth in the vinegar solution and wring it out prior to wiping the streaks. After the streaks are gone, wipe the floor dry with another cloth.

Cleaning Concrete Floors

Calcium chloride bonds more strongly to concrete compared to to other flooring materials, and it requires a stronger acid to loosen its grip. Mix a solution containing 1 part vinegar to 5 parts water or 1 part hydrochloric acid to 20 parts water. Expand the answer generously; wait several moments, and neutralize the acid by mopping with a dilute solution of household ammonia and water. To stop individuals from tracking calcium chloride in your property, place an absorbent mat from the door and encourage visitors and family to remove their shoes when they enter.

See related

The Meaning of Loam Soil

Most gardeners struggle some type of soil challenge — typically too much sand or too much clay. At the conclusion of a gardener’s upbeat rainbow is a backyard filled with loam, which is that the pot-of-gold blend of soil to sustain plants.

The Loam Equation

Loam is a combo of the three primary types of soil: sand, silt and clay. In the big end of the particle spectrum is sand, which includes inferior water-holding capacity but supplies good aeration for plant roots. Clay soil particles are small, and they pack down easily, shutting the spaces between the particles so air and water can’t penetrate easily. Silt soil particles are medium-sized when compared with clay and mud, plus they share properties with every one of these. In a ideal garden world, loam is the result of almost equal components of each of these components.

The advantages of Loam

Loam combines the best qualities from each of the 3 main soil types. Sand is porous, silt is textured and clay keeps water and adds minerals. Loam is an ideal combination of the three since it holds water, comprises nutrients and allows oxygen to reach plant roots. When garden soil reaches its loamy potential, half of the pore space between soil particles is filled with water and the other half is filled with atmosphere. Since loam allows plant roots to penetrate deeply, it will help prevent soil from eroding.

Loam and Tilth

Tilth is the characteristic of land that explains its texture and water-holding capacity for its suitability to encourage plant growth. Loamy soils have good tilth and therefore are loose and crumbly as opposed to sticky and compacted. You can identify loamy soil by two managing tests. When you squeeze a handful of moist soil, sandy soil breaks apart, clay ground forms a tough bump and loam soil holds together. Should you roll sandy soil between your thumb and forefinger, you can’t form it to a decoration. Clay soil is easy to develop into a decoration, and loamy soil forms a short ribbon that crumbles when it reaches 1 inch long.

Achieving Loam Balance

If your garden soil isn’t loamy, you can better its tilth by adding organic amendments, such as well-aged manure or compost. Organic matter loosens heavy clay soils and enriches sandy soils. Optimally, add organic matter to garden soil in the rate of 30 percent by quantity and work it in by tilling or spading. Organic mulches in flower beds or vegetable gardens can also improve soil tilth. As the mulch decomposes, it breaks down into organic particles that help change sandy or clay soil to loamy soil.

See related

Jambu Fruit Plant Truth

Jambu fruit (Syzygium samarangense or Eugenia javanica) goes by many common names, including wax apple, java apple, samarang rose apple and jumrool. Although rare in cultivation outside the tropics, they are grown as trees in warmer climates where frosts are rare. Jambu fruit trees endure conditions under which other fruit trees will endure. But, handsome appearance and their fruit will suffer if increased in poor, sandy soils.

Physical Description

Jambu fruit trees vary considerably in height, from 16 to 50 feet. But all include a stout, 10- to 12-inch trunk and a spreading canopy like a shrub. Their oval leaves contrast nicely providing them an ornamental appearance year-round. Panicles of pompom-like, mild yellow flowers type each measuring 3/4 into 1 1/2 inches broad. The flowers grow into fruit, if pollination occurs. The fruit starts out green or white ripening into a glossy, brownish-red color.

Climate Considerations

A native of southeastern Asia, the jambu fruit tree’s marine areas is accommodated to climates. It grows best within U.S. Department of Agriculture plant hardiness zones 10a to 11, where it will withstand minor cold snaps if coated. Gardeners in colder climates can develop fruit plants in containers for many seasons, overwintering them in a greenhouse or a hot, bright room indoors. But , they will outgrow a container and need a situation to endure.

Growing and Care

Jambu fruit plants grow best in full sun with moist, fertile soil. Bad soil lowers the quantity and quality of the fruit. Although jambu fruit plants benefit from twice feeding using balanced, 15-15-15 analysis fertilizer to encourage their development garden-grown trees require very little care apart from occasional watering and annual mulching. One factor when developing fruit plants that are jambu is temperature. They need temperatures above 60 degrees Fahrenheit to successfully fruit, which proves challenging in temperate climates. Pot cultivation allows for more easy access to their fruit, as well as easier control over their growing states during harvest.

Fruit Information

The fruit of trees that are jambu have slightly insipid, spongy flesh which ranges . Fruit tend to be of greater quality than those harvested in summer, even though the quality varies with their growing requirements. The varieties are consumed raw, stewed with apples or served with sugar, while the greenish fruit is used in a succulent fashion in sauces or consumed with salt. Mature fruit trees may endure a hefty crop, producing up to 700 fruits by their fifth year if increased in fertile soil. Jambu fruit’s skin is thin, so care has to be taken when harvesting them to prevent bruising or puncturing their flesh.

See related

The very best Chemical to Control Yellow Jackets

Yellow jackets (Dolichovespula spp., Vespula spp.) , black wasps with jagged yellow markers, are considered beneficial because they feed on large numbers of pest infestation. Nevertheless, many people view yellow jackets as pests themselves, because they can deliver wicked stings when hardened. Although yellow jackets typically prefer nesting in quiet, out-of-the-way places, some colonies develop in areas that experience a lot of human action. Those nests will need to be eradicated to avoid painful and potentially dangerous stings. The ideal chemical for the job depends on whether you’re dealing with a curved aerial nest or a single unseen beneath the ground.

Aerial Nests

A few yellow jacket queens build exposed nests that hang out in the open from tree limbs, shrub branches or roof eaves. The University of Idaho Extension recommends treating aerial nests using a pyrethroid-based insecticide. Pyrethroids quickly kill yellow jackets but only have reduced toxicity for people, birds and pets. The common names of pyrethroids always end in “-ate” or “-thrin,” like “cypermethrin” or “lambda cyhalothrin,” both widely used to eliminate the stinging pests. To treat the nest from a safe distance, then pick a pyrethroid product that comes at a ready-to-use aerosol format using a jet propelled trigger that sprays a stream of insecticide at least 20 feet away. Take the pesticide right into the entrance, typically located at the bottom of the nest, and then completely soak the outside of the nest as well. Wait at least 24 hours before returning to the treatment site in order to check for yellow jacket activity. Repeat the spray treatment every 3 days until you no more spot live yellow jackets in the nest area.

Subterranean Nests

Ground-dwelling yellow jackets are somewhat more challenging to control than people residing in aerial nests because they are often located in hard-to-find abandoned rodent burrows and other cavities that are protected. Carbaryl-based dust pesticides effectively control subterranean yellow jacket populations, but you have to get the dust inside the nest in order for it to work. As soon as you find the nest entrance, wait until dusk, and until you do not see yellow coat action, to sprinkle carbaryl dust around the entrance hole. Then use a hand duster or a moist liquid detergent bottle half filled with the insecticide product to get several puffs of their dust inside the opening. Instantly leave the treatment area, and don’t return for at least 24 hours. Duplicate the dusting process about every 3 days for as long as you visit yellow coat activity at the nest area. Once you successfully remove the stinging insects, seal the entrance hole with soil treated with carbaryl dust or a pyrethroid-based aerosol insecticide. This should maintain any surviving yellow jackets from reestablishing a colony.

Timing Chemical Treatments

Mid- to late spring is the ideal time to chemically treat a yellow jacket nest because the queen has started establishing her perverse but its numbers are still quite small. If you find a curved airborne nest earlier in the season, only knock it down with a powerful blast of water from a garden hose. Apply chemical therapies in dusk or after dark when cold night temperatures arrive and the majority of the foragers are calmly resting from the nest. Yellow jackets are sluggish and also have trouble flying as soon as the temperature falls below 50 degrees Fahrenheit.

Personal Safety

Yellow jackets attack as soon as they sense their nest being threatened by poison. Protect yourself from both stings and compound exposure by wearing heavy clothes, goggles, thick work gloves, socks and shoes, a hat, and a face mask or bee veil. Wear a long-sleeved shirt and pants, taping the cloth around your ankles and wrists to keep the agitated insects from getting beneath your clothes. Light may startle yellow jackets into aggressiveness, so avoid shining a light source straight at a nest opening. If you have to use a torch, cover it with red cellophane because the insects can’t see red light. Never, ever try to deal with a nest if you’re allergic to yellow jacket venom. Enlist the assistance of a non-allergic individual or a professional exterminator rather.

See related

How to Remove Body Odors Out Of Sheets and Pillows

The typical person spends about 7 hours sleeping in bed every night. During sleep, your body has plenty of time to move monies, perspiration, skin cells and germs to sheets and your pillows, which results in odors. Knowing the cleaning methods that are right allows you to sleep on bedding, and cuts through odor-creating germs.

Soak in Vinegar

The properties of vinegar can help cut through and remove the bacteria and residues which are causing odor from your sheets. Fill a bucket, bathtub or other container with 5 components water plus 1 part white vinegar. Permit your sheets and pillowcases soak for a couple of hours. It is also possible to add the washing machine and the vinegar and allow them to soak before washing.

Heat Them Up

After scrubbing the sheets for sheets that are colorfast, add detergent and warm water into the washing machine. Kills any bacteria. And by adding a half cup of hydrogen peroxide into your laundry load, it is helpful to lift stains and brighten the sheet colors. After washing if the odor remains , wash another time without detergent. Occasionally detergent remains on the face of cloths, which makes a body odor-containing residue.

Require Them Outdoors

Hang them out to dry in direct sunlight for up to three hours Following your sheets have been thoroughly cleaned. The ultraviolet rays of the sun disinfect and kill any remaining germs that could be causing odor. String a rope tight between two points to create a clothesline. Drape the sheets or hang them up . It not only, by hanging the sheets outside in the sun to dry airs out the fabric, but it provides sheets.

Protect the Pillows

Review the care tags onto your pillow washed. Insert two pillows at a time on your washing machine and wash water which exceeds 140 degrees F. Down and man-made fiber fill pillows are usually machine washable, though cotton and silk are generally not. Dry them onto a fluff setting or low heat setting with two tennis balls put to keep pillows fluffy. Let them stand in the sun for over three hours to kill any remaining germs. Cover your pillows with instances before adding pillowcases to keep body odor. Pillows with covers should be washed and those without should be cleaned at least four times annually.

See related